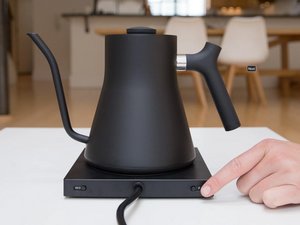
Kettle won’t heat, base is fine
Hello,
Fellow has sent me thru the normal rigamorole with descaling, and when that didn’t work, sending a replacement base. The kettle is the problem, and now they are offering to replace the kettle. But I want mine to work, I don’t want to throw another unrecyclable piece of trash into the landfills.
Does anyone know how to start investigating what’s wrong with it, or anyone else who has successfully repaired a Fellow Kettle?
Thank you!
Cette question est-elle utile ?
Indice
3


6 commentaires
@valentine89505 can you post some good pictures of the base and the bottom of the kettle.? Let's see how this all comes together. Do you have a multimeter and some basic hand tools, like screwdrivers etc?
Ajout d'images à une question existante
par oldturkey03
Have you opened up the kettle? I know there's a fuse or maybe a diode that can go bad. Looking at how this is working may solve your issue.
par Ian Zeringue
I have one of these that stopped heating. I tested the thermal fuse and it was good (it has continuity), and the heating element measures about 12 ohms so it is also good. The contacts on the kettle and the base are all clean and bright. So i assume the control in the base is bad even though it powers up and shows the "Fellow" logo and then lets me set the temperature.
par Tim McVey
I have the same issue - the base turns on, correctly senses the water temp, but does not heat up. How do I isolate the base versus the kettle as the failure? I have a multimeter.
Thanks for your assistance.
par todd12x12
Follow up: for some reason i got the idea that the little peg in the bottom of the kettle was not working, causing the control in the base to not turn on the current to the heating element. Fellow unhelpfully tells their customers to "descale" the appliance--after it stops working when it is impossible to boil vinegar or whatever they recommend you go buy for "descaling." So i took a wirebrush with a small amount of acetone and carefully cleaned that little peg in the bottom of the kettle. Then i cleaned the kettle with soap and water, and after that it worked fine. I suspect anybody could achieve the same thing with a wet toothbrush and a bit of baking soda. I don't know why the company can't just say to try that.
par Tim McVey
Afficher 1 commentaire en plus