Aller au contenu principal

Apple Watch – Series 8 Opening Procedure

Ce dont vous avez besoin

  1. Apple Watch – Series 8 Opening Procedure, Power down the watch: étape 1, image 1 de 2 Apple Watch – Series 8 Opening Procedure, Power down the watch: étape 1, image 2 de 2
  2. Apple Watch – Series 8 Opening Procedure, Safety Requirements: étape 2, image 1 de 3 Apple Watch – Series 8 Opening Procedure, Safety Requirements: étape 2, image 2 de 3 Apple Watch – Series 8 Opening Procedure, Safety Requirements: étape 2, image 3 de 3
    Outil utilisé dans cette étape :
    iFlex Opening Tool
    $11.99
    J'achète
    • Because the gap between the screen and watch body is so thin, an iFlex is needed to separate the two.

    • Protect your fingers by keeping them completely clear of the iFlex edge. If in doubt, protect your free hand with a heavy glove, such as a leather shop glove or gardening glove.

    • Be careful not to apply too much pressure, as this might cause the iFlex to slip and cut you, or damage the watch.

    • Wear eye protection. If the opening procedure is performed incorrectly or with too much pressure, the glass could crack, sending small glass shards flying.

    • Attach or remove the watch band as needed to provide more control as you make repairs.

  3. Apple Watch – Series 8 Opening Procedure, Soften the display adhesive: étape 3, image 1 de 1
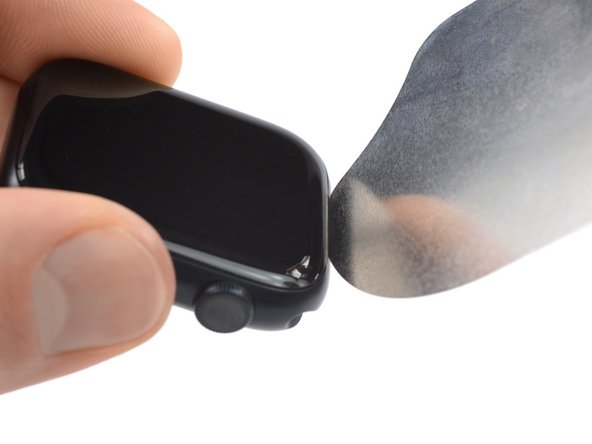
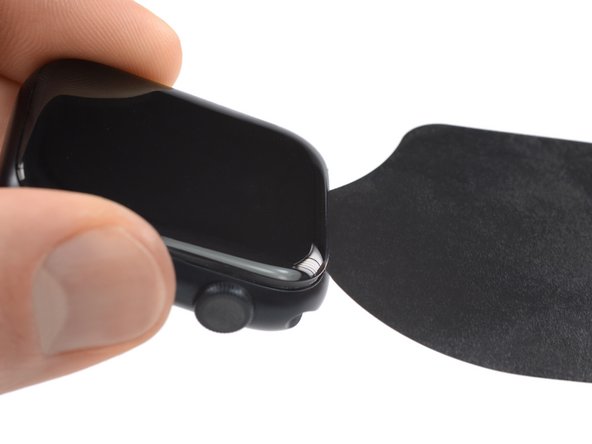
    • Prepare an iOpener and apply it to the screen for three minutes to loosen the adhesive underneath.

    • A hair dryer, heat gun, or hot plate may also be used, but be careful not to overheat the watch—the display and internal battery are both susceptible to heat damage.

    • You may need to reheat the iOpener and repeat this procedure several times until the display adhesive softens.

  4. Apple Watch – Series 8 Opening Procedure, Create a gap: étape 4, image 1 de 3 Apple Watch – Series 8 Opening Procedure, Create a gap: étape 4, image 2 de 3 Apple Watch – Series 8 Opening Procedure, Create a gap: étape 4, image 3 de 3
    • Take your time and work carefully to avoid scratching the watch body with your iFlex.

    • Insert the iFlex into the thin gap between the display and frame at the edge adjacent to the digital crown.

    • Tilt the iFlex down to pry the display open slightly and create a gap between the screen and the watch body.

    • The Apple Watch Series 8 display is equipped with a plastic bezel on its rear side. If you want to reuse your display, avoid using too much pressure with the iFlex or you may separate the bezel from the screen.

  5. Apple Watch – Series 8 Opening Procedure, Slice the adhesive: étape 5, image 1 de 2 Apple Watch – Series 8 Opening Procedure, Slice the adhesive: étape 5, image 2 de 2
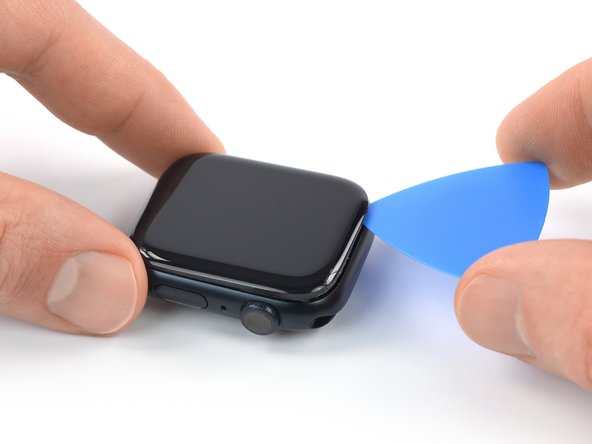
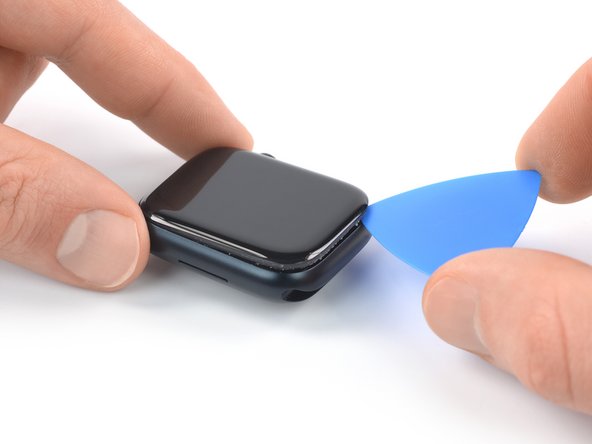
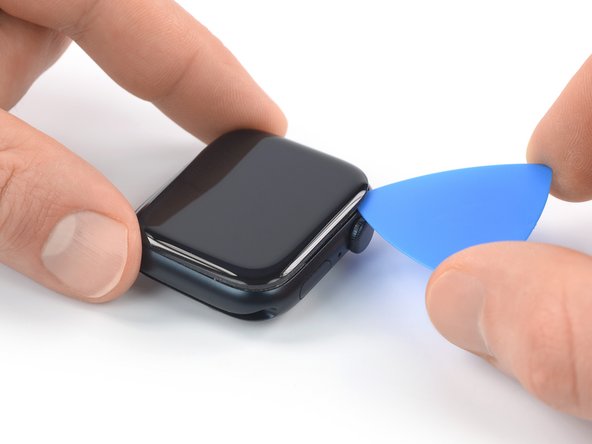
    • Insert the tip of an opening pick into the gap you just created.

    • Slide the opening pick along the short edge of the watch to slice the adhesive.

  6. Apple Watch – Series 8 Opening Procedure: étape 6, image 1 de 2 Apple Watch – Series 8 Opening Procedure: étape 6, image 2 de 2
    • Slide the opening pick around the corner and along the long edge opposite to the watch crown to slice the adhesive.

  7. Apple Watch – Series 8 Opening Procedure: étape 7, image 1 de 2 Apple Watch – Series 8 Opening Procedure: étape 7, image 2 de 2
    • Slide the opening pick around the corner and along the next short edge to slice the adhesive.

  8. Apple Watch – Series 8 Opening Procedure: étape 8, image 1 de 2 Apple Watch – Series 8 Opening Procedure: étape 8, image 2 de 2
    • When slicing the adhesive on the edge with the watch crown, only insert the opening pick 2–3 mm to prevent damaging the display cables.

    • Slide the opening pick around the corner and toward the watch crown to slice the remaining adhesive.

    • Don't try to fully remove the display yet, as it‘s still connected to the watch assembly.

  9. Apple Watch – Series 8 Opening Procedure, Swing open the display: étape 9, image 1 de 3 Apple Watch – Series 8 Opening Procedure, Swing open the display: étape 9, image 2 de 3 Apple Watch – Series 8 Opening Procedure, Swing open the display: étape 9, image 3 de 3
    • Be careful not to strain the display cables when you open the display.

    • Lift the display and carefully pull it towards the watch crown.

    • Swing the display open to an upright position.

    • To reseal your watch follow this general Apple Watch resealing guide.

Conclusion

If possible, turn on your device and test your repair before installing new adhesive and resealing.

To reassemble your device, follow these instructions in reverse order.

Take your e-waste to an R2 or e-Stewards certified recycler.

Repair didn’t go as planned? Try some basic troubleshooting, or ask our Answers community for help.

Une autre personne a terminé cette réparation.

Dominik Schnabelrauch

Membre depuis le 11/23/16

203 632 Réputation

682 tutoriels rédigés

Équipe

iFixit Membre de l'équipe iFixit

Staff

135 membres

17 146 tutoriels rédigés

0 commentaires

Ajouter un commentaire

Nombre de vues :

Dernières 24 heures : 4

7 derniers jours : 19

30 derniers jours : 110

Total : 2,114