Introduction
Ce tutoriel montre comment remplacer les piles d'un clavier sans fil d'Apple.
Ce dont vous avez besoin
-
-
Utilisez une pièce de monnaie pour enlever le couvercle du compartiment où se trouvent les piles.
 Demander à FixBot
-
-
-
-
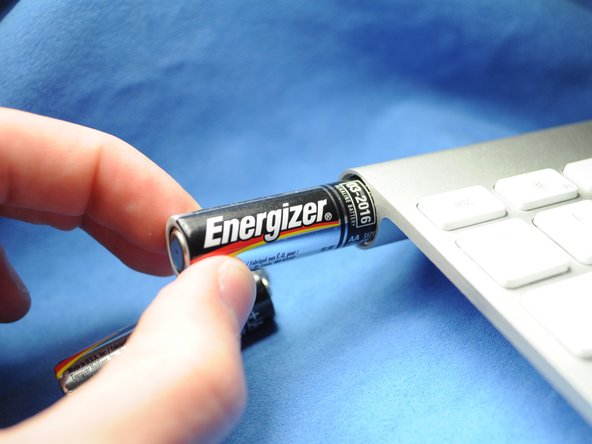
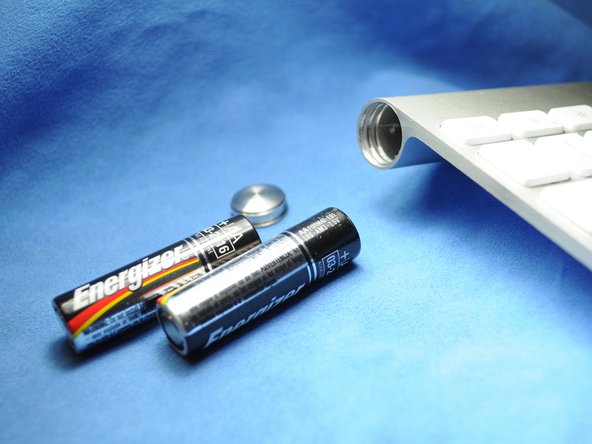
Faites glisser les deux piles AA du compartiment. Vérifiez que les bornes positives et négatives soient dans le bon sens.
-


Pour réassembler votre appareil, suivez les instructions dans le sens inverse.
Annulation : je n'ai pas terminé ce tutoriel.
35 autres ont terminé cette réparation.
Merci à ces traducteurs :
100%


Ces traducteurs nous aident réparer le monde ! Vous voulez contribuer ?
Commencez à traduire ›

5 commentaires de tutoriel
This works great - as long as the batteries inside did not leak and create a permanent seal for the cap. I managed to get the keyboard working again by removing the batteries through the electronics compartment (remove grey center cover, slide electronics out). It did take some effort (including driving a screw into the stuck battery and yanking it out with pliers) to remove the stuck batteries and all the remains of the leakage, but I ended up with a working keyboard. Only thing is that I need to use the 'backdoor' every time my batteries need replacing, since the battery cover is permanently sealed...
Also have a perma sealed battery cover. Poured vinegar in from middle and let soak over night. Wanna drill into coin slot to try and remove cover but need to get batteries out first. Can I just remove the one screw from logic board and disconnect ribbon cable, to have it slide out the power button end? How careful w cable? Looks like it has 2 tiny clips, do these need to be addressed or can I just pry it off?