Cette version peut contenir des modifications incorrectes. Passez au dernier aperçu vérifié.
Ce dont vous avez besoin
-
Cette étape n’est pas traduite. Aidez à la traduire
-
Use your T5 Torx driver to remove all eight 3.2mm hex screws holding down the back panel.
-
Wedge an opening pick between the back cover and the base of the board, then slightly lift the tool to pop the clips on the back cover off.
-
-
Cette étape n’est pas traduite. Aidez à la traduire
-
Remove the bottom cover from the device when all sides are free.
-
-
Cette étape n’est pas traduite. Aidez à la traduire
-
Wedge the plastic opening pick in between the aluminum cover and the motherboard.
-
Gently pull up popping off the cover and revealing the rest of the heat sink.
-
-
Cette étape n’est pas traduite. Aidez à la traduire
-
Use the Phillips #0 screwdriver to remove all five black 3.2mm screws.
-
-
-
Cette étape n’est pas traduite. Aidez à la traduire
-
Wedge the plastic opening pick in between the edge of the heat sink and the aluminum perimeter with care not to scratch the CPU beneath.
-
Gently pry up on the heat sink until it is loose enough for you to remove. Then grab and remove the heat sink.
-
-
Cette étape n’est pas traduite. Aidez à la traduire
-
Use a plastic opening pick to pop up the small black tab of the touchscreen ZIF connector.
-
Use the tweezers to remove the orange ribbon cable from the connector and peel the ribbon from the backboard, as it's secured with a light adhesive.
-
-
Cette étape n’est pas traduite. Aidez à la traduire
-
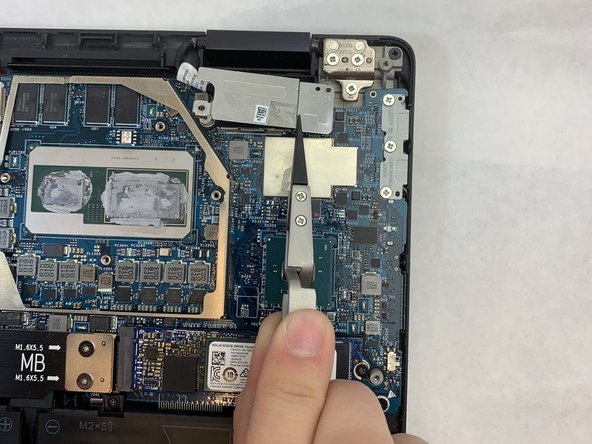
Use the Phillips #0 screwdriver to remove two 3.2 mm silver screws.
-
Use the tweezers to remove the grey cover.
-
Use the tweezers and gently pull straight up on each of the coaxial cables to disconnect them from their specialized brackets.
-
Reposition the tweezers farther up on the wire and pull forward to remove the wires from the plastic guides that hold the them in place.
-
-
Cette étape n’est pas traduite. Aidez à la traduire
-
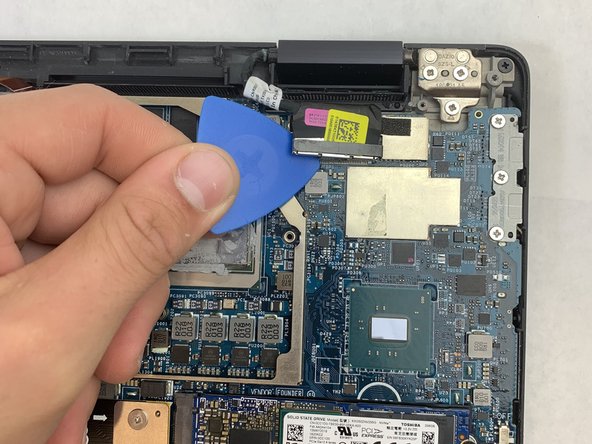
Use the Phillips #0 screwdriver to remove the two 3.2 mm black screws holding down the cover.
-
Now use the tweezers to carefully remove the silver cover from the backboard.
-
Gently wedge the plastic opening pick in between the display cable and the backboard.
-
Gently pry up disconnecting the adapter with the display cable from its bracket.
-
-
Cette étape n’est pas traduite. Aidez à la traduire
-
Open the screen until it is 180 degrees from the keyboard and then lay the laptop face down.
-
Use the Phillips #0 screwdriver to remove the six, 6.3 mm, silver screws securing the hinges.
-
-
Cette étape n’est pas traduite. Aidez à la traduire
-
Grip the screen assembly and gently pull straight up from the table removing the entire assembly.
-


Annulation : je n'ai pas terminé ce tutoriel.
Une autre personne a terminé cette réparation.
Équipe

Embry-Riddle Aeronautical University, Team S1-G1, Watkins Fall 2019 Membre de l'équipe Embry-Riddle Aeronautical University, Team S1-G1, Watkins Fall 2019
ERAU-WATKINS-F19S1G1
4 membres
16 tutoriels rédigés