Aller au contenu principal
Pour réparer ensemble - Je crée un compte

Google Pixel 9a Front Camera Replacement

Ce dont vous avez besoin

  1. Google Pixel 9a Front Camera Replacement, Safety precautions: étape 1, image 1 de 2 Google Pixel 9a Front Camera Replacement, Safety precautions: étape 1, image 2 de 2
    • Let your Pixel's battery drain below 25% before starting this repair. A charged lithium‑ion battery may catch fire if damaged.

    • Unplug all cables and completely power down your phone.

    Demander à FixBot
  2. Google Pixel 9a Front Camera Replacement, Heat the rear cover: étape 2, image 1 de 3 Google Pixel 9a Front Camera Replacement, Heat the rear cover: étape 2, image 2 de 3 Google Pixel 9a Front Camera Replacement, Heat the rear cover: étape 2, image 3 de 3
    • Adhesive secures the rear cover to the frame. Heating the cover softens the adhesive, making it easier to separate.

    • Use a hair dryer to heat the entire rear cover.

    • Only heat your phone so it's just hot to the touch. Extreme heat can damage the rear cover, screen, or battery.

    Demander à FixBot
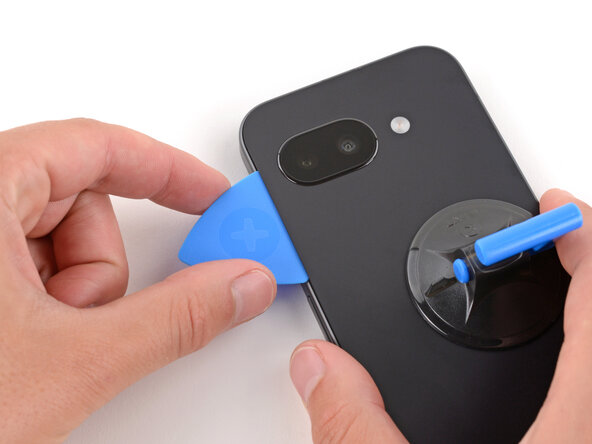
  3. Google Pixel 9a Front Camera Replacement, Apply a suction handle: étape 3, image 1 de 2 Google Pixel 9a Front Camera Replacement, Apply a suction handle: étape 3, image 2 de 2
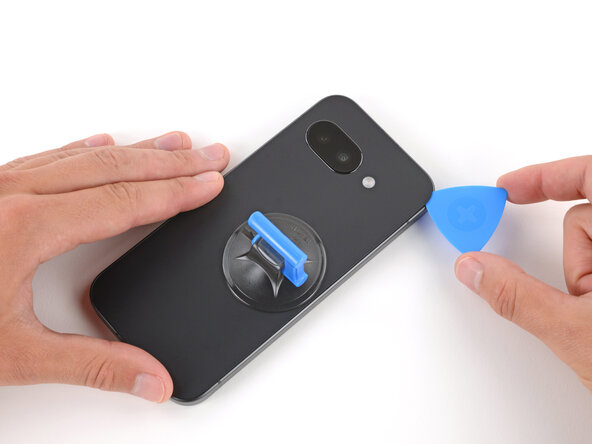
    • Apply a suction handle near the center of the rear cover's right edge, as close to the edge as possible.

    Demander à FixBot
  4. Google Pixel 9a Front Camera Replacement, Insert an opening pick: étape 4, image 1 de 3 Google Pixel 9a Front Camera Replacement, Insert an opening pick: étape 4, image 2 de 3 Google Pixel 9a Front Camera Replacement, Insert an opening pick: étape 4, image 3 de 3
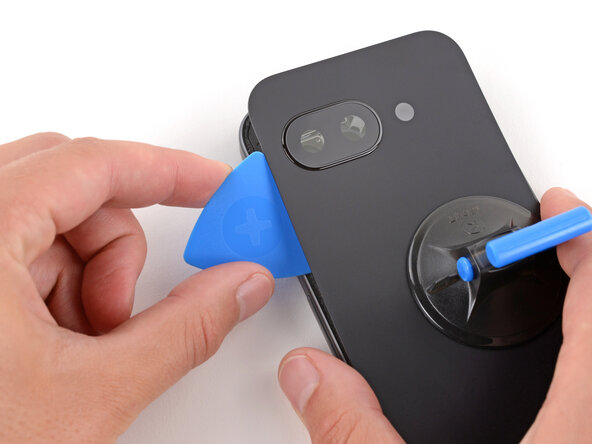
    • Pull up on the suction handle with strong, steady force until a gap forms between the cover and frame.

    • Insert the tip of an opening pick into the gap.

    Demander à FixBot
  5. Google Pixel 9a Front Camera Replacement, Adhesive information: étape 5, image 1 de 3 Google Pixel 9a Front Camera Replacement, Adhesive information: étape 5, image 2 de 3 Google Pixel 9a Front Camera Replacement, Adhesive information: étape 5, image 3 de 3
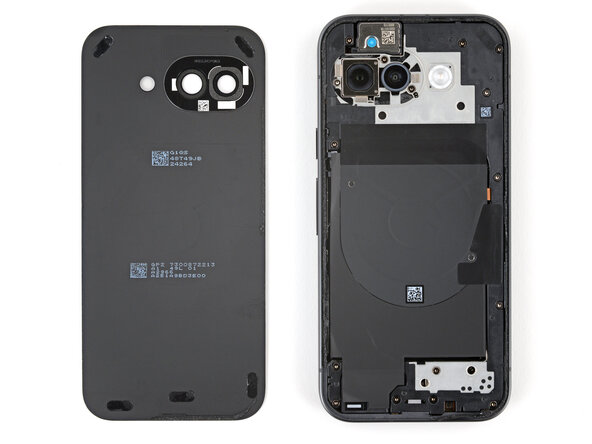
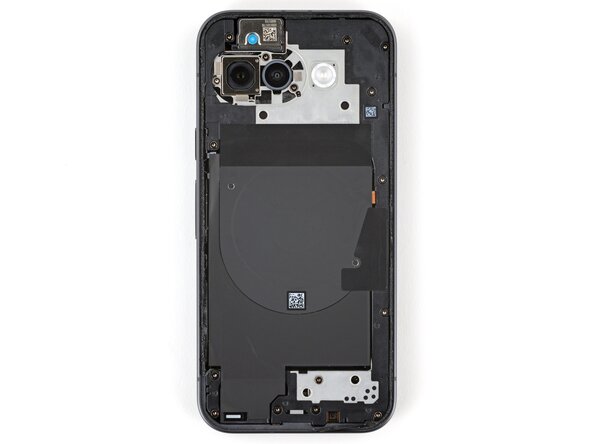
    • The rear cover is secured with adhesive around the perimeter of the frame and near the cameras. Use this picture as a reference while you separate the adhesive.

    • When separating the left and right edge adhesive, don't insert your pick more than 3 mm to avoid damaging the wireless charging coil and its graphite film.

    Demander à FixBot
  6. Google Pixel 9a Front Camera Replacement, Separate the rear cover adhesive: étape 6, image 1 de 3 Google Pixel 9a Front Camera Replacement, Separate the rear cover adhesive: étape 6, image 2 de 3 Google Pixel 9a Front Camera Replacement, Separate the rear cover adhesive: étape 6, image 3 de 3
    • If you ever have trouble separating the adhesive, apply more heat and try again.

    • Slide the opening pick up the right edge, around the top right corner, and along the top edge to separate the adhesive securing the rear cover.

    Demander à FixBot
  7. Google Pixel 9a Front Camera Replacement: étape 7, image 1 de 3 Google Pixel 9a Front Camera Replacement: étape 7, image 2 de 3 Google Pixel 9a Front Camera Replacement: étape 7, image 3 de 3
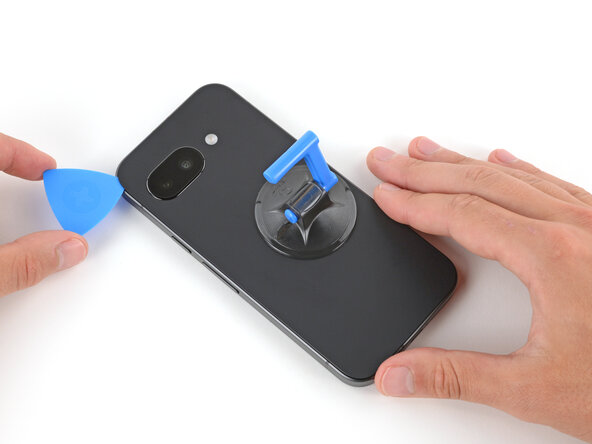
    • Insert an opening pick in the initial gap you created near the center of the rear cover's right edge.

    • Slide the opening pick down the right edge, along the bottom edge, and up the left edge to separate the adhesive securing the cover.

    Demander à FixBot
  8. Google Pixel 9a Front Camera Replacement, Separate the camera bezel adhesive: étape 8, image 1 de 3 Google Pixel 9a Front Camera Replacement, Separate the camera bezel adhesive: étape 8, image 2 de 3 Google Pixel 9a Front Camera Replacement, Separate the camera bezel adhesive: étape 8, image 3 de 3
    • Insert the flat edge of an opening pick under the top of the rear cover's left edge, near the camera bezel.

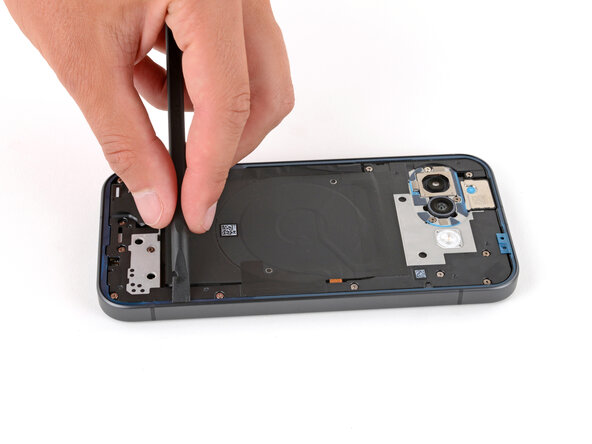
    • Twist the pick and apply constant pressure to separate the adhesive around the camera bezel.

    Demander à FixBot
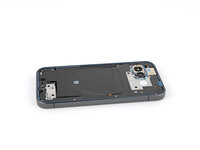
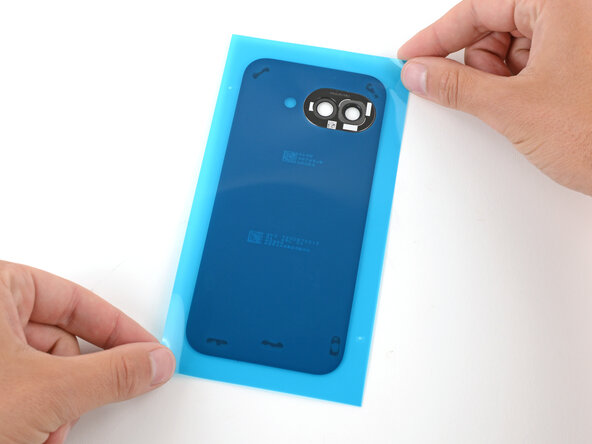
  9. Google Pixel 9a Front Camera Replacement, Remove the rear cover: étape 9, image 1 de 2 Google Pixel 9a Front Camera Replacement, Remove the rear cover: étape 9, image 2 de 2
    • Remove the rear cover.

    • If you feel resistance, go back around the perimeter of the cover and use a pick to separate any remaining adhesive.

    Demander à FixBot
  10. Google Pixel 9a Front Camera Replacement, Remove the camera bezel: étape 10, image 1 de 3 Google Pixel 9a Front Camera Replacement, Remove the camera bezel: étape 10, image 2 de 3 Google Pixel 9a Front Camera Replacement, Remove the camera bezel: étape 10, image 3 de 3
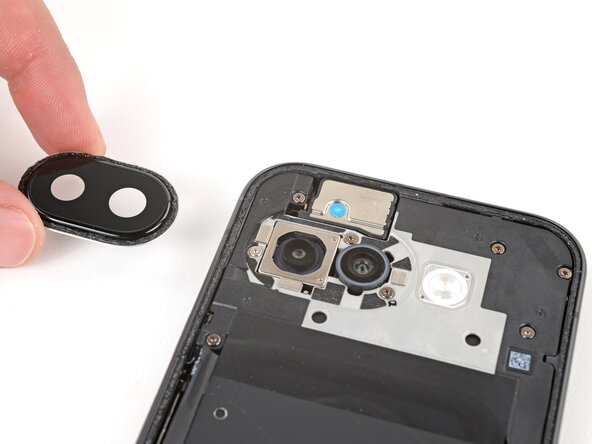
    • If the camera bezel detached from the rear cover and stayed stuck to your phone, follow this step to remove it. Otherwise, skip this step.

    • Slide an opening pick under the camera bezel and pry up to remove it.

    • Only insert the pick a few millimeters under the bezel, or you risk damaging the cameras.

    • If you're having trouble, lightly heat the camera bezel.

    Demander à FixBot
  11. Google Pixel 9a Front Camera Replacement, Remove the wireless charging assembly screws: étape 11, image 1 de 2 Google Pixel 9a Front Camera Replacement, Remove the wireless charging assembly screws: étape 11, image 2 de 2
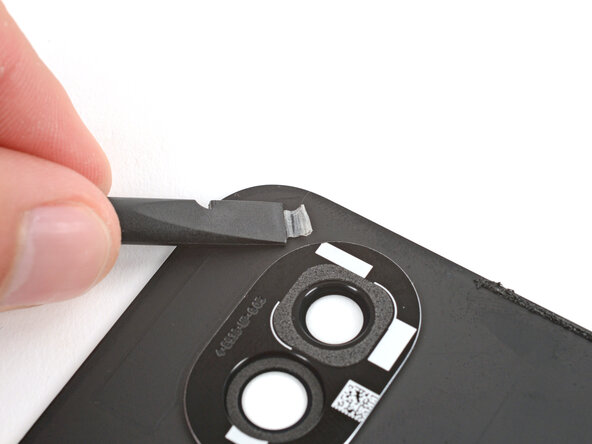
    Outil utilisé dans cette étape :
    Magnetic Project Mat
    $19.95
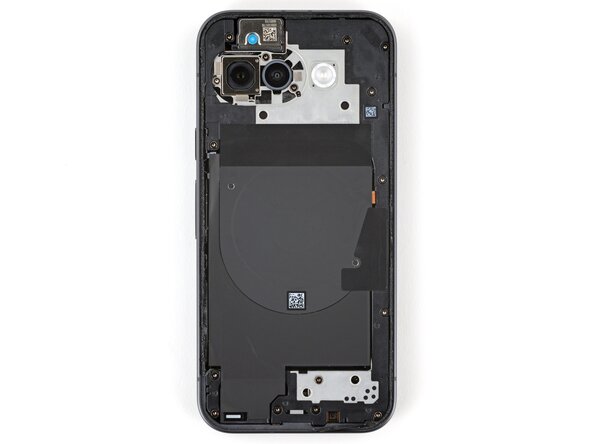
    • Use a Torx Plus 3IP screwdriver to remove the 16 screws securing the wireless charging assembly:

    • Thirteen 5.0 mm‑long screws

    • Three 2.2 mm‑long screws

    • Throughout this repair, keep track of each screw and make sure it goes back exactly where it came from to avoid damaging your phone.

    Demander à FixBot
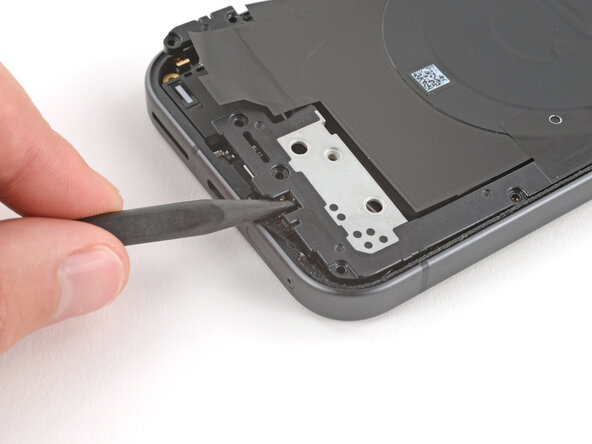
  12. Google Pixel 9a Front Camera Replacement, Unclip the wireless charging assembly: étape 12, image 1 de 3 Google Pixel 9a Front Camera Replacement, Unclip the wireless charging assembly: étape 12, image 2 de 3 Google Pixel 9a Front Camera Replacement, Unclip the wireless charging assembly: étape 12, image 3 de 3
    Demander à FixBot
  13. Google Pixel 9a Front Camera Replacement, Remove the wireless charging assembly: étape 13, image 1 de 2 Google Pixel 9a Front Camera Replacement, Remove the wireless charging assembly: étape 13, image 2 de 2
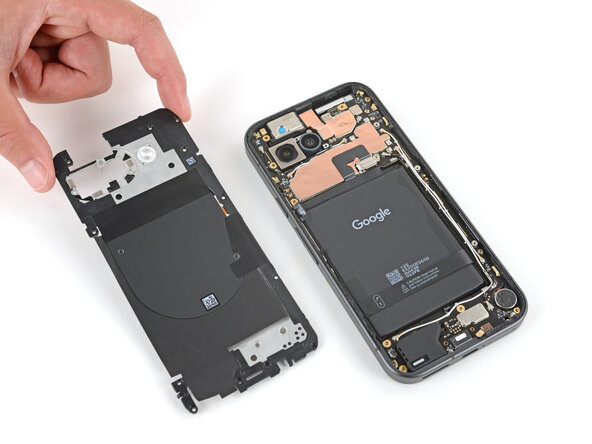
    • Remove the wireless charging assembly.

    Demander à FixBot
  14. Google Pixel 9a Front Camera Replacement, Remove the connector cover screw: étape 14, image 1 de 2 Google Pixel 9a Front Camera Replacement, Remove the connector cover screw: étape 14, image 2 de 2
    • Be careful not to damage the battery with your tools while disconnecting it.

    • Use a Torx Plus 3IP screwdriver to remove the 1.7 mm‑long screw securing the battery connector cover.

    Demander à FixBot
  15. Google Pixel 9a Front Camera Replacement, Remove the battery connector cover: étape 15, image 1 de 3 Google Pixel 9a Front Camera Replacement, Remove the battery connector cover: étape 15, image 2 de 3 Google Pixel 9a Front Camera Replacement, Remove the battery connector cover: étape 15, image 3 de 3
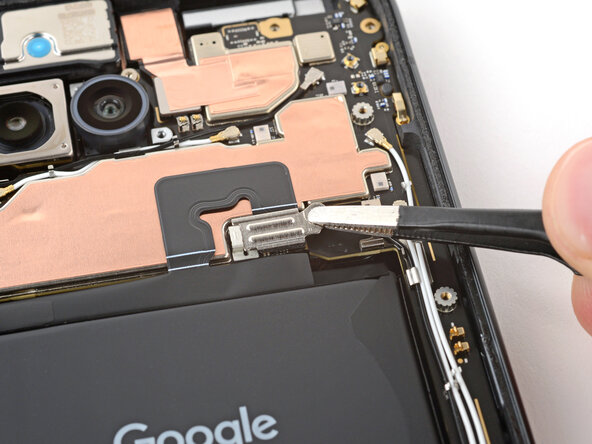
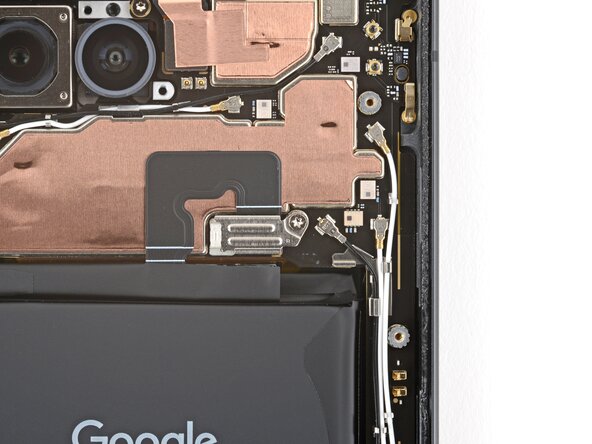
    • Use tweezers to lift and remove the battery connector cover.

    Demander à FixBot
  16. Google Pixel 9a Front Camera Replacement, Disconnect the battery: étape 16, image 1 de 2 Google Pixel 9a Front Camera Replacement, Disconnect the battery: étape 16, image 2 de 2
    • Use a spudger to pry up and disconnect the battery cable press connector.

    Demander à FixBot
  17. Google Pixel 9a Front Camera Replacement, Disconnect the front camera: étape 17, image 1 de 2 Google Pixel 9a Front Camera Replacement, Disconnect the front camera: étape 17, image 2 de 2
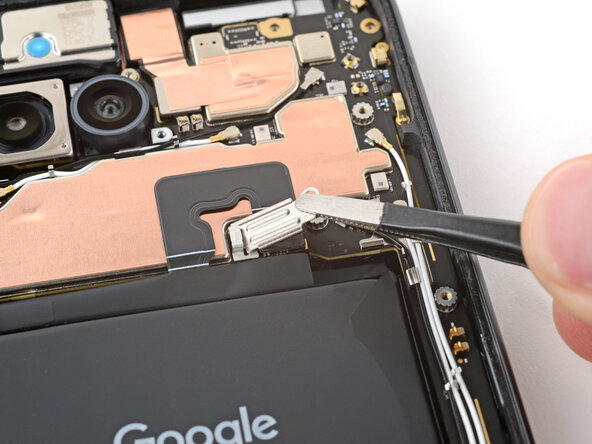
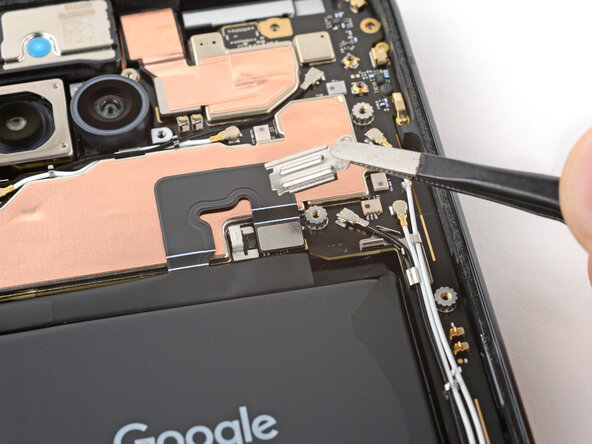
    • Be very careful not to touch the camera lenses when removing the front camera. If you accidentally do, use a clean cloth to wipe them off.

    • Use the point of a spudger to pry up and disconnect the front camera press connector, prying under the top left corner.

    Demander à FixBot
  18. Google Pixel 9a Front Camera Replacement, Remove the front camera: étape 18, image 1 de 3 Google Pixel 9a Front Camera Replacement, Remove the front camera: étape 18, image 2 de 3 Google Pixel 9a Front Camera Replacement, Remove the front camera: étape 18, image 3 de 3
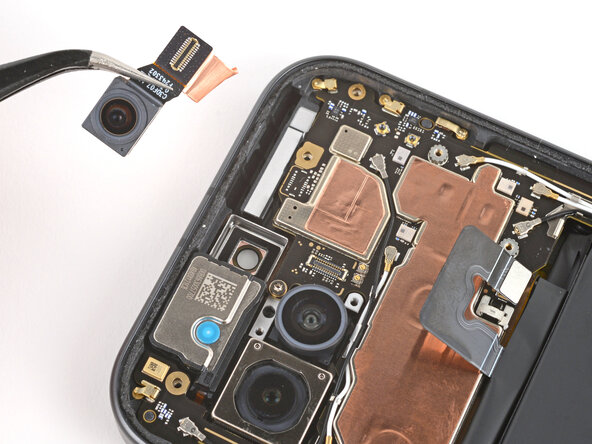
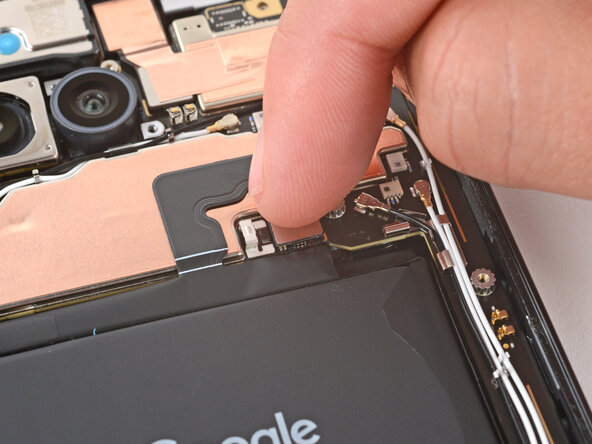
    • Use tweezers to grip the center of the front camera, between the press connector and the camera itself.

    • Flip the camera towards the right edge and gently peel it off the copper foil.

    Demander à FixBot
  19. Google Pixel 9a Front Camera Replacement, Disassembly complete: étape 19, image 1 de 1
    • Congratulations on completing disassembly! The remaining steps will show how to reassemble your phone.

    Demander à FixBot
  20. Google Pixel 9a Front Camera Replacement, Remove any lens caps or liners: étape 20, image 1 de 1
    • Remove any caps or plastic liners from your replacement front camera lens.

    • Be careful not to grip or smudge the exposed lens.

    Demander à FixBot
  21. Google Pixel 9a Front Camera Replacement, Install the front camera: étape 21, image 1 de 2 Google Pixel 9a Front Camera Replacement, Install the front camera: étape 21, image 2 de 2
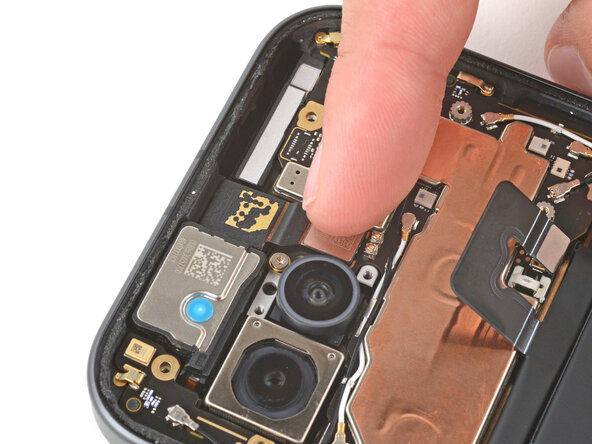
    • Place the front camera into its recess.

    • Use your finger to press down and reconnect the front camera press connector.

    Demander à FixBot
  22. Google Pixel 9a Front Camera Replacement, Apply new copper foil: étape 22, image 1 de 3 Google Pixel 9a Front Camera Replacement, Apply new copper foil: étape 22, image 2 de 3 Google Pixel 9a Front Camera Replacement, Apply new copper foil: étape 22, image 3 de 3
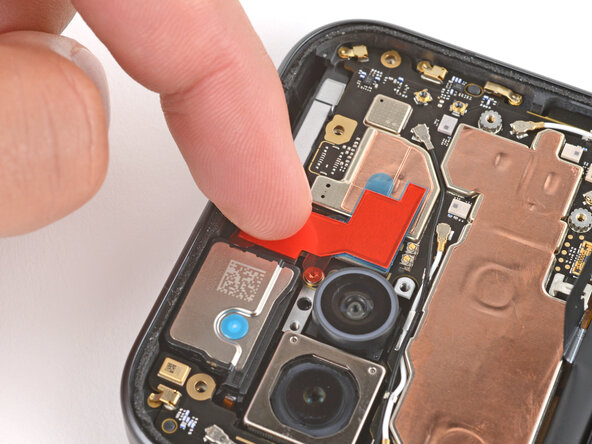
    • Remove the copper foil from its large clear liner and place it onto the front camera.

    • Don't remove any of the other liners yet.

    • Gently press down on the top section of the foil to secure it to the camera (the bottom section still has a plastic liner under it).

    Demander à FixBot
  23. Google Pixel 9a Front Camera Replacement: étape 23, image 1 de 3 Google Pixel 9a Front Camera Replacement: étape 23, image 2 de 3 Google Pixel 9a Front Camera Replacement: étape 23, image 3 de 3
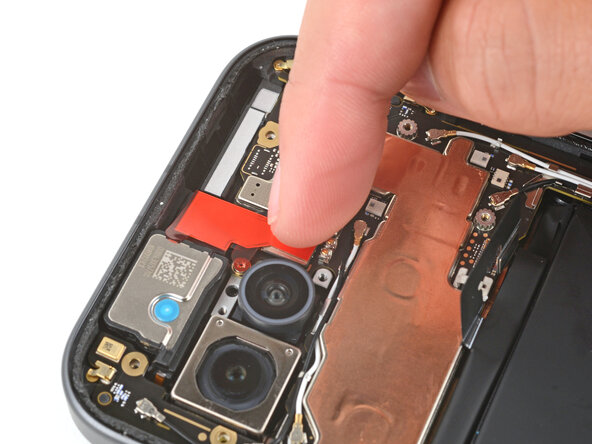
    • Hold the top section of the copper foil in place with your finger, and use tweezers to slide the liner out from the bottom section of foil.

    • Gently press the bottom section of copper foil into place to secure it to the front camera press connector.

    Demander à FixBot
  24. Google Pixel 9a Front Camera Replacement: étape 24, image 1 de 3 Google Pixel 9a Front Camera Replacement: étape 24, image 2 de 3 Google Pixel 9a Front Camera Replacement: étape 24, image 3 de 3
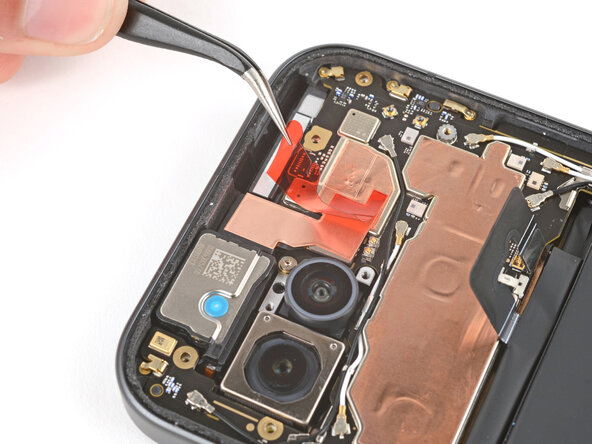
    • Use tweezers to remove the remaining liner from the top of the copper foil.

    Demander à FixBot
  25. Google Pixel 9a Front Camera Replacement, Remove the old adhesive: étape 25, image 1 de 2 Google Pixel 9a Front Camera Replacement, Remove the old adhesive: étape 25, image 2 de 2
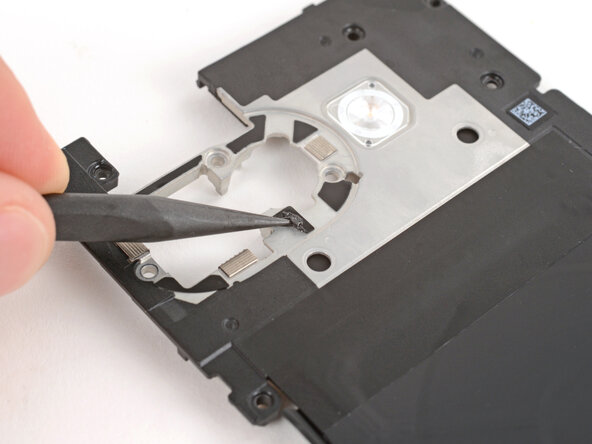
    • Use a spudger to scrape up and remove the six small pieces of adhesive around the rear cameras.

    • Use high‑concentration (>90%) isopropyl alcohol and a lint‑free cloth (or coffee filter) to clean up and remove any residue from the adhesives that were removed.

    Demander à FixBot
  26. Google Pixel 9a Front Camera Replacement, Apply the adhesive: étape 26, image 1 de 3 Google Pixel 9a Front Camera Replacement, Apply the adhesive: étape 26, image 2 de 3 Google Pixel 9a Front Camera Replacement, Apply the adhesive: étape 26, image 3 de 3
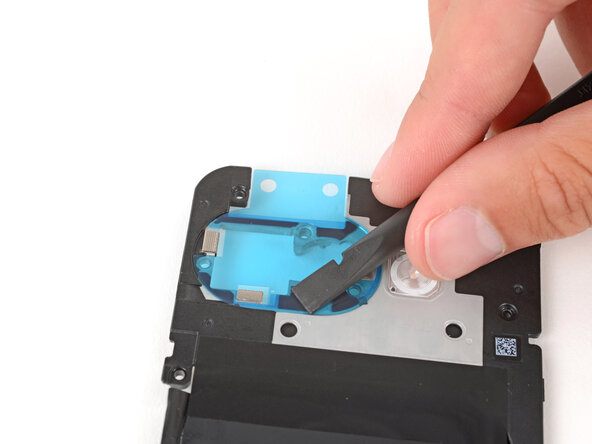
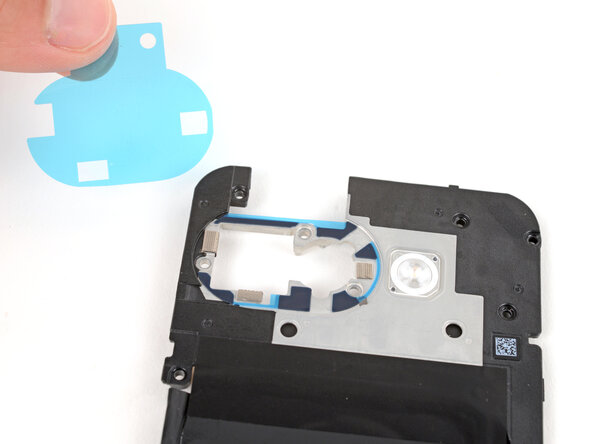
    • Remove the larger, clear liner from the inner housing adhesive and lay it in place around the camera holes.

    • Use the cutouts for the small silver pads to help align the adhesive.

    • Use the flat end of a spudger to firmly push down on each piece of adhesive, securing them in place.

    • Remove the colored liner using the pull tab on the top edge.

    • If the adhesive starts to pull up with the liner, lay it back in place and use your spudger to secure it again.

    Demander à FixBot
  27. Google Pixel 9a Front Camera Replacement, Secure the adhesive: étape 27, image 1 de 3 Google Pixel 9a Front Camera Replacement, Secure the adhesive: étape 27, image 2 de 3 Google Pixel 9a Front Camera Replacement, Secure the adhesive: étape 27, image 3 de 3
    • Use a spudger to firmly press down on each of the six pieces of inner housing adhesive to secure them.

    • These pieces of adhesive can easily be pulled up when removing the final liners, so make sure they're firmly in place.

    Demander à FixBot
  28. Google Pixel 9a Front Camera Replacement, Connect the battery press connector: étape 28, image 1 de 2 Google Pixel 9a Front Camera Replacement, Connect the battery press connector: étape 28, image 2 de 2
    • Use your finger to align the battery press connector over its socket and press down to connect it.

    • Don't try to force the connector into place. If you're having trouble, reposition it and try again.

    Demander à FixBot
  29. Google Pixel 9a Front Camera Replacement, Install the battery connector cover: étape 29, image 1 de 3 Google Pixel 9a Front Camera Replacement, Install the battery connector cover: étape 29, image 2 de 3 Google Pixel 9a Front Camera Replacement, Install the battery connector cover: étape 29, image 3 de 3
    • Use tweezers to hook the left edge of the battery connector cover into place, then lay the cover down flat.

    Demander à FixBot
  30. Google Pixel 9a Front Camera Replacement: étape 30, image 1 de 2 Google Pixel 9a Front Camera Replacement: étape 30, image 2 de 2
    • Use a 3IP Torx Plus screwdriver to install the 1.7 mm‑long screw securing the battery connector cover.

    Demander à FixBot
  31. Google Pixel 9a Front Camera Replacement, Install the wireless charging assembly: étape 31, image 1 de 2 Google Pixel 9a Front Camera Replacement, Install the wireless charging assembly: étape 31, image 2 de 2
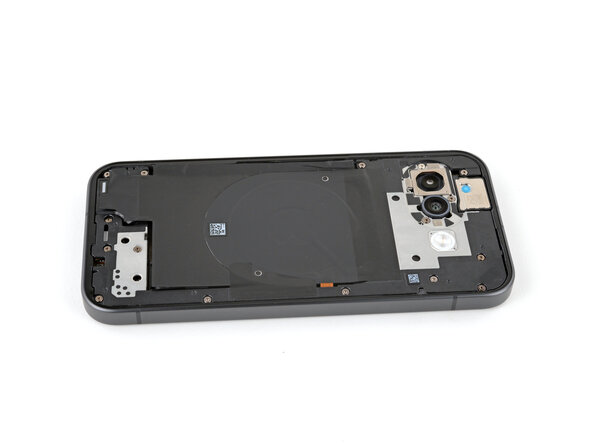
    • Place the wireless charging assembly onto the frame.

    Demander à FixBot
  32. Google Pixel 9a Front Camera Replacement: étape 32, image 1 de 3 Google Pixel 9a Front Camera Replacement: étape 32, image 2 de 3 Google Pixel 9a Front Camera Replacement: étape 32, image 3 de 3
    • Use your fingers to firmly press around the perimeter of the wireless charging assembly to re‑engage all of its clips.

    Demander à FixBot
  33. Google Pixel 9a Front Camera Replacement, Install the wireless charging assembly screws: étape 33, image 1 de 2 Google Pixel 9a Front Camera Replacement, Install the wireless charging assembly screws: étape 33, image 2 de 2
    • Use a Torx Plus 3IP screwdriver to install the 16 screws securing the wireless charging assembly:

    • Thirteen 5.0 mm‑long screws

    • Three 2.2 mm‑long screws

    Demander à FixBot
  34. Google Pixel 9a Front Camera Replacement, Remove the old rear cover adhesive: étape 34, image 1 de 3 Google Pixel 9a Front Camera Replacement, Remove the old rear cover adhesive: étape 34, image 2 de 3 Google Pixel 9a Front Camera Replacement, Remove the old rear cover adhesive: étape 34, image 3 de 3
    • Take your time during the next two steps. A clean frame allows replacement adhesive to lay evenly, ensuring a better bond.

    • When removing the rear cover adhesive during this step, be very careful not to damage the battery or any of the fragile components near the perimeter of the frame.

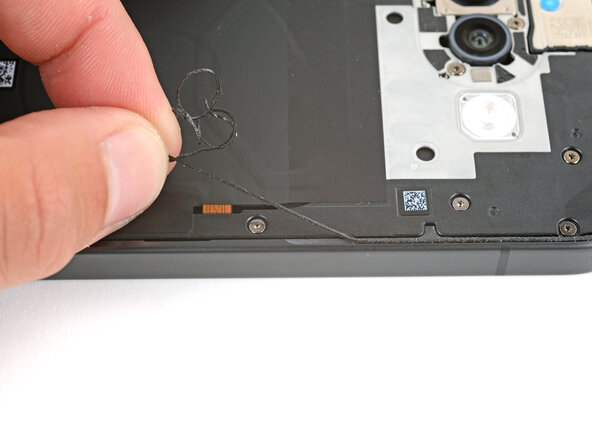
    • Use a spudger and tweezers to scrape up and remove all the old rear cover adhesive from the perimeter of your phone.

    • If you scrape up a piece big enough to grip with your fingers, you can pull long sections of the adhesive up. Pull slowly and straight in the opposite direction of the adhesive.

    Demander à FixBot
  35. Google Pixel 9a Front Camera Replacement, Clean the frame: étape 35, image 1 de 1
    • Using some high-concentration (>90%) isopropyl alcohol and a lint‑free cloth (or coffee filter), clean the areas of the frame where the adhesive was.

    Demander à FixBot
  36. Google Pixel 9a Front Camera Replacement, Find the adhesive orientation: étape 36, image 1 de 2 Google Pixel 9a Front Camera Replacement, Find the adhesive orientation: étape 36, image 2 de 2
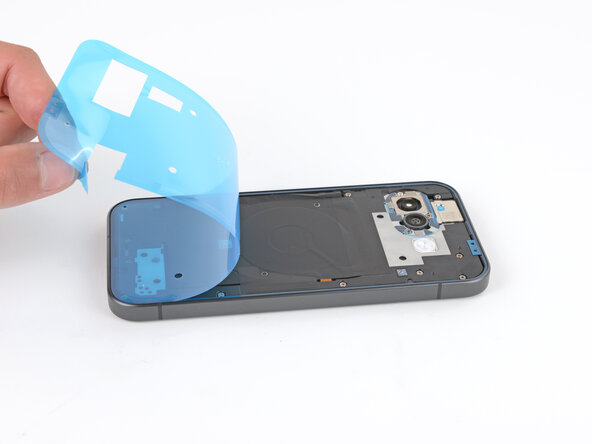
    • Before applying the rear cover adhesive, make sure you know how it will sit on the frame. If you apply the adhesive incorrectly, you'll need to restart with new adhesive.

    • Hold the adhesive above the frame to find its orientation. Use the camera cutout in the liner to help visualize how it will lay on the frame.

    Demander à FixBot
  37. Google Pixel 9a Front Camera Replacement, Peel the liner halfway down: étape 37, image 1 de 1
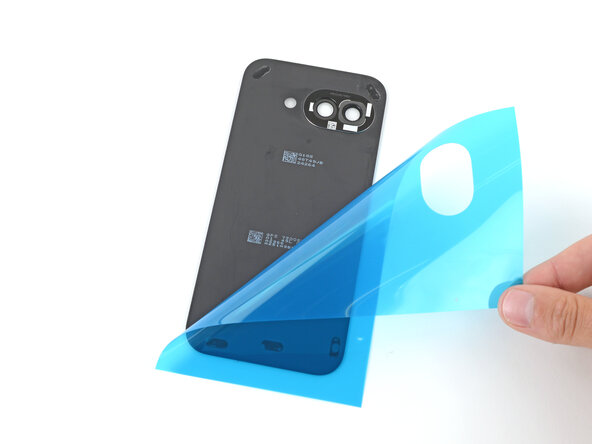
    • Peel down the top half of the large, clear liner to expose the adhesive—don't fully remove the liner yet.

    Demander à FixBot
  38. Google Pixel 9a Front Camera Replacement, Apply the adhesive: étape 38, image 1 de 3 Google Pixel 9a Front Camera Replacement, Apply the adhesive: étape 38, image 2 de 3 Google Pixel 9a Front Camera Replacement, Apply the adhesive: étape 38, image 3 de 3
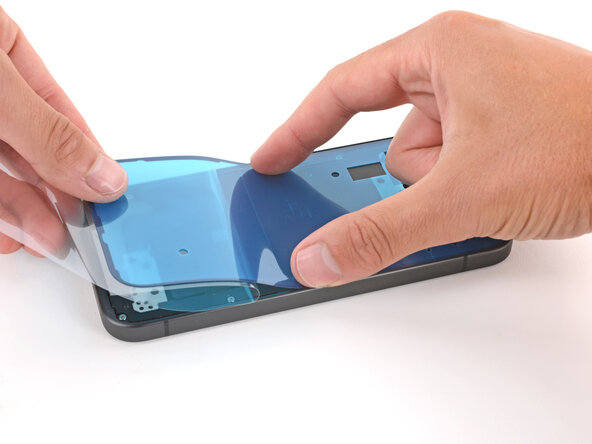
    • Take your time aligning the adhesive with the frame—it's very sticky and can't be moved once you apply it.

    • With the larger, clear liner folded towards the bottom of the phone, lay the exposed top edge of the adhesive onto the frame.

    • Use the lip of the frame to help align the adhesive.

    • Once the top edge is properly aligned, gently press down on the top corners with your fingers to secure the adhesive.

    Demander à FixBot
  39. Google Pixel 9a Front Camera Replacement: étape 39, image 1 de 3 Google Pixel 9a Front Camera Replacement: étape 39, image 2 de 3 Google Pixel 9a Front Camera Replacement: étape 39, image 3 de 3
    • Slowly lay the rest of the adhesive onto the frame, pressing it into place and peeling away the larger liner as you go.

    Demander à FixBot
  40. Google Pixel 9a Front Camera Replacement, Remove the top liner: étape 40, image 1 de 3 Google Pixel 9a Front Camera Replacement, Remove the top liner: étape 40, image 2 de 3 Google Pixel 9a Front Camera Replacement, Remove the top liner: étape 40, image 3 de 3
    • Use the pull tab to remove the large, colored liner.

    Demander à FixBot
  41. Google Pixel 9a Front Camera Replacement, Secure the adhesive: étape 41, image 1 de 3 Google Pixel 9a Front Camera Replacement, Secure the adhesive: étape 41, image 2 de 3 Google Pixel 9a Front Camera Replacement, Secure the adhesive: étape 41, image 3 de 3
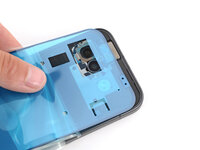
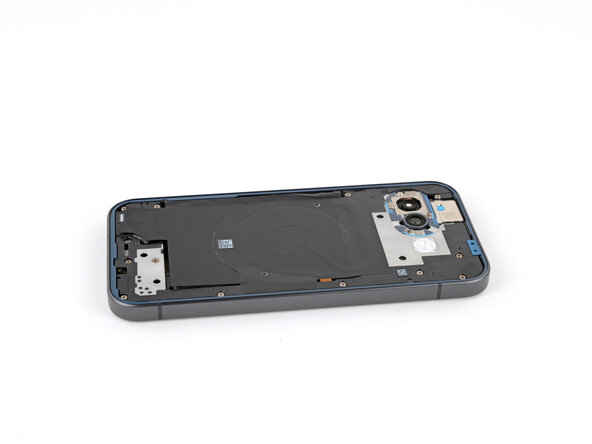
    • Use a spudger to press down firmly on the adhesive around the perimeter of your phone to secure it to the frame.

    Demander à FixBot
  42. Google Pixel 9a Front Camera Replacement, Remove the old camera bezel adhesive: étape 42, image 1 de 2 Google Pixel 9a Front Camera Replacement, Remove the old camera bezel adhesive: étape 42, image 2 de 2
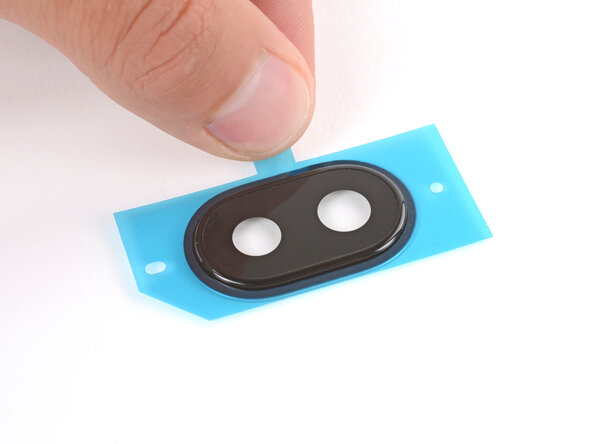
    • If the camera bezel detached when removing the rear cover, follow the next five steps to install it. Otherwise, skip down five steps.

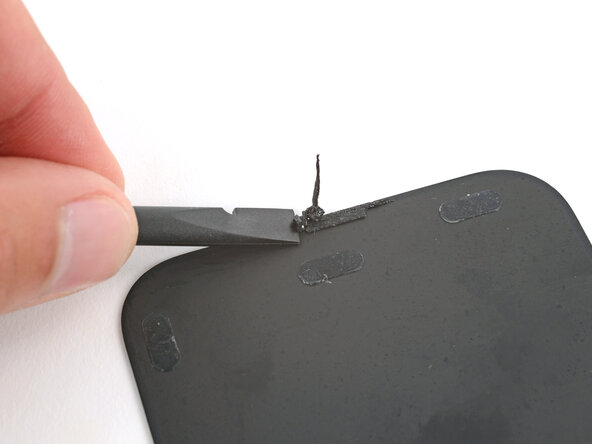
    • Use a spudger to scrape up and remove any of the old adhesive from the camera bezel and its corresponding spot on the rear cover.

    Demander à FixBot
  43. Google Pixel 9a Front Camera Replacement, Remove the adhesive residue: étape 43, image 1 de 2 Google Pixel 9a Front Camera Replacement, Remove the adhesive residue: étape 43, image 2 de 2
    • Use high-concentration (>90%) isopropyl alcohol and a lint‑free cloth (or coffee filter) to clean up and remove any adhesive residue from the camera bezel and its corresponding spot on the rear cover.

    Demander à FixBot
  44. Google Pixel 9a Front Camera Replacement, Apply the adhesive: étape 44, image 1 de 2 Google Pixel 9a Front Camera Replacement, Apply the adhesive: étape 44, image 2 de 2
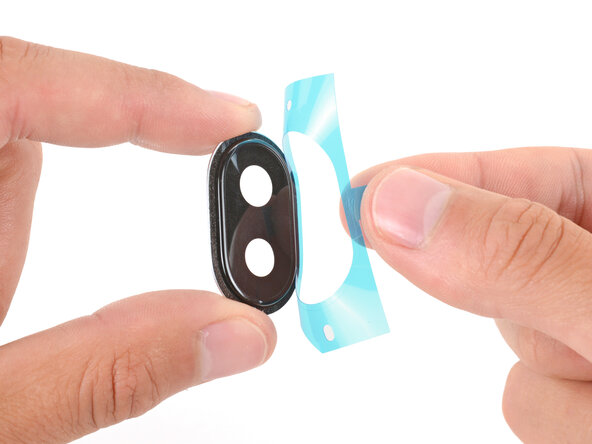
    • Remove the large, clear liner from the camera bezel adhesive.

    • Put the adhesive over the top of the camera bezel and set it in place.

    Demander à FixBot
  45. Google Pixel 9a Front Camera Replacement: étape 45, image 1 de 3 Google Pixel 9a Front Camera Replacement: étape 45, image 2 de 3 Google Pixel 9a Front Camera Replacement: étape 45, image 3 de 3
    • Use a spudger to firmly press around the perimeter of the camera bezel to secure the adhesive.

    • Remove the second, colored liner from the camera bezel adhesive.

    Demander à FixBot
  46. Google Pixel 9a Front Camera Replacement, Install the camera bezel: étape 46, image 1 de 2 Google Pixel 9a Front Camera Replacement, Install the camera bezel: étape 46, image 2 de 2
    • Align the camera bezel such that the square foam is closest to the edge.

    • Use your fingers to press the camera bezel into place on the rear cover, squeezing firmly around the perimeter to secure it with the adhesive.

    Demander à FixBot
  47. Google Pixel 9a Front Camera Replacement, Remove the old rear cover adhesive: étape 47, image 1 de 2 Google Pixel 9a Front Camera Replacement, Remove the old rear cover adhesive: étape 47, image 2 de 2
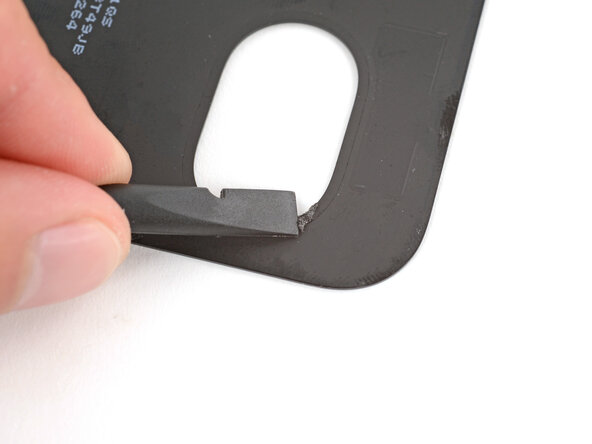
    • Use the flat end of a spudger to scrape up and remove any all the old adhesive that stayed on the back cover, including the five pieces of small, oval‑shaped adhesive.

    • If you don't see all the oval adhesives, some might've stuck to the phone frame.

    Demander à FixBot
  48. Google Pixel 9a Front Camera Replacement: étape 48, image 1 de 1
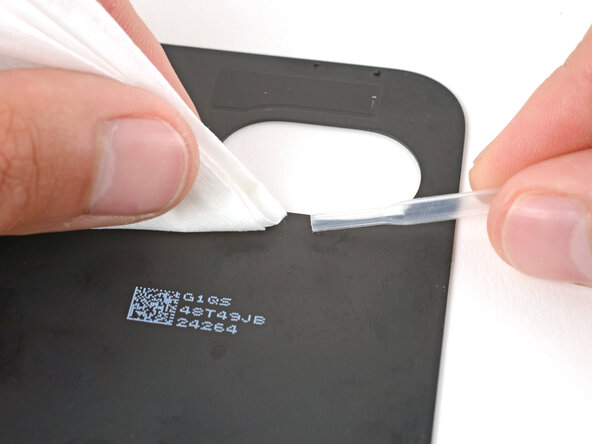
    • Use high‑concentration (>90%) isopropyl alcohol and a lint‑free cloth (or coffee filter) to clean up and remove any residue from the adhesives you removed.

    Demander à FixBot
  49. Google Pixel 9a Front Camera Replacement, Apply the adhesive: étape 49, image 1 de 2 Google Pixel 9a Front Camera Replacement, Apply the adhesive: étape 49, image 2 de 2
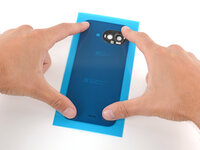
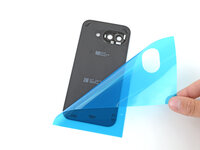
    • Remove the larger, clear liner from the back cover inner adhesive.

    • Lay the adhesive onto the bottom of the back cover, making sure the cutout goes around the camera bezel.

    Demander à FixBot
  50. Google Pixel 9a Front Camera Replacement, Secure the adhesive: étape 50, image 1 de 2 Google Pixel 9a Front Camera Replacement, Secure the adhesive: étape 50, image 2 de 2
    • Use your fingers or a spudger to firmly push down on the five small adhesives to secure them to the back cover.

    • Slowly peel up and remove the remaining liner.

    • If the adhesives start to peel up with the liner, lay it back down and use your spudger to secure the adhesive again.

    Demander à FixBot
  51. Google Pixel 9a Front Camera Replacement, Remove the remaining liners: étape 51, image 1 de 3 Google Pixel 9a Front Camera Replacement, Remove the remaining liners: étape 51, image 2 de 3 Google Pixel 9a Front Camera Replacement, Remove the remaining liners: étape 51, image 3 de 3
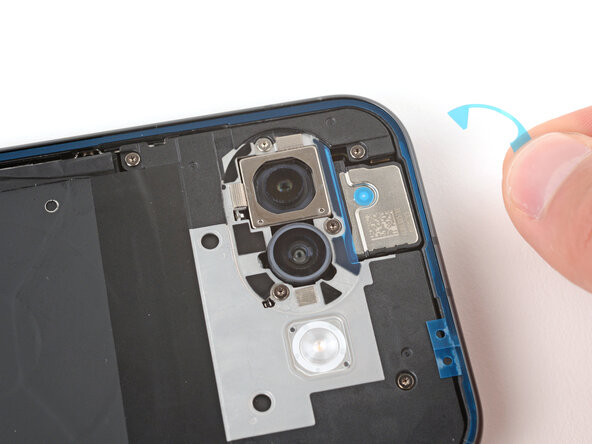
    • Use the point of a spudger to lift and remove the plastic liners from the adhesive around the rear cameras.

    • If the adhesive starts to pull up with the liner, lay it back in place and use your spudger to secure it again.

    Demander à FixBot
  52. Google Pixel 9a Front Camera Replacement: étape 52, image 1 de 2 Google Pixel 9a Front Camera Replacement: étape 52, image 2 de 2
    • Use the pull tabs to remove the final liner from the rear cover adhesive.

    Demander à FixBot
  53. Google Pixel 9a Front Camera Replacement, Install the rear cover: étape 53, image 1 de 3 Google Pixel 9a Front Camera Replacement, Install the rear cover: étape 53, image 2 de 3 Google Pixel 9a Front Camera Replacement, Install the rear cover: étape 53, image 3 de 3
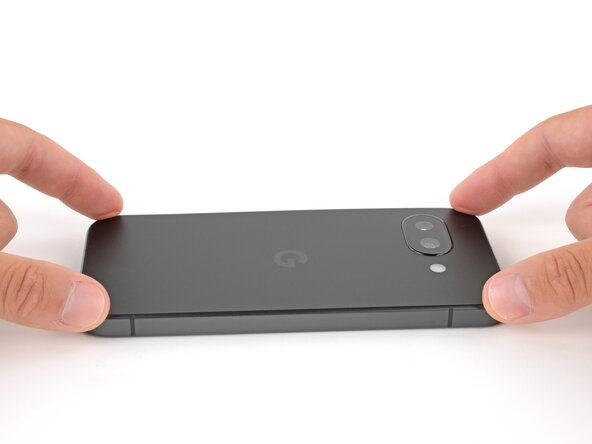
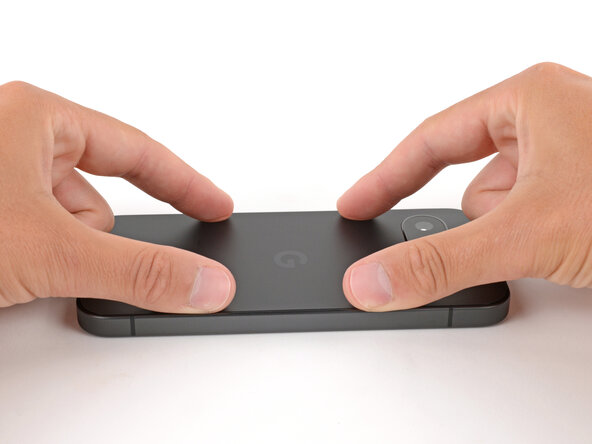
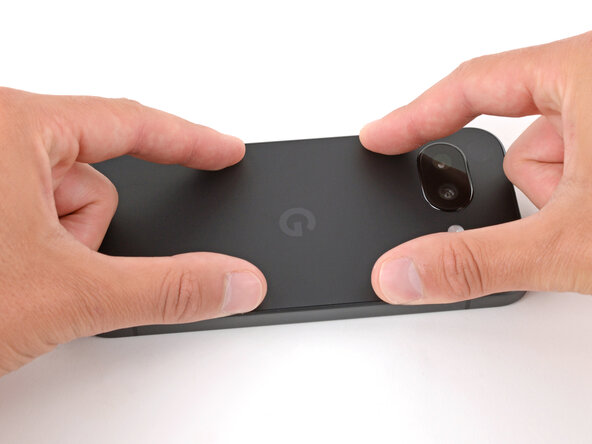
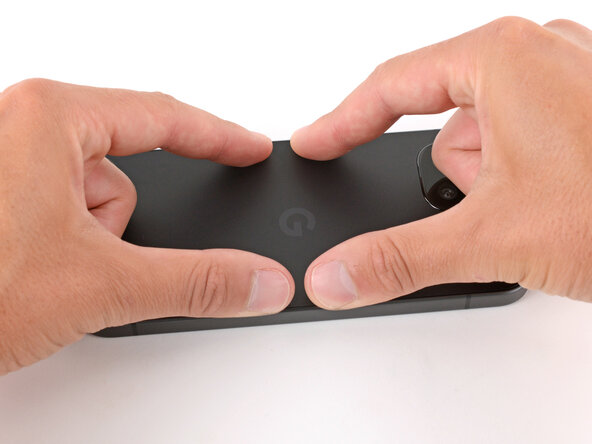
    • Align the rear cover over the frame and press it into place.

    Demander à FixBot
  54. Google Pixel 9a Front Camera Replacement: étape 54, image 1 de 3 Google Pixel 9a Front Camera Replacement: étape 54, image 2 de 3 Google Pixel 9a Front Camera Replacement: étape 54, image 3 de 3
    Demander à FixBot
Conclusion

Congratulations on completing your repair!

Take your e-waste to an R2 or e-Stewards certified recycler.

To run a diagnostics test with the built-in Pixel Diagnostic tool, click here.

Repair didn’t go as planned? Try some basic troubleshooting, or ask our Answers community for help.

Une autre personne a terminé cette réparation.

Spencer Day

Membre depuis le 09/14/22

187 810 Réputation

1 187 tutoriels rédigés

Équipe

iFixit Membre de l'équipe iFixit

Staff

123 membres

25 699 tutoriels rédigés

2 commentaires de tutoriel

will this phone operate without a front camera installed at all? i plan on buying one but never want a camera facing me as i'm using it (and don't use the front-facing camera anyway)

sugarcane - Réponse Partager

可以,我自己组装的这款手机并没有装前置摄像头

蒋宏烨 - Réponse Partager
Ajouter un commentaire

Nombre de vues :

Dernières 24 heures : 2

7 derniers jours : 23

30 derniers jours : 101

Total : 856