Aller au contenu principal
Pour réparer ensemble - Je crée un compte

Levoit Core 300-RAC Control Board Replacement

Ce dont vous avez besoin

    1. Levoit Core 300-RAC Control Board Replacement, Control Board: étape 1, image 1 de 3 Levoit Core 300-RAC Control Board Replacement, Control Board: étape 1, image 2 de 3 Levoit Core 300-RAC Control Board Replacement, Control Board: étape 1, image 3 de 3
      • Make sure the device is turned off and unplugged before disassembling it.

      • Insert the Jimmy between the gray grille cover and the top of the device.

      • Work your way around the grille cover with the Jimmy to release the clips holding it in place.

      • Take note of the placement of the clips, as they are keyed and need to go back in the exact way they came out.

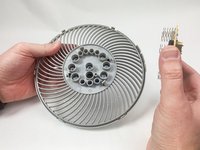
      • Remove the grille cover gently as it is connected by a ribbon cable.

      • Be careful not to put too much strain on the ribbon cable as it may break.

      Demander à FixBot

      Ajouter un commentaire

    2. Levoit Core 300-RAC Control Board Replacement: étape 2, image 1 de 3 Levoit Core 300-RAC Control Board Replacement: étape 2, image 2 de 3 Levoit Core 300-RAC Control Board Replacement: étape 2, image 3 de 3
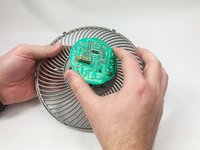
      • Squeeze the tab on the connector to release the bundled cable from the control board.

      • The connector should come out fairly easily, so do not force it. Pulling too hard could damage the connector.

      Demander à FixBot

      Ajouter un commentaire

    3. Levoit Core 300-RAC Control Board Replacement: étape 3, image 1 de 2 Levoit Core 300-RAC Control Board Replacement: étape 3, image 2 de 2
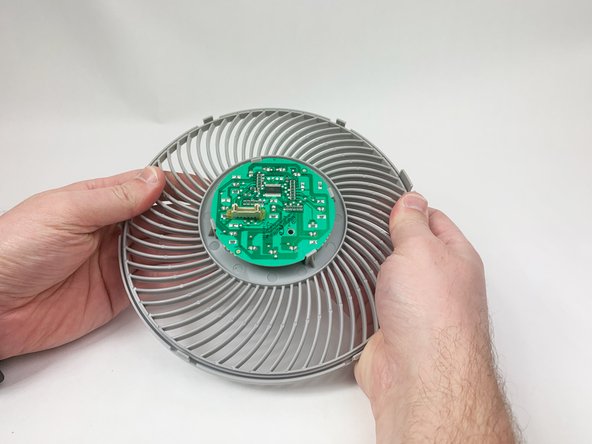
      • Gently bend the gray plastic cover to release the control board.

      • There are several hard tabs holding the control board in place.

      Demander à FixBot

      Ajouter un commentaire

    4. Levoit Core 300-RAC Control Board Replacement: étape 4, image 1 de 3 Levoit Core 300-RAC Control Board Replacement: étape 4, image 2 de 3 Levoit Core 300-RAC Control Board Replacement: étape 4, image 3 de 3
      • Lift the control board from the gray plastic cover.

      • Take note of the orientations of the buttons, as that will help during reassembly.

      Demander à FixBot

      Ajouter un commentaire

Conclusion

To reassemble your device, follow these instructions in reverse order.

Annulation : je n'ai pas terminé ce tutoriel.

Mustafa

Membre depuis le 11/03/23

259 Réputation

1 tutoriel rédigé

Équipe

UMass Dartmouth, Team 1-6, Petersen Fall 2023 Membre de l'équipe UMass Dartmouth, Team 1-6, Petersen Fall 2023

UMASSD-PETERSEN-F23S1G6

5 membres

14 tutoriels rédigés

0 commentaires de tutoriel

Ajouter un commentaire

Nombre de vues :

Dernières 24 heures : 4

7 derniers jours : 13

30 derniers jours : 92

Total : 1,906