Introduction
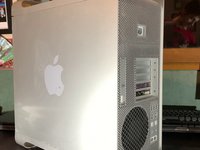
Si votre Mac Pro à un boitier rayé ou abîmé, voici un tutoriel pour entièrement le remplacer.
Tout le monde peux y arriver, juste que le démontage et le remontage sont des étapes très longue. La patience est la clé de la réussite.
Ce dont vous avez besoin
-
-
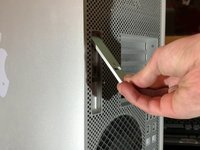
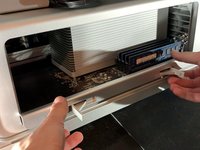
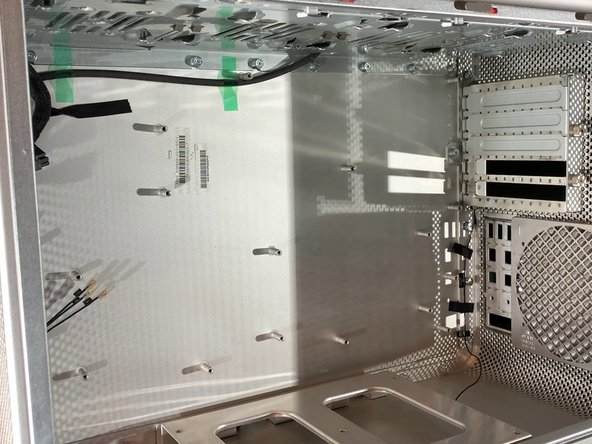
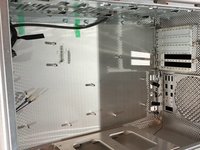
Pour ouvrir le Mac Pro, vous aurez un clapet à soulever sur l'arrière du boitier
-
-
-
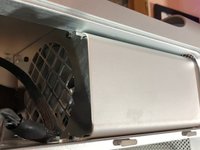
En ayant le clapet dans la position haute, le panneau devrait se séparer du boitier sans forcer
-
-
-
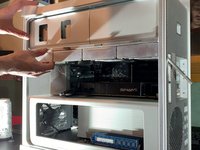
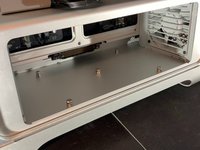
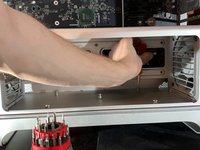
Il faut ensuite enlever les disques durs, pour ça rien de plus simple : les tirer vers vous en forçant un peu
-
-
-
Très simple, tirez vers vous le support des lecteurs DVD, il devrait venir vers vous en forçant un peu
-
-
-
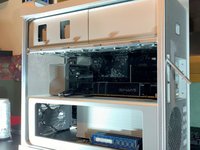
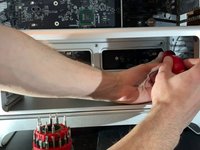
Appuyer sur les deux loquets pour déverrouillez le support
-
Tirez le ensuite vers vous
-
-
-
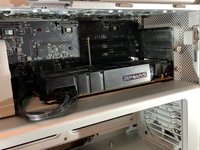
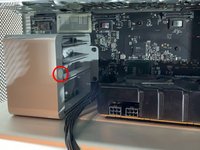
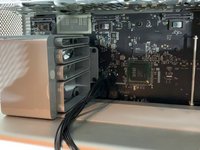
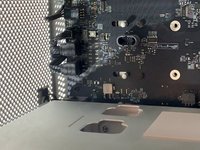
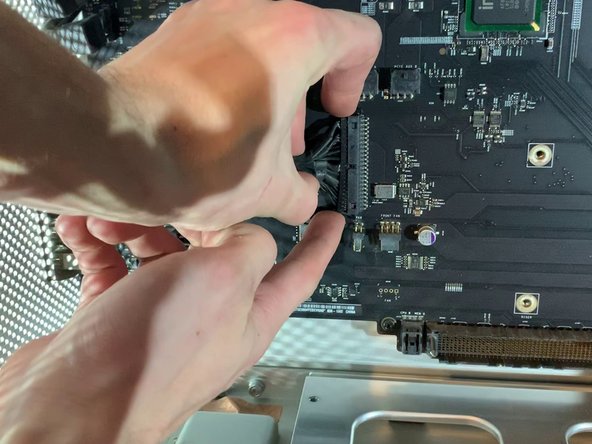
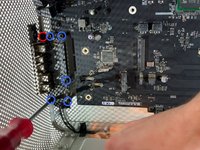
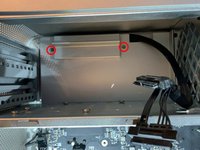
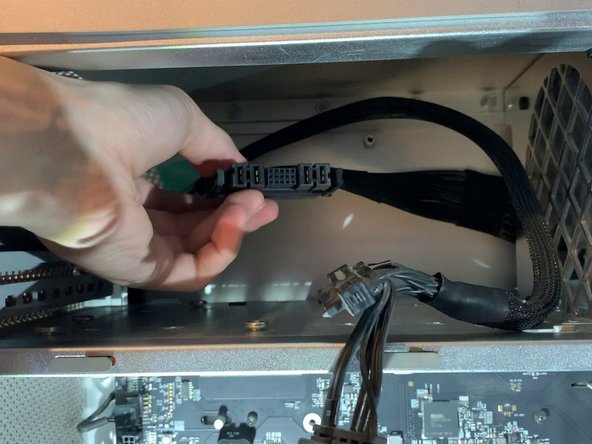
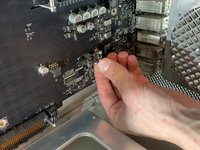
Enlevez les connecteurs 6 pins ou 8 pins de votre carte graphique
-
-
-
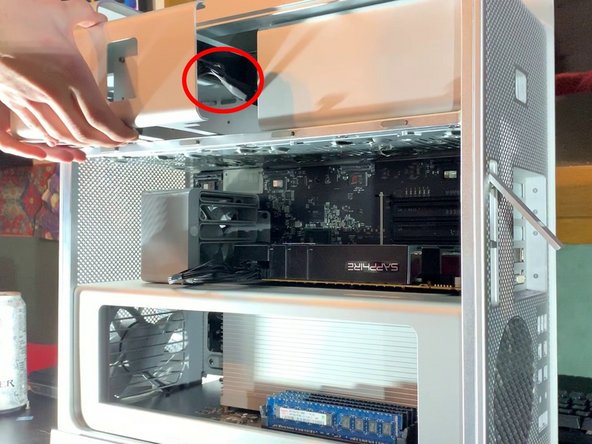
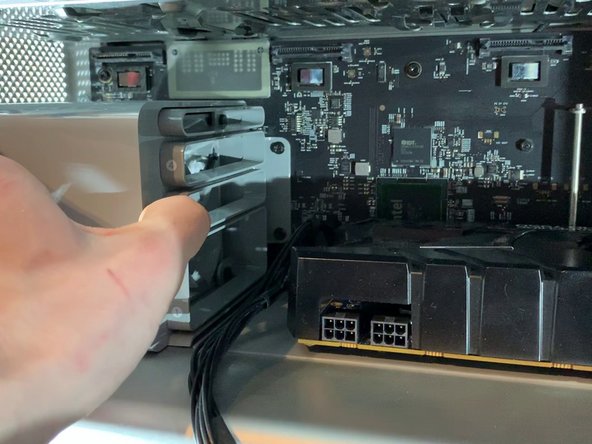
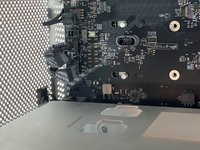
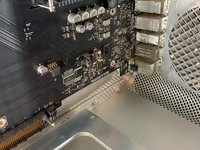
Sur le support du ventilateur il y a une sorte de bouton, appuyez dessus et vous pourrez bouger le support vers la gauche (voir image)
-
Vous avez qu'a tirez vers vous la carte graphique pour la sortir du boitier
That is not the power supply but rather just a fan shroud. It is important to move that back to release any PCIE cards that have the rear locking tab as it also moves the metal bat shown on the right side of the picture to release the lock from the tabs.
Hello, the cable between the grey block and GPU is my GPU alimentation (mini 8-pins), so for unplug this alimentation, you need to move the fan shroud
Please read the whole tutorial, just after this step, I explain how to unplug this cable
-
-
-
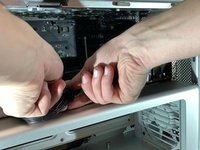
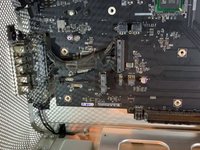
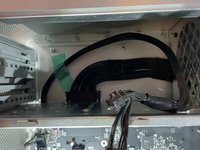
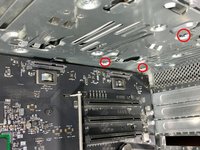
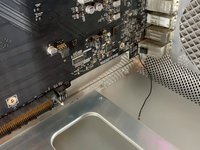
Déconnectez les câbles PCI-e de la carte-mère
-
-
-
-
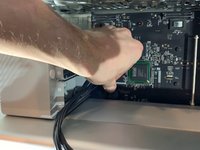
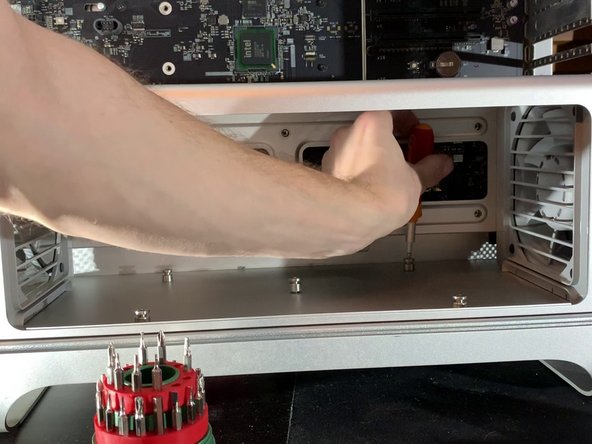
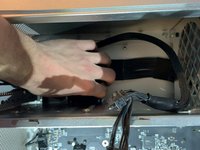
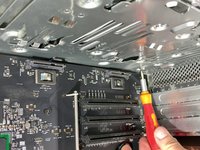
Avec le tournevis dévissez les deux vis qui retiennent le support du ventilateur
-
Ensuite tirez vers vous pour le dégager du boitier
-
-
-
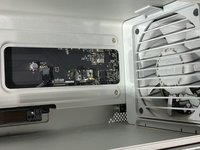
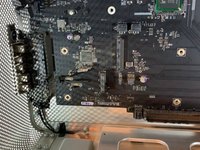
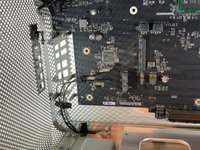
Derrière le support du ventilateur, il y a 2 câbles SATA, une alimentation 4 mini pins et un ventilateur 4 pins
-
-
-
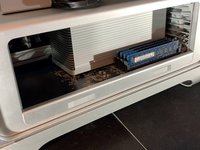
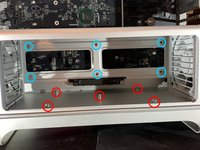
Avec un tournevis H2.5, dévissez les vis sur le bas du support (photo 2)
-
Avec un tournevis cruciforme, dévissez les vis sur le fond du boitier (photo 3)
-
-
-
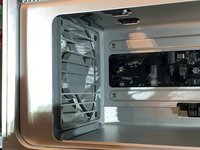
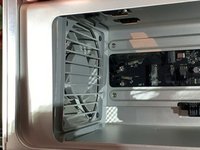
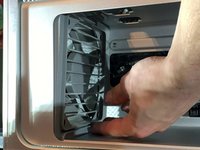
Sortir le clips en haut du ventilateur
-
Tirez un peu le ventilateur
-
-
-
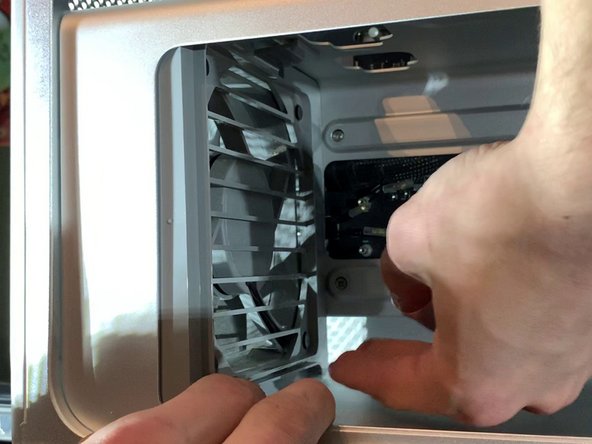
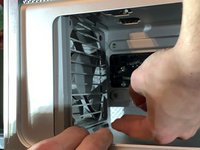
Ensuite, comme sur la photo, soulevez légèrement le bas du ventilateur pour sortir le clips du bas
Where tf os the clip at the bottom???????
It is only necessary to move both fans about 1 cm towards the centre of the computer box. You then need to disconnect the plugs for both fans the the loudspeaker in order to slide out the cpu unit. Do not attempt to remove the fans!
-
-
-
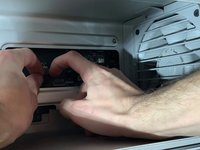
Déconnectez 2 x 4 pins (ventilateurs) et 1 x 2 pins (haut parleur)
Wtf hot the !&&* do you get those out. There like stuck
- You need to disconnect/seperate the retaining catch on the motherboard connecting shroud from the retaining clip on the cable connector.
- To help do this, you can Very Lightly use a spudger/prying tool or cut some piece of scrap recycled plastic off a bottle to slide between the two on the top side of the connector, parallel to the motherboard.
- Once you have to two interlocking halves held apart, then you may be able to
* wiggle the connector off
* use a small flat headed screw driver or similar tool to Again Lightly help start to push from between the motherboard and cable connectors
* and/or, Gently use a hobby plyers or large tweezers to lightly grab the cable connector from the short edges for a better grip while wiggling
- If this still doesn’t make sense, then you might try searching for images of “motherboard cable connector retaining clip” or some such.
Hope that helps.
-
-
-
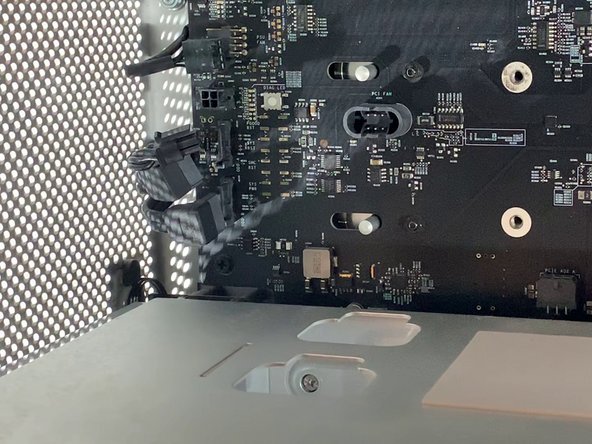
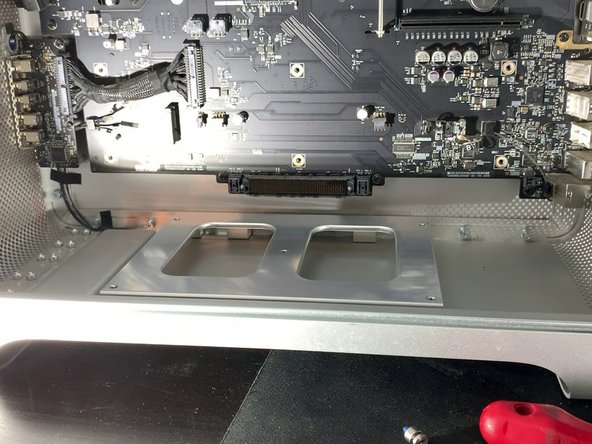
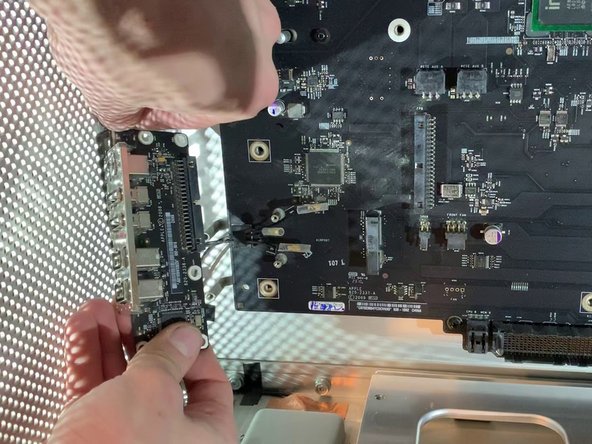
Retirer la nappe qui relie la carte-mère à la carte d'extension (USB, Jack, Power Off etc)
-
-
-
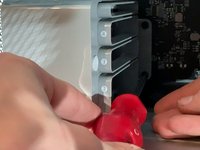
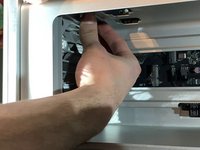
Appuyez sur les deux crochet pour débloquer le connecteur d’alimentation
-
-
-
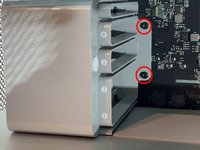
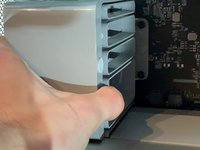
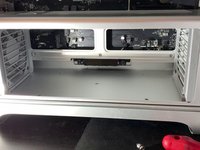
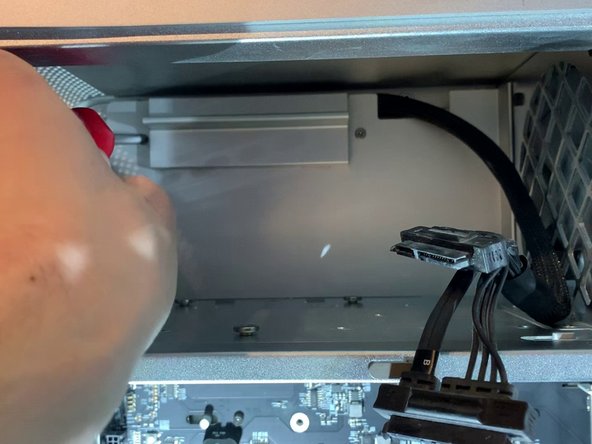
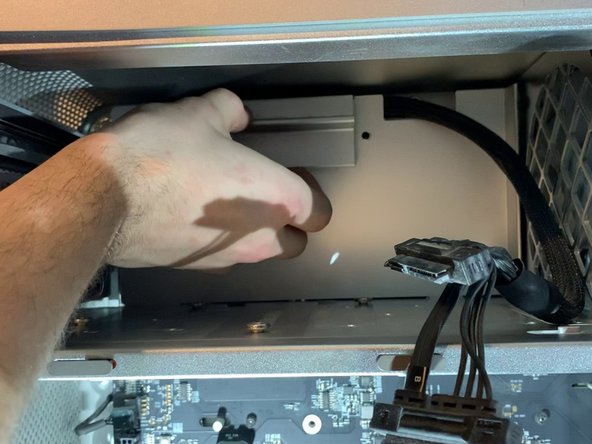
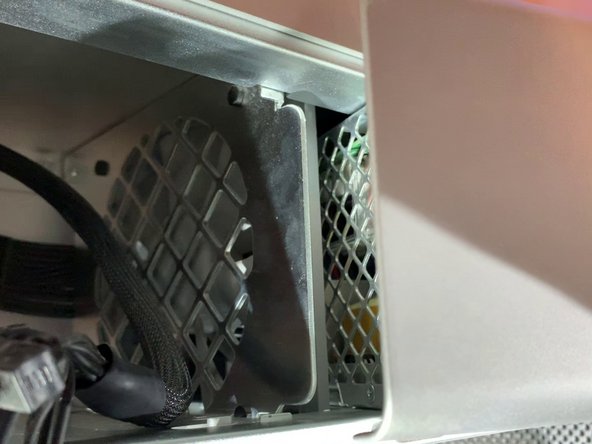
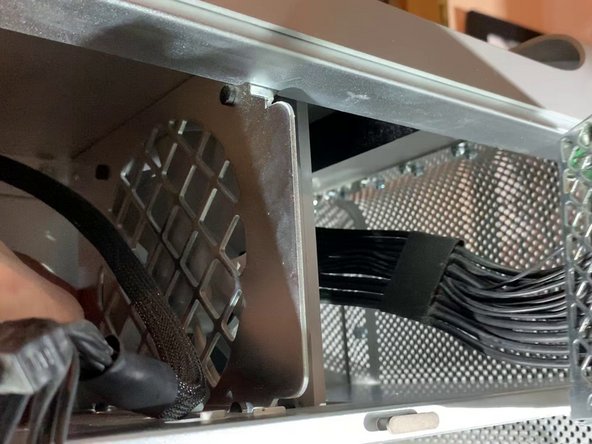
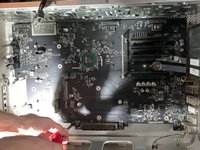
Dévissez les 4 vis qui retiennent le bloc d'alimentation
The 4 screws used here require a 2mm Hex bit. You do not need to unscrew the Phillips screws to remove the power supply.
-
-
-
Plus qu'a refaire les étapes inverses pour le remontage !
Great instructions.
Easy to follow
Thanks for posting this teardown! Worked out great!
Used this to replace all the cooling fans in my macpro5,1
how can i take apart the case further as in Taking off the latch and the Wifi and the top piece that holds the PSU?
how can i take apart the case Further as in the latch and the plastic parts the cheese grater front panel ect.
-


Pour réassembler votre appareil, suivez les instructions dans l'ordre inverse.
Pour réassembler votre appareil, suivez les instructions dans l'ordre inverse.
Annulation : je n'ai pas terminé ce tutoriel.
22 autres ont terminé cette réparation.

7 commentaires
Bonjour, j’ai un mac pro 5,1 de 2010 dont les clapets (ou les trappes, j’ignore le terme exact) de la baie des lecteurs de disques restent ouverts à chaque fois qu’ils sont actionnés. Je n’ai pas réussi à les démonter, et les 2 gouttes de 3 en 1 sur les glissières latérales n’ont rien changé au problème. Je n’ai trouvé aucun tutoriel, ni même aucune occurrence de ce problème sur le web. Pourriez-vous me donner quelques conseils ? Merci.
Amazing explanations and perfect picture track on each move made.
Thanks much - this was very helpful :)
Dennis.
Hello sir , I have a problem with my Mac Pro 5,1 mid 2010 Xeon 6core Cpu 64 GB Ram RX580
I erase SSD Hard Drive and I want to reinstall mojave OS and it does not work still appear ‘Missing Operating System’
I try to use all commends on startup like (Option) (Commend+R) (Option+Commend+R)(Option+Commend+R+P) and more commends
but nothing work with it … please I want help . I need your help please , please …
You’d probably get an answer a lot quicker if you just posted that as a question.
Thanks for posting this guide!
I used it to replace all the cooking fans in my macpro5,1. Worked great!!
The "cooking fans", is your Mac Pro a flat top grill?
Por favor….. ¿sabes dónde está ubicada la batería interna que conserva el reloj actualizado?…… Gracias.
Agustin Redondo - Réponse