Aller au contenu principal

MacBook Pro 13" Late 2020 Right Speaker Replacement

Ce dont vous avez besoin

  1. MacBook Pro 13" Late 2020 Right Speaker Replacement, Remove the lower case: étape 1, image 1 de 1
    Outil utilisé dans cette étape :
    Magnetic Project Mat
    $19.95
    J'achète
    • Before starting this procedure, you should disable your Mac's Auto Boot feature. Auto Boot powers on your Mac when you open the lid, and may be accidentally triggered during disassembly. Use this guide to disable Auto Boot.

    • If your MacBook is running Big Sur v11.1 or later, disabling Auto Boot may not work. You can proceed normally, but make sure to disconnect the battery as soon as you're inside.

    • Completely power off and unplug your MacBook before you start. Close the display and flip the entire laptop upside-down.

    • Use a P5 Pentalobe driver to remove the six screws securing the lower case:

    • Two 6.8 mm screws

    • Two 5.3 mm screws

    • Two 3.4 mm screws

    • Throughout this repair, keep track of each screw and make sure it goes back exactly where it came from to avoid damaging your device.

  2. MacBook Pro 13" Late 2020 Right Speaker Replacement: étape 2, image 1 de 2 MacBook Pro 13" Late 2020 Right Speaker Replacement: étape 2, image 2 de 2
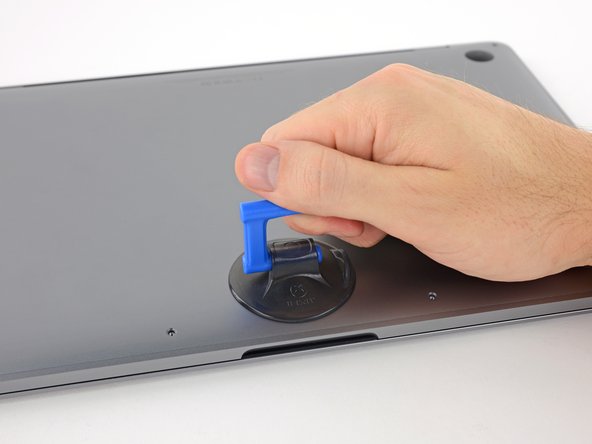
    • Apply a suction handle to the lower case near the front-center area of the MacBook Pro.

    • Lift the suction handle to create a slight separation between the lower case and the chassis.

  3. MacBook Pro 13" Late 2020 Right Speaker Replacement: étape 3, image 1 de 3 MacBook Pro 13" Late 2020 Right Speaker Replacement: étape 3, image 2 de 3 MacBook Pro 13" Late 2020 Right Speaker Replacement: étape 3, image 3 de 3
    • Insert one corner of an opening pick into the space between the lower case and the chassis.

    • Slide the opening pick around the nearest corner and halfway up the side of the case.

    • This releases the first of the hidden clips securing the lower case to the chassis. You should feel and hear the clip pop free.

  4. MacBook Pro 13" Late 2020 Right Speaker Replacement: étape 4, image 1 de 3 MacBook Pro 13" Late 2020 Right Speaker Replacement: étape 4, image 2 de 3 MacBook Pro 13" Late 2020 Right Speaker Replacement: étape 4, image 3 de 3
    • Repeat the previous step on the opposite side, sliding your opening pick under the lower case and up the side to pop the second clip free.

  5. MacBook Pro 13" Late 2020 Right Speaker Replacement: étape 5, image 1 de 3 MacBook Pro 13" Late 2020 Right Speaker Replacement: étape 5, image 2 de 3 MacBook Pro 13" Late 2020 Right Speaker Replacement: étape 5, image 3 de 3
    • Insert your opening pick once again under the front edge of the lower case, near one of the two centermost screw holes.

    • Give the pick a firm twist to pop free the third clip securing the lower case to the chassis.

    • Repeat this procedure near the other of the two centermost screw holes, popping the fourth clip free.

  6. MacBook Pro 13" Late 2020 Right Speaker Replacement: étape 6, image 1 de 3 MacBook Pro 13" Late 2020 Right Speaker Replacement: étape 6, image 2 de 3 MacBook Pro 13" Late 2020 Right Speaker Replacement: étape 6, image 3 de 3
    • Pull the lower case firmly towards the front of the MacBook (away from the hinge area) to separate the last of the clips securing the lower case.

    • It may help to pull first at one corner, then the other.

    • Pull to the side—not up.

    • This may require a lot of force.

    • The edges of the case can be sharp, so grip the sides carefully.

  7. MacBook Pro 13" Late 2020 Right Speaker Replacement: étape 7, image 1 de 1
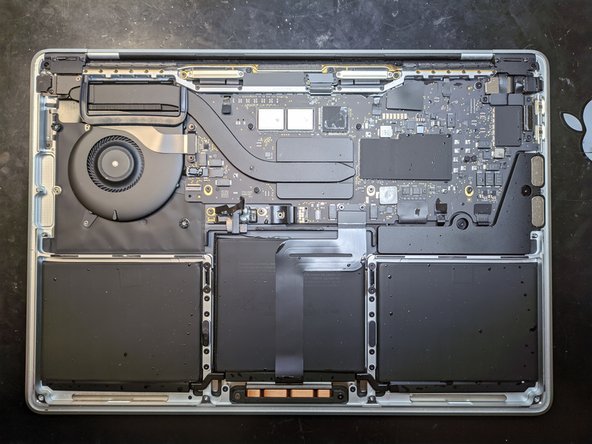
    • Remove the lower case.

    • To reinstall the lower case:

    • Set it in place and align the sliding clips near the display hinge. Press down and slide the cover toward the hinge. It should stop sliding as the clips engage.

    • When the sliding clips are fully engaged and the lower case looks correctly aligned, press down firmly on the lower case to engage the four hidden clips underneath. You should feel and hear them snap into place.

  8. MacBook Pro 13" Late 2020 Right Speaker Replacement, Disconnect the battery: étape 8, image 1 de 2 MacBook Pro 13" Late 2020 Right Speaker Replacement, Disconnect the battery: étape 8, image 2 de 2
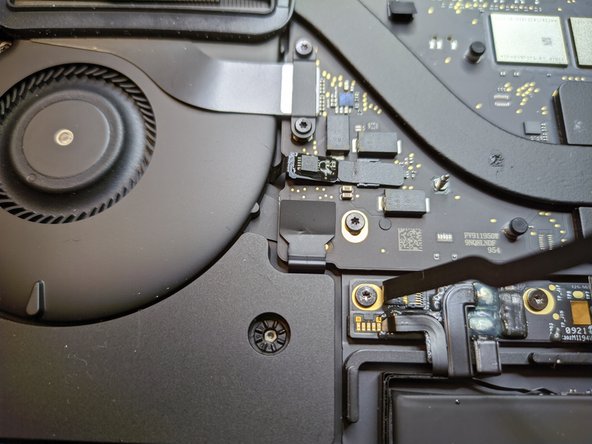
    • Carefully peel up the large piece of tape covering the battery connector, on the edge of the logic board nearest the battery.

    • Remove the tape.

  9. MacBook Pro 13" Late 2020 Right Speaker Replacement: étape 9, image 1 de 2 MacBook Pro 13" Late 2020 Right Speaker Replacement: étape 9, image 2 de 2
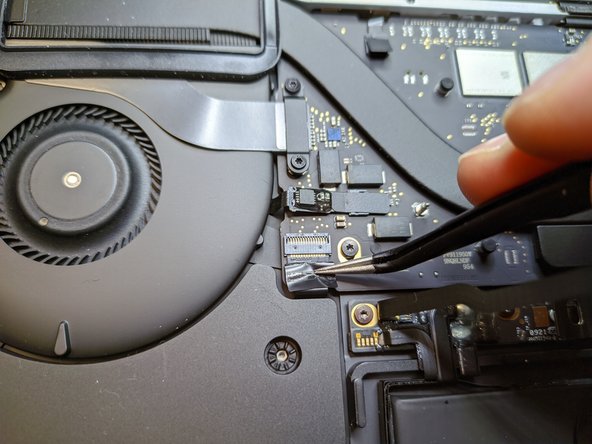
    • Gently peel back the small piece of tape covering the battery board data cable connector.

    • The tape is integrated into the ribbon cable and will not detach completely. Simply peel it back enough to access the connector.

  10. MacBook Pro 13" Late 2020 Right Speaker Replacement: étape 10, image 1 de 2 MacBook Pro 13" Late 2020 Right Speaker Replacement: étape 10, image 2 de 2
    • Use the tip of a spudger to flip up the small black locking tab securing the cable in its connector.

    • Locking tabs on ZIF connectors are fragile, so be gentle when using the tip of the spudger.

  11. MacBook Pro 13" Late 2020 Right Speaker Replacement: étape 11, image 1 de 2 MacBook Pro 13" Late 2020 Right Speaker Replacement: étape 11, image 2 de 2
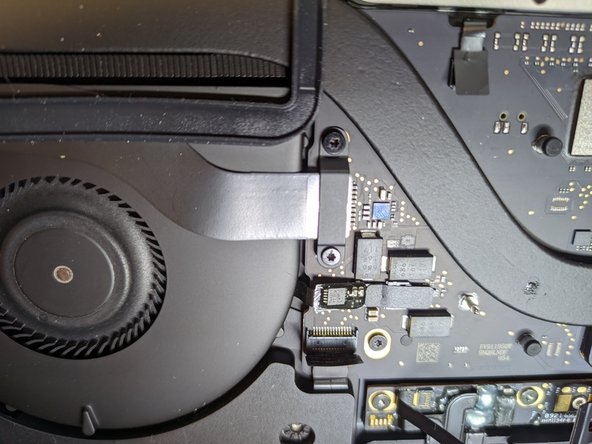
    • Disconnect the battery board data cable by sliding it out from its socket.

    • Slide parallel to the logic board, in the direction of the cable.

  12. MacBook Pro 13" Late 2020 Right Speaker Replacement: étape 12, image 1 de 1
    • Fold the battery board data cable back and out of the way.

    • If you're replacing your battery, you may need to completely remove and transfer this cable to your new battery. Disconnect both ends and carefully remove the cable. During installation, be careful not to install it upside-down or backwards—note the orientation in the photos.

  13. MacBook Pro 13" Late 2020 Right Speaker Replacement: étape 13, image 1 de 2 MacBook Pro 13" Late 2020 Right Speaker Replacement: étape 13, image 2 de 2
    • Use a T5 Torx driver to remove the 3.7 mm pancake screw securing the battery power connector.

  14. MacBook Pro 13" Late 2020 Right Speaker Replacement: étape 14, image 1 de 2 MacBook Pro 13" Late 2020 Right Speaker Replacement: étape 14, image 2 de 2
    • Use a spudger to gently lift the battery power connector, disconnecting the battery.

    • Lift the connector high enough so that it stays separated from its socket.

    • If it accidentally makes contact during the course of your repair, it could damage your MacBook Pro.

  15. MacBook Pro 13" Late 2020 Right Speaker Replacement, Unplug the right speaker: étape 15, image 1 de 3 MacBook Pro 13" Late 2020 Right Speaker Replacement, Unplug the right speaker: étape 15, image 2 de 3 MacBook Pro 13" Late 2020 Right Speaker Replacement, Unplug the right speaker: étape 15, image 3 de 3
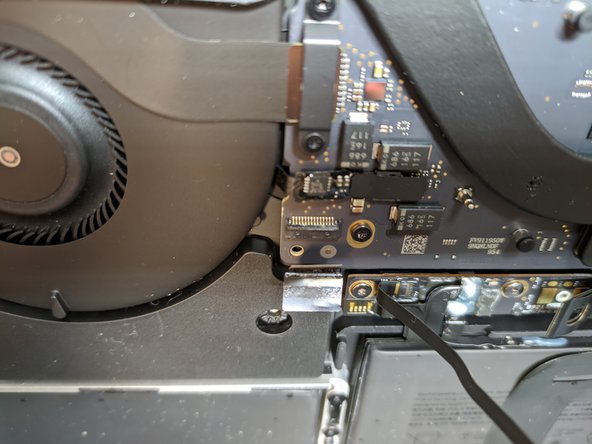
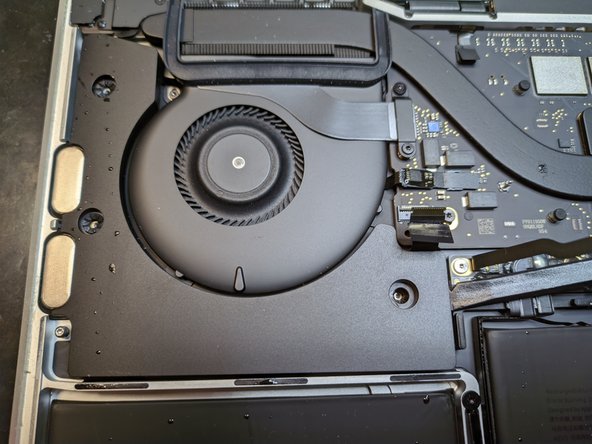
    • Lift the adhesive covering the right speaker connector using a pair of tweezers to pull it towards you.

  16. MacBook Pro 13" Late 2020 Right Speaker Replacement: étape 16, image 1 de 2 MacBook Pro 13" Late 2020 Right Speaker Replacement: étape 16, image 2 de 2
    • Use the flat side of a spudger to rotate the locking tab of the ZIF connector upwards.

  17. MacBook Pro 13" Late 2020 Right Speaker Replacement: étape 17, image 1 de 2 MacBook Pro 13" Late 2020 Right Speaker Replacement: étape 17, image 2 de 2
    • Pull the ribbon cable out of its socket using a pair of tweezers.

  18. MacBook Pro 13" Late 2020 Right Speaker Replacement, Remove the screws: étape 18, image 1 de 1
    • Remove the three 2.85mm T5 Torx screws holding the right speaker in place.

  19. MacBook Pro 13" Late 2020 Right Speaker Replacement, Remove the right speaker: étape 19, image 1 de 3 MacBook Pro 13" Late 2020 Right Speaker Replacement, Remove the right speaker: étape 19, image 2 de 3 MacBook Pro 13" Late 2020 Right Speaker Replacement, Remove the right speaker: étape 19, image 3 de 3
    • Slide the flat side of the spudger under the right speaker, next to the battery board.

    • Push the spudger down to lift the right speaker out of its socket.

    • Remove the right speaker from its housing.

    • Be careful not to slip the anti-vibration gasket in the screw holes. Otherwise it will be very difficult to rethread during reassembly.

Conclusion

Compare your replacement part with the original one - some components may need to be relocated, or adhesive guards removed from the new part before installing.

To reassemble your device, follow the instructions in reverse order.

Take your e-waste to an R2 or e-Stewards certified recycler.

Did the repair not go as planned? Try reaching out to our Answers community for help with troubleshooting.

3 autres ont terminé cette réparation.

Merci à ces traducteurs :

it en

100%

Ces traducteurs nous aident réparer le monde ! Vous voulez contribuer ?
Commencez à traduire ›

Daniele Carminati

Membre depuis le 03/07/21

29 318 Réputation

2 tutoriels rédigés

0 commentaires

Ajouter un commentaire

Nombre de vues :

Dernières 24 heures : 6

7 derniers jours : 39

30 derniers jours : 151

Total : 1,513