Aller au contenu principal

OnePlus Nord 2 5G Rear Glass Replacement

Ce dont vous avez besoin

  1. OnePlus Nord 2 5G Rear Glass Replacement, Loosen the rear glass: étape 1, image 1 de 1
    • Prepare an iOpener and apply it to the rear glass for at least three minutes to loosen the adhesive underneath.

    • A hair dryer, heat gun, or hot plate may also be used, but be careful not to overheat the phone—the display and internal battery are both susceptible to heat damage.

  2. OnePlus Nord 2 5G Rear Glass Replacement, Insert an iFlex: étape 2, image 1 de 3 OnePlus Nord 2 5G Rear Glass Replacement, Insert an iFlex: étape 2, image 2 de 3 OnePlus Nord 2 5G Rear Glass Replacement, Insert an iFlex: étape 2, image 3 de 3
    • Due to its surface, no suction tool will hold onto the phone's rear glass. A thin slicing tool is required to create a gap between the rear glass and the midframe.

    • Insert an iFlex into the seam between the rear glass and the midframe at the bottom edge of the phone to create a gap. This may require some force.

    • Leave the iFlex in place to prevent the adhesive from resealing.

  3. OnePlus Nord 2 5G Rear Glass Replacement, Insert an opening pick: étape 3, image 1 de 3 OnePlus Nord 2 5G Rear Glass Replacement, Insert an opening pick: étape 3, image 2 de 3 OnePlus Nord 2 5G Rear Glass Replacement, Insert an opening pick: étape 3, image 3 de 3
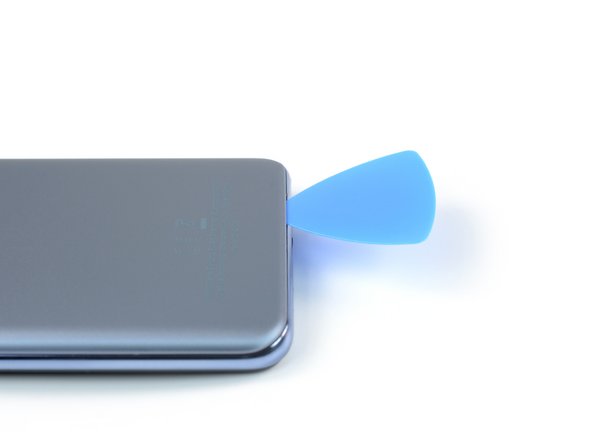
    • Insert an opening pick into the gap you created with the iFlex.

    • Remove the iFlex.

  4. OnePlus Nord 2 5G Rear Glass Replacement, Slice the bottom edge adhesive: étape 4, image 1 de 2 OnePlus Nord 2 5G Rear Glass Replacement, Slice the bottom edge adhesive: étape 4, image 2 de 2
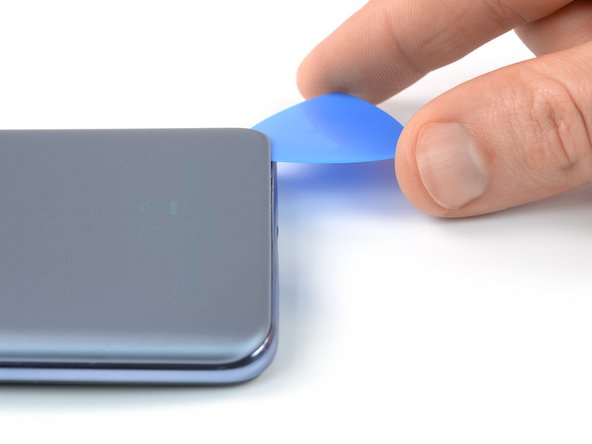
    • Slide the opening pick to the bottom right corner to slice the adhesive.

    • Leave the opening pick in place to prevent the adhesive from resealing.

  5. OnePlus Nord 2 5G Rear Glass Replacement: étape 5, image 1 de 2 OnePlus Nord 2 5G Rear Glass Replacement: étape 5, image 2 de 2
    • Insert a second opening pick at the bottom right corner of your phone.

    • Slide the opening pick to the bottom left corner to slice the adhesive.

    • Leave the opening picks in place to prevent the adhesive from resealing.

  6. OnePlus Nord 2 5G Rear Glass Replacement, Slice the left edge adhesive: étape 6, image 1 de 3 OnePlus Nord 2 5G Rear Glass Replacement, Slice the left edge adhesive: étape 6, image 2 de 3 OnePlus Nord 2 5G Rear Glass Replacement, Slice the left edge adhesive: étape 6, image 3 de 3
    • If the adhesive becomes hard to cut, it has most likely cooled down. Use your iOpener to reheat it.

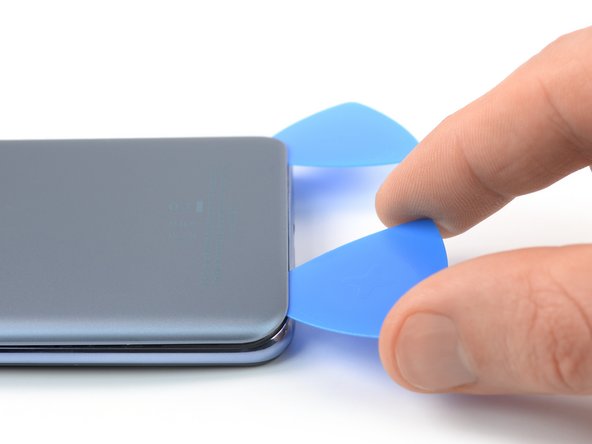
    • Insert a third opening pick at the bottom left corner of your phone.

    • Slide the opening pick along the left edge of your phone to slice the adhesive.

    • Leave the opening pick in the top left corner to prevent the adhesive from resealing.

  7. OnePlus Nord 2 5G Rear Glass Replacement, Slice the top edge adhesive: étape 7, image 1 de 2 OnePlus Nord 2 5G Rear Glass Replacement, Slice the top edge adhesive: étape 7, image 2 de 2
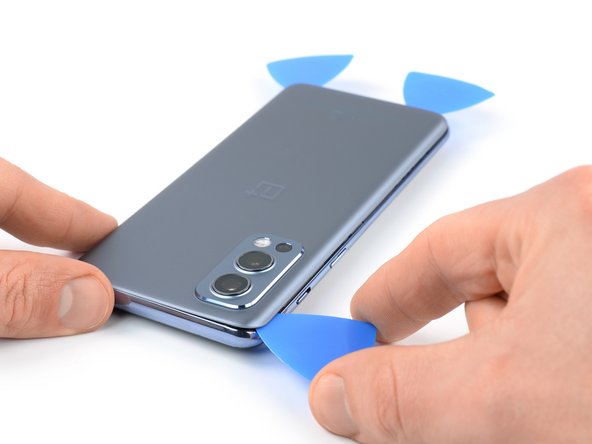
    • Insert a fourth opening pick underneath the top left corner of the rear glass.

    • Slide the opening pick along the top edge to slice the adhesive.

    • Leave the opening pick in the top right corner to prevent the adhesive from resealing.

  8. OnePlus Nord 2 5G Rear Glass Replacement, Slice the right edge adhesive: étape 8, image 1 de 3 OnePlus Nord 2 5G Rear Glass Replacement, Slice the right edge adhesive: étape 8, image 2 de 3 OnePlus Nord 2 5G Rear Glass Replacement, Slice the right edge adhesive: étape 8, image 3 de 3
    • Insert a fifth opening pick underneath the top right corner.

    • Slide the opening pick along the right edge of the back cover to slice the remaining adhesive.

  9. OnePlus Nord 2 5G Rear Glass Replacement, Remove the back cover: étape 9, image 1 de 2 OnePlus Nord 2 5G Rear Glass Replacement, Remove the back cover: étape 9, image 2 de 2
    • Remove the back cover.

    • Secure the new back cover with pre-cut adhesive or double-sided adhesive tape. After installing the back cover, apply strong, steady pressure to your phone for several minutes to help the adhesive form a good bond—a stack of heavy books works well.

Conclusion

To reassemble your device, follow these instructions in reverse order.

During reassembly, apply new adhesive where it's necessary after cleaning the relevant areas with isopropyl alcohol (>90%).

Take your e-waste to an R2 or e-Stewards certified recycler.

Repair didn’t go as planned? Try some basic troubleshooting, or ask our OnePlus Nord 2 5G answers community for help.

Une autre personne a terminé cette réparation.

Dominik Schnabelrauch

Membre depuis le 11/23/16

203 899 Réputation

682 tutoriels rédigés

Équipe

iFixit Membre de l'équipe iFixit

Staff

135 membres

17 198 tutoriels rédigés

0 commentaires

Ajouter un commentaire

Nombre de vues :

Dernières 24 heures : 6

7 derniers jours : 35

30 derniers jours : 141

Total : 1,875