Introduction
Votre ordinateur portable a des problèmes de chargement malgré un chargeur neuf ou une réinitialisation SMC? Remplacez la carte de raccordement MagSafe.
Ce dont vous avez besoin
-
-
À l'aide d'une pièce de monnaie, faites pivoter la vis de verrouillage de la batterie de 90 degrés dans le sens des aiguilles d'une montre.
-
-
-
Dévissez les trois vis cruciformes espacées régulièrement sur la paroi arrière du compartiment de la batterie.
-
-
-
Retirez les 3 vis suivantes :
-
Une vis cruciforme #00 de 11 mm au milieu du boîtier
-
Deux vis cruciformes #00 de 14,5 mm.
-
-
-
-
En commençant près de l'écran et en vous rapprochant de l'avant de l'ordinateur, soulevez le boîtier supérieur en faisant levier. Il est maintenu par des clips sur le côté au-dessus du lecteur optique. Ceux-ci s'ouvriront sous l'effet d'une ferme pression de levier.
-
Faites attention en soulevant le boîtier supérieur. On se coupe facilement le bout d'un doigt. C'est le sacrifice que les dieux Mac exigent parfois de ceux qui tiennent à exécuter leurs propres réparations.
-
-
-
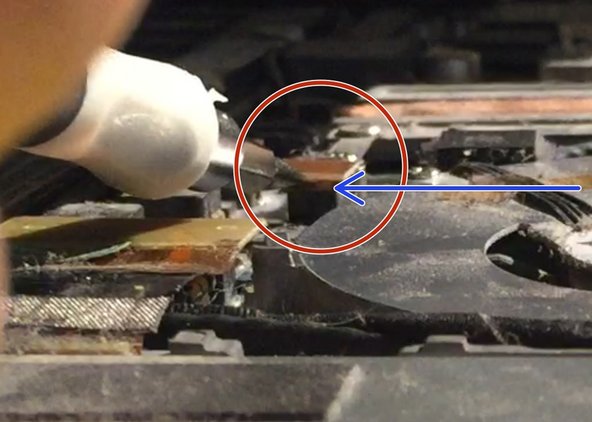
Retirez l'unique vis cruciforme fixant la carte de raccordement MagSafe au boîtier inférieur.
-


Pour remonter votre appareil, suivez les mêmes instructions dans l'ordre inverse.
Pour remonter votre appareil, suivez les mêmes instructions dans l'ordre inverse.
Annulation : je n'ai pas terminé ce tutoriel.
109 autres ont terminé cette réparation.
Merci à ces traducteurs :
100%


Ces traducteurs nous aident réparer le monde ! Vous voulez contribuer ?
Commencez à traduire ›

5 commentaires
I did this and battery is charging but now MacBook doesn't boot up any ideas? I took it appart again and everything is connected ;(
broke the keyboard cable to motherboard BE CAREFUL!!!! ALL WORKING GOOD!
Does not boot up and did not break or damage the cable to motherboard. Any suggestions? The cable looks as new. But keeps booting for many minutes with spinning wheel
Before you do this - might be worth checking to see that the insulating gasket in the magsafe port is intact. I was about to buy a new board when I noticed that the gasket was broken (I wouldn’t have noticed there was even a gasket unless it was broken).
Turned out for me it was just this insulating gasket in the outside of the port that was stopping it charging and I didn’t even need to open the back. When I found part of it still intact, I guessed partial insulation might be that causing a short. The gasket is made of very thin tape and sure enough when I made a copy and put that in, it charged fine on the new charger I had bought. The old charger is dead (on this and a friend's machine) so I presume it was fried shorting while I repeatedly tried to charge before. P.S. I made the copy by making an inverse template by pressing Blutac into the port and used that as a block to print an outline onto the tape.
“Turned out for me it was just this insulating gasket in the outside of the port that was stopping it charging and I didn’t even need to open the back. When I found part of it still intact, I guessed partial insulation might be that causing a short. The gasket is made of very thin tape and sure enough when I made a copy and put that in, it charged fine on the new charger I had bought.”
INDEED!!! That was the same case for my macbook! the plastic film on the charger port was partly broken. I took off the rest of that broken film with a pin, then I cut out duct tape to fit and place around the pin connections, and that did the trick!!