Introduction
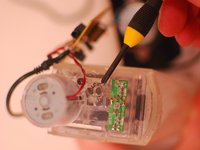
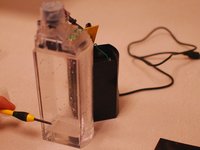
Ce tutoriel va vous montrer comment remplir le liquide des enceintes à eau en passant par le bouchon en dessous de chaque unité. Ces appareils ayant tendance à fuir par ce même bouchon, ce tutoriel va vous expliquer comment les démonter, remplacer l'eau et refermer le tout de manière hermétique. Utiliser de la colle forte à la place du bouchon d'origine va permettre une bien meilleure étanchéité, tout en étant simple à mettre en place.
Ce dont vous avez besoin
-
-
Vous allez avoir besoin d'un espace libre, d'enceintes à eau, de la colle forte, de l'eau minérale ainsi qu'un tournevis cruciforme.
-
-


Vos enceintes à eau sont maintenant prêtes à l'usage. Merci d'avoir suivi ce tutoriel.
Vos enceintes à eau sont maintenant prêtes à l'usage. Merci d'avoir suivi ce tutoriel.
Annulation : je n'ai pas terminé ce tutoriel.
47 autres ont terminé cette réparation.
Merci à ces traducteurs :
100%


Ces traducteurs nous aident réparer le monde ! Vous voulez contribuer ?
Commencez à traduire ›
Équipe

36 commentaires
the pump is defective how to replace
anpicard@videotron.ca
I couldnt get plug out either so I drilled a hole in back and filled it with mineral water and sealed it with a small strip of scotch tape and duct tape on top of that in case I had to get back in. It works, but now it looks different. Sometimes the water clings to the inside and it looks a little foggy. Is it mineral water, or mineral oil? If it leaks again I'll prob try the oil.
The original liquid has a lower surface tension than water. I used odorless mineral spirits.
If the pump is noisy, try a drop of oil in the motor.
My speakers keep spraying even though their is no music playing, is that a good thing?
That means that the speakers are broken. You might need to replace it. If not, then its a probelm with the board, which I have no idea how to fix.