Introduction
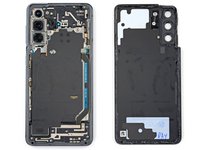
Use this guide to remove or replace the daughterboard in your Samsung Galaxy S21.
For your safety, discharge the battery below 25% before disassembling your phone. This reduces the risk of a dangerous thermal event if the battery is accidentally damaged during the repair. If your battery is swollen, take appropriate precautions.
The daughterboard and USB-C charging port are soldered together; replacing one component means replacing both.
It’s not necessary to remove both interconnect cables before removing the daughterboard, but doing so will make the procedure easier.
Some photos show the interconnect cables being replaced individually, but, if you follow the steps in order, they should both be removed.
Ce dont vous avez besoin
-
-
Insert a SIM eject tool, bit, or straightened paper clip into the SIM card tray hole on the bottom edge of the phone.
-
Press the SIM eject tool into the SIM card tray hole to eject the SIM card tray.
-
Remove the SIM card tray.
-
-
-
Heat an iOpener and apply it to the back cover's bottom edge for two minutes.
How hot does the back cover have to be to come off? I tried with iOpener many times but have had no luck opening it. The surface temperature goes up to 105-110F (43C).
Hi Imtiaz!
We don't have a specific temperature that we recommend, but, if you're still having issues separating the adhesive with the iOpener, I would recommend you switch to a hair dryer or a heat pad. The back cover should be slightly too warm to the touch.
-
-
-
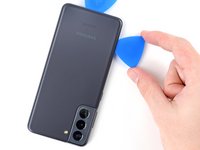
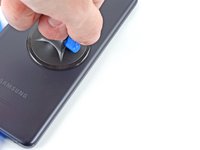
Apply a suction cup to the back of the phone, as close to the center of the bottom edge as possible.
-
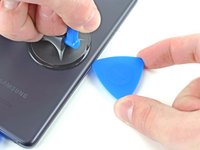
Pull up on the suction cup with strong, steady force to create a gap between the back cover and the frame.
-
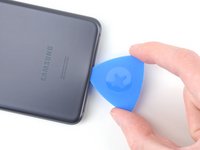
Insert an opening pick into the gap.
The backing is a polycarbonate material - so yes it's plastic. Also, when pulling up with the suction cup your correct in that it is or should be done on an angle. Plus, the back is plastic so it will only flex upwards as you're applying the pressure. Lastly, because the backing is still tapped inside and your pulling upwards, if necessary with the hand that's pulling up you can gently rest the part of your palm/wrist against the phone which may also help in the separation process but remember you're goal is to only lift it enough so you can slide in the separator pick. I use guitar picks myself since I have them laying around all over the place. Good luck, and don't rush yourself :0)
-
-
-
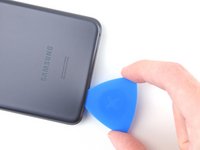
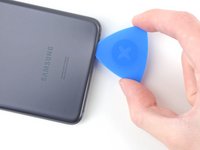
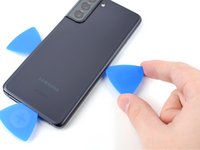
Slide the pick back and forth along the bottom edge to slice through the adhesive.
-
Leave the pick in to prevent the adhesive from resealing.
-
-
-
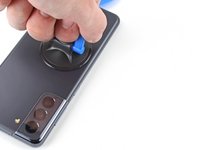
Apply a heated iOpener to the back cover's left edge for two minutes.
If you have access to a heating pad you can use this instead and save some cash but make sure to turn it on and let it heat up so you check the temperature first as it needs to be hot enough to melt the glue but not damage the components. Typically, these work great because they're designed not to burn a person.
-
-
-
Apply a suction cup to the back of the phone, as close to the center of the left edge as possible.
-
Pull up on the suction cup with strong, steady force to create a gap between the back cover and the frame.
-
Insert an opening pick into the gap.
-
-
-
Apply a heated iOpener to the back cover's right edge for two minutes.
-
-
-
Apply a suction cup to the back of the phone, as close to the center of the right edge as possible.
-
Pull up on the suction cup with strong, steady force to create a gap between the back cover and the frame.
-
Insert an opening pick into the gap.
-
-
-
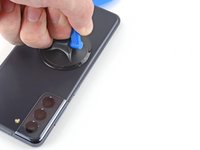
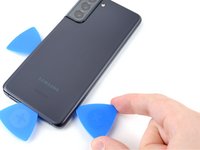
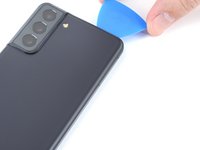
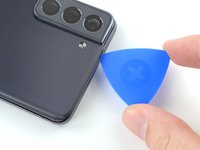
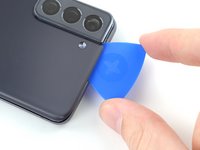
Rotate the right-edge opening pick around the top-right corner of the phone.
-
-
-
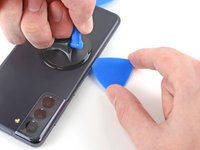
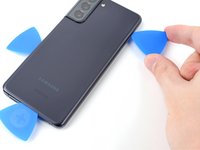
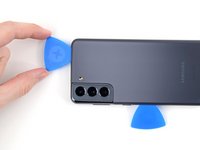
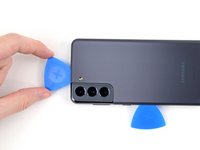
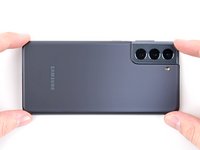
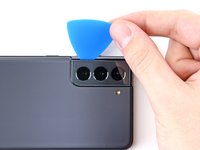
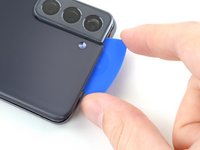
Slide the top-most opening pick as close to the camera shell as possible.
-
Repeat for the left-edge pick.
-
-
-
-
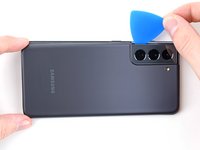
Heat an iOpener and apply it to the camera shell for two minutes.
-
-
-
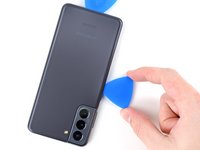
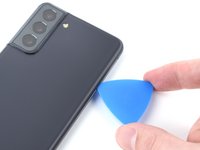
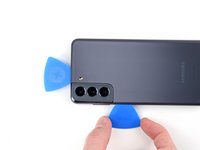
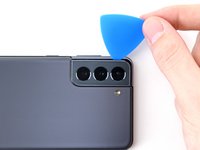
Rotate the back cover counterclockwise to create a gap between the camera shell and the frame.
-
Insert an opening pick in the gap.
-
-
-
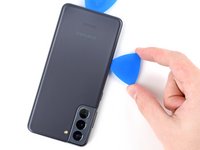
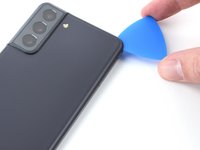
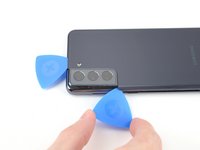
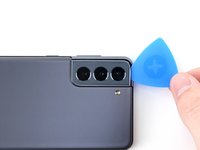
Gently slide the two picks toward the camera shell so they are under the corners of the back cover adjacent to the camera shell.
-
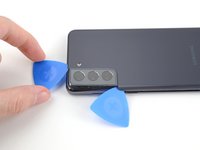
Move the picks back and forth along the bridge between the back cover and the camera shell until you create a gap between the camera shell and the frame.
-
-
Outil utilisé dans cette étape :Tweezers$4.99
-
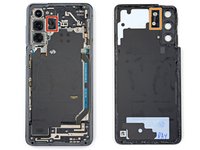
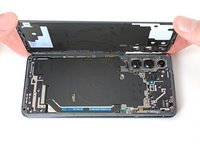
Remove the back cover.
-
This is a good point to power on your phone and test all functions before sealing it up. Be sure to power your phone back down completely before you continue working.
-
Remove any adhesive chunks with a pair of tweezers or your fingers. Use some high concentration (over 90%) isopropyl alcohol to wipe away any adhesive residue.
-
If you're using Samsung custom-cut adhesives, follow this guide.
-
If you're using double-sided tape, follow this guide.
Why begin reassemble directions or reminders when the battery has not even been removed yet? This advice would be better suited just after the battery install and just after powering on to test. Might have to inject multiple "test" points before and after reassembly.
-
-
Outil utilisé dans cette étape :Magnetic Project Mat$19.95
-
Use a Phillips screwdriver to remove the five 4 mm-long screws securing the motherboard bracket to the frame.
-
-
Outil utilisé dans cette étape :Tweezers$4.99
-
Use a pair of tweezers to gently pull up and unclip the motherboard bracket from the frame.
-
-
-
While using tweezers, or your fingers, to hold the motherboard bracket out of the way, use a spudger to pry up the battery press connector.
-
-
-
While still holding the motherboard bracket out of the way, use a spudger to pry up and disconnect the wireless charging coil's press connector.
-
-
-
Use your fingers to gently peel the wireless charging coil away from the phone.
-
-
-
Use a Phillips screwdriver to remove the six 4 mm screws securing the loudspeaker to the frame.
-
-
-
Insert the point of a spudger into the notch in the top-left corner of the loudspeaker and pry up to release the clips holding it in place.
-
Remove the loudspeaker.
-
-
-
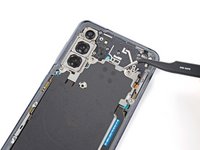
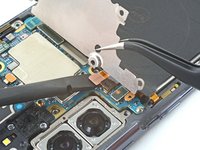
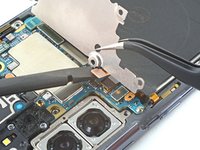
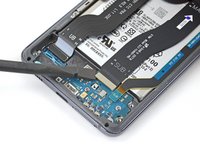
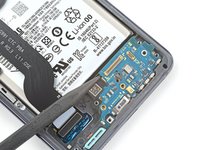
Use the flat end of a spudger to pry up and disconnect the primary interconnect cable's bottom press connector.
-
-
Outil utilisé dans cette étape :Tweezers$4.99
-
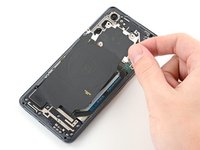
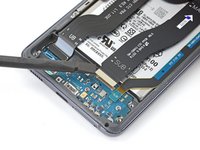
Use tweezers, or your fingers, to remove the primary interconnect cable.
-
-
-
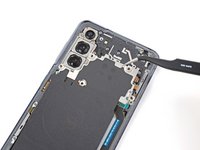
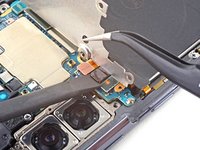
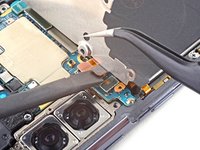
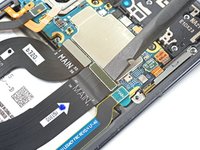
Use the flat end of a spudger to pry up and disconnect the secondary interconnect cable's bottom press connector.
-
-
Outil utilisé dans cette étape :Tweezers$4.99
-
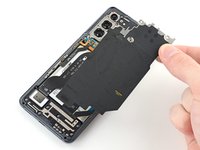
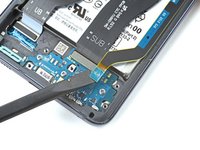
Use tweezers, or your fingers, to remove the secondary interconnect cable.
-
-
-
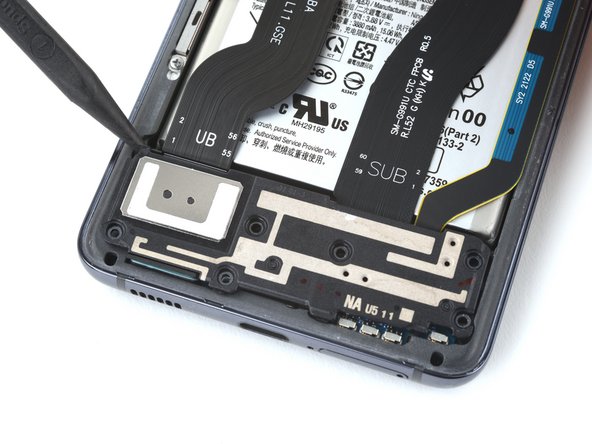
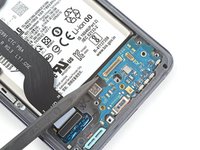
Use a Phillips screwdriver to remove the three 3.5 mm screws securing the daughterboard to the frame.
-
-
-
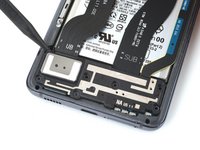
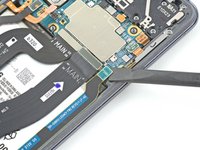
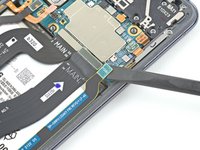
Use the point of a spudger to pry up the daughterboard.
-
Use your fingers to pull the daughterboard up and away from the bottom of the phone and remove it.
-


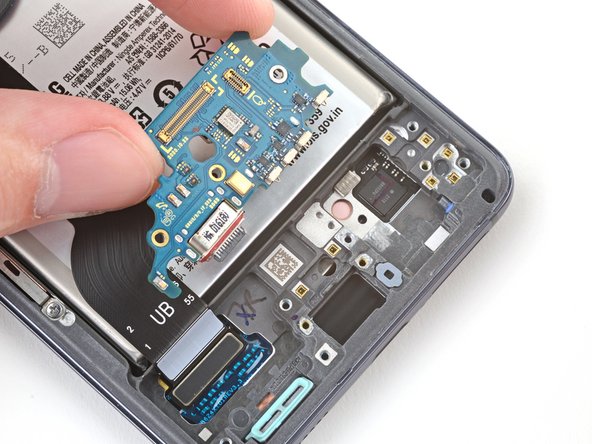

Compare your new replacement part to the original part—you may need to transfer remaining components or remove adhesive backings from the new part before installing.
To reassemble your device, follow the above steps in reverse order.
After you've completed the repair, follow this guide to test your repair.
Take your e-waste to an R2 or e-Stewards certified recycler.
Repair didn’t go as planned? Check out our Answers community for troubleshooting help.
Annulation : je n'ai pas terminé ce tutoriel.
3 autres ont terminé cette réparation.


Un commentaire
I dids this replacement and I am now getting a "SIM not provisioned" message. The board does not seem to know what service provider the sim is with.