Introduction
Consultez ce tutoriel pour remplacer la carte de gestion du synthétiseur Teenage Engineering OP-1, incluant le microphone, les connecteurs d'entrée et de sortie audio et le port USB.
Ce dont vous avez besoin
-
-
Ouvrez le cache arrière en utilisant un Jimmy sur le côté du cache. Faites attention à ne pas endommager le revêtement de votre OP-1.
-
Soulevez et retirez le cache arrière. La carte de gestion des connecteurs est à présent visible.
-
-
-
-
Déconnectez le connecteur de la nappe en le soulevant avec une spatule.
-
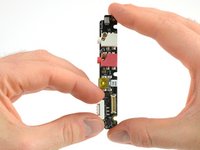
Dévissez les trois vis cruciformes. Ne perdez pas la rondelle de la vis inférieure.
-
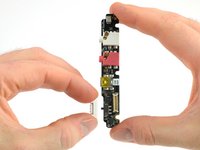
Retirez la carte de gestion des connecteurs.
-


Pour remonter votre appareil, suivez ces instructions en sens inverse.
Pour remonter votre appareil, suivez ces instructions en sens inverse.
Annulation : je n'ai pas terminé ce tutoriel.
46 autres ont terminé cette réparation.
Merci à ces traducteurs :
100%


Ces traducteurs nous aident réparer le monde ! Vous voulez contribuer ?
Commencez à traduire ›

Équipe

44 commentaires
Veeery useful , thank you !
Even with the Jimmy I can't seem to get the back panel off... a video would be helpful :)
Got the back panel off finally but my connector board won't come out.
Ok... finally got the connector board out. It took a bit of gentle prying using a very small thin screw driver bit on each side of the connector board. Once I had the right side popped up a bit I was able to push on the input output jacks from the outside to get clearance. Removing the connector board and putting it back in resolved the power switch issues I was experiencing. No new connector board needed! :)
Im so glad I was reading these comments. I had an OP1 with failing power as well, every bit more tougher touch would turn it off and on, or sometimes would have problems starting up.
I took it apart to see if something was bothering, and taking off the white power switch actually solved it haha.
Good I didnt order it yet!
J-J -