Aller au contenu principal
Pour réparer ensemble - Je crée un compte

Tungsten E Power Button Repair

Ce dont vous avez besoin

    1. Tungsten E Power Button Repair, Tungsten E Disassembly: étape 1, image 1 de 2 Tungsten E Power Button Repair, Tungsten E Disassembly: étape 1, image 2 de 2
      • Remove the stylus and SD card.

      • Using a T5 torx screwdriver, remove all 4 back panel screws.

      • The screws are small and can be lost easily. Be sure to place them in a secure area.

      Demander à FixBot

      Ajouter un commentaire

    2. Tungsten E Power Button Repair: étape 2, image 1 de 3 Tungsten E Power Button Repair: étape 2, image 2 de 3 Tungsten E Power Button Repair: étape 2, image 3 de 3
      • Insert a plastic opening tool under the USB and power input slots.

      • Slide the plastic opener along the seam and gently pry the cover from the PDA body to remove the cover completely.

      Demander à FixBot

      Ajouter un commentaire

    3. Tungsten E Power Button Repair: étape 3, image 1 de 2 Tungsten E Power Button Repair: étape 3, image 2 de 2
      • Your device may not have a screen protector. If not, you can move on to step four.

      • Remove the screen protector by lifting the hinge out of the plastic housing.

      • Remove the top cover by gently pulling it away from the device with a plastic opening tool or your fingers.

      Demander à FixBot

      Ajouter un commentaire

    4. Tungsten E Power Button Repair: étape 4, image 1 de 2 Tungsten E Power Button Repair: étape 4, image 2 de 2
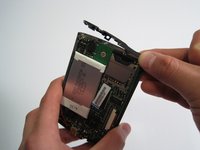
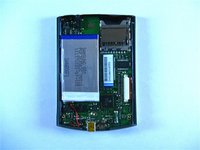
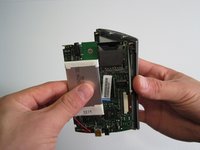
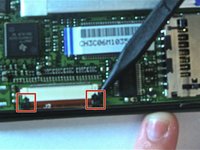
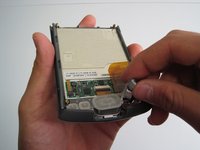
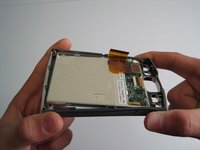
      • Carefully remove motherboard from the standoffs without damaging the LCD flex connector.

      • Using a spudger, unlock both sides of the flex connector block by pushing down.

      • Remove motherboard completely.

      • Metal washers may pop out of the device during this step

      Demander à FixBot

      Ajouter un commentaire

    5. Tungsten E Power Button Repair: étape 5, image 1 de 3 Tungsten E Power Button Repair: étape 5, image 2 de 3 Tungsten E Power Button Repair: étape 5, image 3 de 3
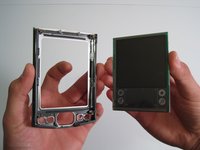
      • Remove buttons using fingers.

      • Gently flex frame to release screen from plastic frame.

      • Lift out screen.

      Demander à FixBot

      Ajouter un commentaire

    6. Tungsten E Power Button Repair: étape 6, image 1 de 1
      • Congratulations! You have successfully taken apart a Palm Tungsten E.

      Demander à FixBot

      Ajouter un commentaire

    1. Tungsten E Power Button Repair, Tungsten E Power Button Repair: étape 7, image 1 de 1
      Demander à FixBot

      Ajouter un commentaire

    2. Tungsten E Power Button Repair: étape 8, image 1 de 1
      • On the motherboard, find the power button near the upper right corner.

      • Check for disconnection of the power button.

      Demander à FixBot

      Ajouter un commentaire

    3. Tungsten E Power Button Repair: étape 9, image 1 de 1
      • Use soldering iron to reattach the damaged power button to the motherboard.

      Demander à FixBot

      Ajouter un commentaire

Conclusion

To reassemble your device, follow these instructions in reverse order.

Annulation : je n'ai pas terminé ce tutoriel.

Une autre personne a terminé cette réparation.

Kathleen Hix

Membre depuis le 01/21/10

49 Réputation

2 tutoriels rédigés

Équipe

Cal Poly, Team 13-22, Maness Winter 2010 Membre de l'équipe Cal Poly, Team 13-22, Maness Winter 2010

CPSU-MANESS-W10S13G22

4 membres

12 tutoriels rédigés

0 commentaires de tutoriel

Ajouter un commentaire

Nombre de vues :

Dernières 24 heures : 0

7 derniers jours : 7

30 derniers jours : 36

Total : 5,624