Aller au contenu principal

Xiaomi Redmi Note 9S Screen Replacement

Ce dont vous avez besoin

  1. Xiaomi Redmi Note 9S Screen Replacement, Heat the rear glass: étape 1, image 1 de 1
    • Prepare an iOpener and apply it to the back cover for at least two minutes to loosen the adhesive underneath.

    • A hair dryer, heat gun, or hot plate may also be used, but be careful not to overheat the phone—the display and internal battery are both susceptible to heat damage.

  2. Xiaomi Redmi Note 9S Screen Replacement, Insert an opening pick: étape 2, image 1 de 3 Xiaomi Redmi Note 9S Screen Replacement, Insert an opening pick: étape 2, image 2 de 3 Xiaomi Redmi Note 9S Screen Replacement, Insert an opening pick: étape 2, image 3 de 3
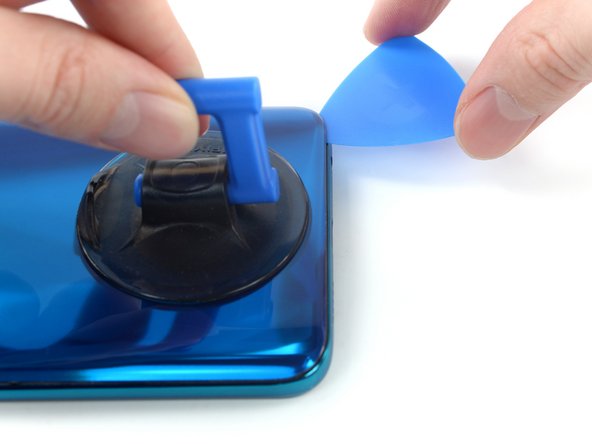
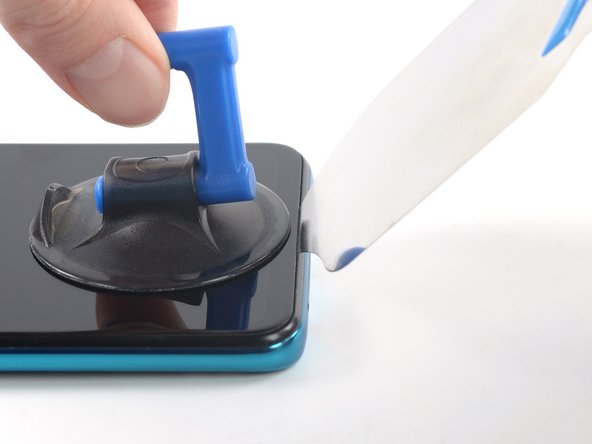
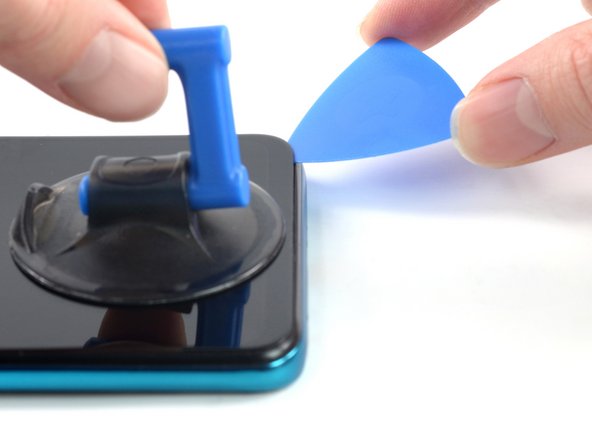
    • Secure a suction handle to the bottom edge of the rear glass, as close to the edge as possible.

    • If the rear glass is cracked, the suction handle may not stick. Try lifting it with strong tape, or superglue the suction handle in place and allow it to cure so you can proceed.

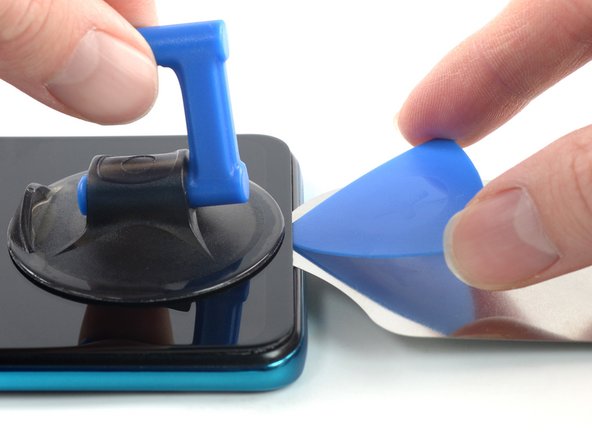
    • Lift the rear glass with the suction handle to create a small gap between the back cover and the frame.

    • In case you have trouble creating a gap, apply more heat to further soften the adhesive. Follow the iOpener instructions to avoid overheating.

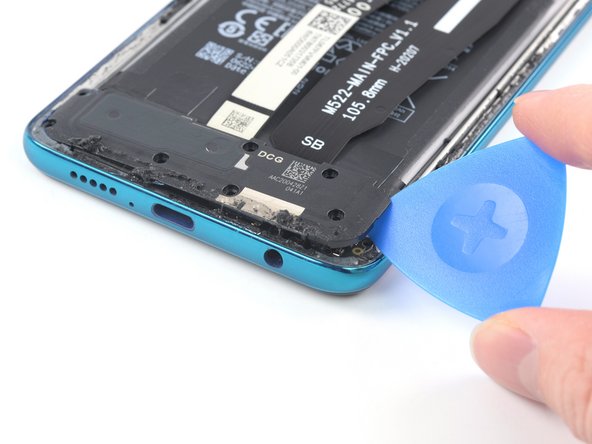
    • Insert an opening pick into the gap you created.

  3. Xiaomi Redmi Note 9S Screen Replacement, Slice the adhesive: étape 3, image 1 de 2 Xiaomi Redmi Note 9S Screen Replacement, Slice the adhesive: étape 3, image 2 de 2
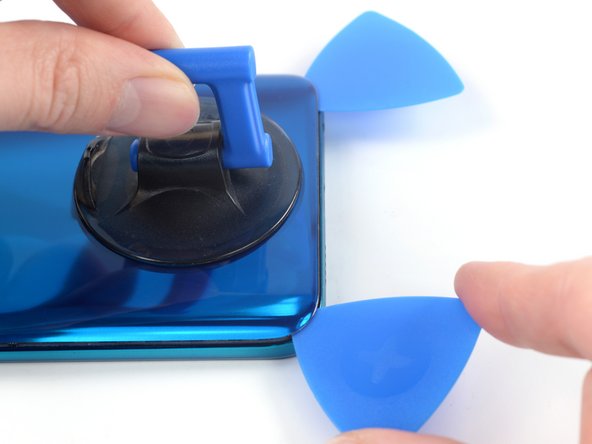
    • Slide the opening pick to the bottom right corner to slice the adhesive.

    • Leave the opening pick in place to prevent the adhesive from resealing.

  4. Xiaomi Redmi Note 9S Screen Replacement, Slice the adhesive: étape 4, image 1 de 3 Xiaomi Redmi Note 9S Screen Replacement, Slice the adhesive: étape 4, image 2 de 3 Xiaomi Redmi Note 9S Screen Replacement, Slice the adhesive: étape 4, image 3 de 3
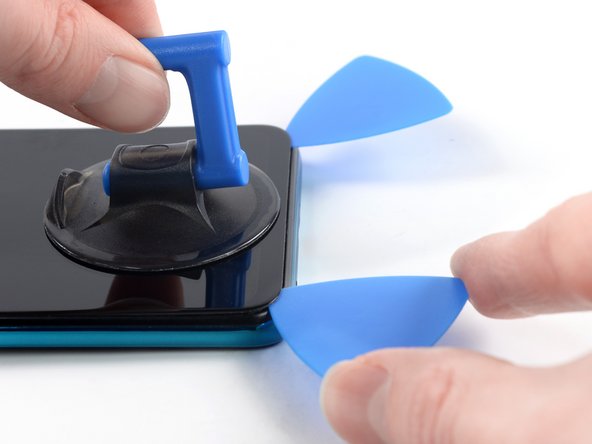
    • Insert a second opening pick at the bottom edge of your phone.

    • Slide the opening pick to the bottom left corner to slice the adhesive.

    • Leave the opening picks in place to prevent the adhesive from resealing.

  5. Xiaomi Redmi Note 9S Screen Replacement: étape 5, image 1 de 3 Xiaomi Redmi Note 9S Screen Replacement: étape 5, image 2 de 3 Xiaomi Redmi Note 9S Screen Replacement: étape 5, image 3 de 3
    • If the adhesive becomes hard to cut, it has most likely cooled down. Use your iOpener for one to two minutes to reheat it.

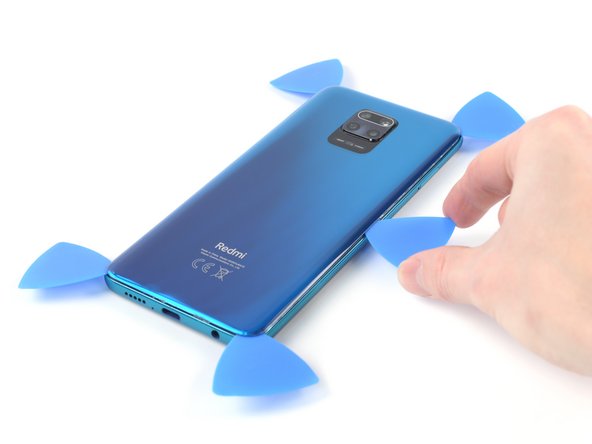
    • Insert a third opening pick at the bottom left corner of your phone.

    • Slide the opening pick along the left edge of your phone to slice the adhesive.

    • Leave the opening pick in the top left corner to prevent the adhesive from resealing.

  6. Xiaomi Redmi Note 9S Screen Replacement: étape 6, image 1 de 3 Xiaomi Redmi Note 9S Screen Replacement: étape 6, image 2 de 3 Xiaomi Redmi Note 9S Screen Replacement: étape 6, image 3 de 3
    • Insert a fourth opening pick underneath the top left corner of your phone.

    • Slide the opening pick along the top edge to slice the adhesive.

    • Leave the opening pick in the top right corner to prevent the adhesive from resealing.

  7. Xiaomi Redmi Note 9S Screen Replacement: étape 7, image 1 de 3 Xiaomi Redmi Note 9S Screen Replacement: étape 7, image 2 de 3 Xiaomi Redmi Note 9S Screen Replacement: étape 7, image 3 de 3
    • Insert a fifth opening pick underneath the top right corner.

    • Slide the opening pick along the right edge of the rear glass to slice the remaining adhesive.

  8. Xiaomi Redmi Note 9S Screen Replacement, Remove the rear glass: étape 8, image 1 de 2 Xiaomi Redmi Note 9S Screen Replacement, Remove the rear glass: étape 8, image 2 de 2
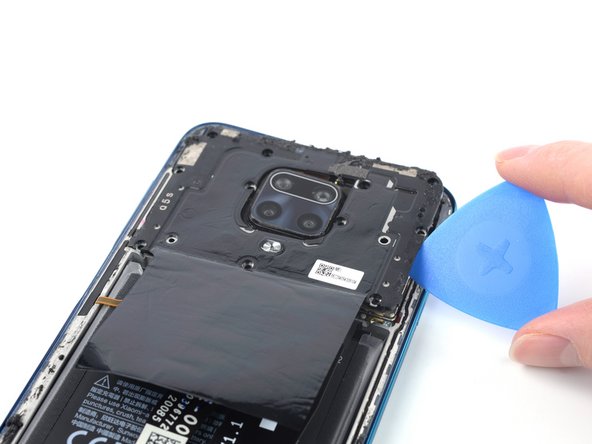
    • Remove the rear glass.

    • Apply new adhesive where necessary after cleaning the relevant areas with isopropyl alcohol (>90%).

    • Secure the new rear glass with pre-cut adhesive or double-sided adhesive tape. After installing the rear glass, apply strong, steady pressure to your phone for several minutes to help the adhesive form a good bond—a stack of heavy books works well.

  9. Xiaomi Redmi Note 9S Screen Replacement, Unfasten the motherboard cover screws: étape 9, image 1 de 1
    • Use a Phillips screwdriver to remove the eleven 3.8 mm-long screws securing the motherboard cover.

    • One of the screws is hidden beneath an orange sticker.

  10. Xiaomi Redmi Note 9S Screen Replacement, Pry up the motherboard cover: étape 10, image 1 de 2 Xiaomi Redmi Note 9S Screen Replacement, Pry up the motherboard cover: étape 10, image 2 de 2
    • Insert the tip of an opening pick underneath the right edge of the motherboard cover.

    • Twist the opening pick sideways to pry up the motherboard cover.

  11. Xiaomi Redmi Note 9S Screen Replacement, Remove the motherboard cover: étape 11, image 1 de 2 Xiaomi Redmi Note 9S Screen Replacement, Remove the motherboard cover: étape 11, image 2 de 2
    • Use your fingers or a pair of tweezers to remove the motherboard cover.

  12. Xiaomi Redmi Note 9S Screen Replacement, Disconnect the battery cable: étape 12, image 1 de 2 Xiaomi Redmi Note 9S Screen Replacement, Disconnect the battery cable: étape 12, image 2 de 2
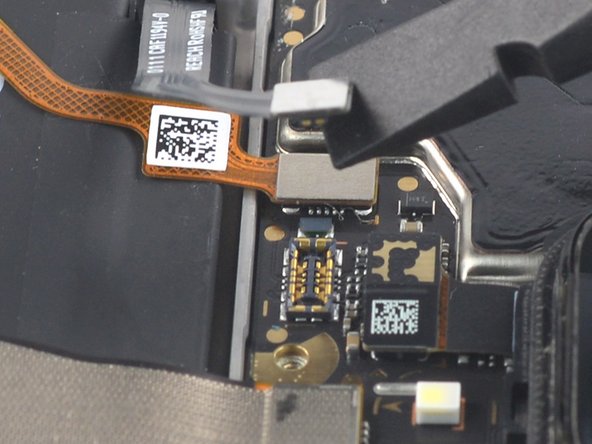
    • Use a spudger to disconnect the battery flex cable by prying the connector straight up from its socket.

  13. Xiaomi Redmi Note 9S Screen Replacement, Unfasten the loudspeaker assembly screws: étape 13, image 1 de 1
    • Use a Phillips screwdriver to remove the seven 3.8 mm-long screws securing the loudspeaker assembly.

    • One of the screws is hidden beneath an orange sticker.

  14. Xiaomi Redmi Note 9S Screen Replacement, Pry up the loudspeaker assembly: étape 14, image 1 de 2 Xiaomi Redmi Note 9S Screen Replacement, Pry up the loudspeaker assembly: étape 14, image 2 de 2
    • Insert an opening pick into the gap between the right edge of the loudspeaker assembly and the frame.

    • Twist the opening pick sideways to pry up the loudspeaker assembly.

  15. Xiaomi Redmi Note 9S Screen Replacement, Remove the loudspeaker assembly: étape 15, image 1 de 2 Xiaomi Redmi Note 9S Screen Replacement, Remove the loudspeaker assembly: étape 15, image 2 de 2
    • Use your fingers or a pair of tweezers to remove the loudspeaker assembly.

    • During reassembly apply new adhesive where it's necessary after cleaning the relevant areas with isopropyl alcohol (>90%).

  16. Xiaomi Redmi Note 9S Screen Replacement, Disconnect the display cable: étape 16, image 1 de 2 Xiaomi Redmi Note 9S Screen Replacement, Disconnect the display cable: étape 16, image 2 de 2
    • Use a spudger to disconnect the display cable by prying the connector straight up from its socket.

  17. Xiaomi Redmi Note 9S Screen Replacement, Loosen the display adhesive: étape 17, image 1 de 1
    • Apply a heated iOpener to the screen to loosen the adhesive underneath. Apply the iOpener for at least two minutes.

    • The protective adhesive of the Redmi Note 9S is very strong and it's hard to get underneath the display panel in the beginning. It's likely that you have to reapply the iOpener more than once.

    • A hair dryer, heat gun, or hot plate may also be used, but be careful not to overheat the device. The edge should feel slightly too hot to the touch.

  18. Xiaomi Redmi Note 9S Screen Replacement, Insert an iFlex: étape 18, image 1 de 3 Xiaomi Redmi Note 9S Screen Replacement, Insert an iFlex: étape 18, image 2 de 3 Xiaomi Redmi Note 9S Screen Replacement, Insert an iFlex: étape 18, image 3 de 3
    • Apply a suction handle to the bottom edge of the screen.

    • If your screen is badly cracked, covering it with a layer of clear packing tape may allow the suction cup to adhere. Alternatively, very strong tape may be used instead of the suction handle. If all else fails, you can superglue the suction cup to the screen.

    • Lift the screen with the suction handle to create a small gap between the screen and the frame.

    • Insert an iFlex into the gap between the midframe and the screen.

    • Make sure to insert the iFlex between the frame and the display.

  19. Xiaomi Redmi Note 9S Screen Replacement, Insert an opening pick: étape 19, image 1 de 3 Xiaomi Redmi Note 9S Screen Replacement, Insert an opening pick: étape 19, image 2 de 3 Xiaomi Redmi Note 9S Screen Replacement, Insert an opening pick: étape 19, image 3 de 3
    • Insert an opening pick above the iFlex.

    • Slide the opening pick to the bottom right corner of the screen to slice its adhesive.

    • Remove the iFlex.

    • Leave the opening pick in place to prevent the adhesive from resealing.

  20. Xiaomi Redmi Note 9S Screen Replacement, Slice the adhesive: étape 20, image 1 de 2 Xiaomi Redmi Note 9S Screen Replacement, Slice the adhesive: étape 20, image 2 de 2
    • Insert a second opening pick at the bottom edge and slide it to the bottom left corner of the screen to slice the adhesive.

    • Leave the opening pick in place to prevent the adhesive from resealing.

  21. Xiaomi Redmi Note 9S Screen Replacement: étape 21, image 1 de 3 Xiaomi Redmi Note 9S Screen Replacement: étape 21, image 2 de 3 Xiaomi Redmi Note 9S Screen Replacement: étape 21, image 3 de 3
    • If the adhesive becomes hard to cut, it has most likely cooled down. Use your iOpener or heat gun for 1–2 minutes to reheat it.

    • Insert a third opening pick underneath the bottom left corner of the screen.

    • Slide the opening pick along the left edge of the screen to slice the adhesive.

    • Leave it in the top left corner to prevent the adhesive from resealing.

  22. Xiaomi Redmi Note 9S Screen Replacement: étape 22, image 1 de 2 Xiaomi Redmi Note 9S Screen Replacement: étape 22, image 2 de 2
    • When you slice near the front facing camera, insert only the tip of the opening pick (about 2–3 mm) to avoid damaging or smearing the camera.

    • Insert a fourth opening pick at the top left corner of the screen.

    • Slide the opening pick along the top edge of the phone to slice the adhesive.

  23. Xiaomi Redmi Note 9S Screen Replacement: étape 23, image 1 de 3 Xiaomi Redmi Note 9S Screen Replacement: étape 23, image 2 de 3 Xiaomi Redmi Note 9S Screen Replacement: étape 23, image 3 de 3
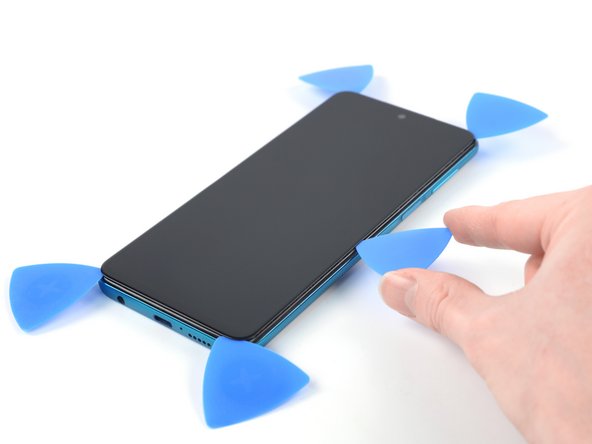
    • Insert a fifth opening pick and slide it along the right edge of the phone to slice the remaining adhesive.

    • Don't try to remove the display all the way yet, the display cable is still threaded through the frame.

  24. Xiaomi Redmi Note 9S Screen Replacement, Remove the screen: étape 24, image 1 de 3 Xiaomi Redmi Note 9S Screen Replacement, Remove the screen: étape 24, image 2 de 3 Xiaomi Redmi Note 9S Screen Replacement, Remove the screen: étape 24, image 3 de 3
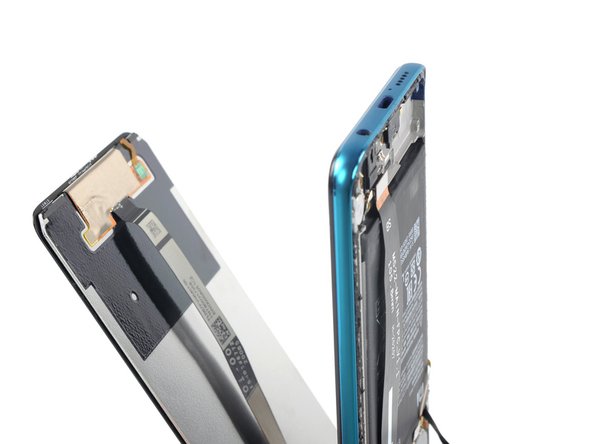
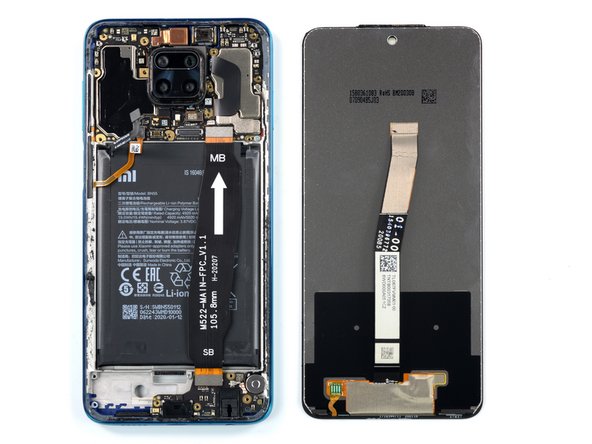
    • Thread the display flex cable through the gap in the midframe and remove the screen.

    • Compare your new replacement part to the original part—you may need to transfer remaining components from your old screen to your replacement part.

    • Apply new adhesive where it's necessary after cleaning the relevant areas with isopropyl alcohol (>90%).

    • During reassembly, follow this guide in case you're using a pre-cut adhesive card.

Conclusion

If possible, turn on your device and test your repair before installing new adhesive and resealing.

Compare your new replacement part to the original part—you may need to transfer remaining components or remove adhesive backings from the new part before installing.

To reassemble your device, follow these instructions in reverse order.

The best way to secure the new screen is to apply a sheet of custom-cut double-sided tape to the back of the screen.

Take your e-waste to an R2 or e-Stewards certified recycler.

Repair didn’t go as planned? Try some basic troubleshooting, or ask our Answers community for help.

2 autres ont terminé cette réparation.

Manuel Haeussermann

Membre depuis le 07/13/22

15 453 Réputation

71 tutoriels rédigés

Équipe

iFixit Membre de l'équipe iFixit

Staff

135 membres

16 757 tutoriels rédigés

0 commentaires

Ajouter un commentaire

Nombre de vues :

Dernières 24 heures : 11

7 derniers jours : 54

30 derniers jours : 146

Total : 1,864