Aller au contenu principal
Pour réparer ensemble - Je crée un compte

iPhone 15 Pro Max Front Camera Assembly Replacement

Vues: 15 k

Afficher les statistiques :

Dernières 24 heures :
20
Sept derniers jours :
136
Trente derniers jours :
700
Total :
15 357
Commentaires: 42

42 commentaires d'étapes.

Terminé: 6

6 personnes ont marqué ce tutoriel comme « terminé ». Serez-vous la prochaine ?

Favoris: 0

Personne n'a mis ce tutoriel en favori (ni ne s'y est abonné). Serez-vous le premier ?

Temps nécessaire: 1 - 2 heures
Difficulté: Modérée
iPhone 15 Pro Max Front Camera Assembly Replacement

Use this guide to replace the front camera assembly in your iPhone 15 Pro Max.

If your front camera’s image looks fuzzy or has stopped working entirely along with your Face ID, you might need to replace the front camera assembly.

This assembly includes the front-facing camera and Face ID hardware. These parts come as one unit, and the sensors are uniquely paired to your logic board. Note: If you replace this part, Face ID will no longer work. This repair will restore a broken selfie cam to working order, but on iOS 17.6 and earlier, only Apple or an Apple “authorized” technician can restore Face ID. On iOS 18 and newer, you can recalibrate genuine front-facing cameras using Apple's Repair Assistant.

You'll need replacement screen adhesive to complete this repair.

Ce dont vous avez besoin

Pièces

Outils

    1. iPhone 15 Pro Max Front Camera Assembly Replacement, Prepare your phone for disassembly: étape 1, image 1 de 2 iPhone 15 Pro Max Front Camera Assembly Replacement, Prepare your phone for disassembly: étape 1, image 2 de 2
      • Allow your phone's battery to drain below 25%, as a charged lithium-ion battery is a potential safety hazard.

      • Unplug any cables from your phone.

      • Hold the power and either volume buttons and slide to power off your phone.

      Demander à FixBot

      Ajouter un commentaire

    2. iPhone 15 Pro Max Front Camera Assembly Replacement, Tape over any cracks: étape 2, image 1 de 2 iPhone 15 Pro Max Front Camera Assembly Replacement, Tape over any cracks: étape 2, image 2 de 2
      • If your screen or back glass is badly cracked, lay overlapping strips of packing tape over the glass to protect yourself and make disassembly easier.

      • Make sure there's a smooth area near the bottom edge that's big enough for a suction cup to stick to.

      Demander à FixBot

      Ajouter un commentaire

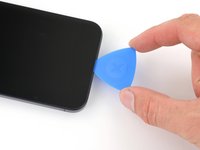
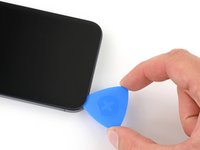
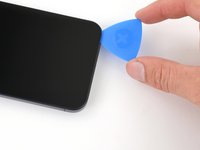
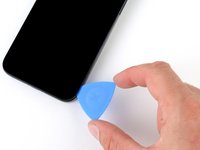
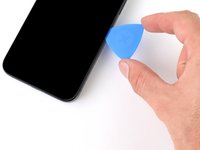
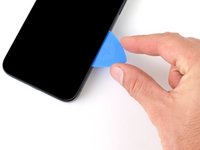
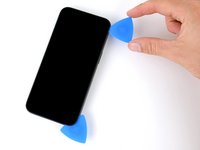
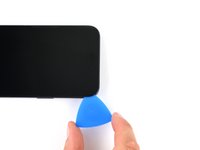
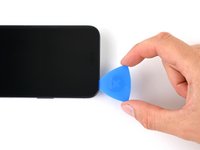
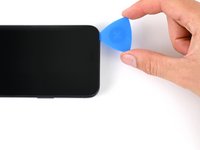
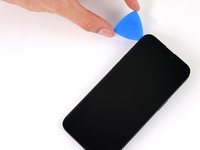
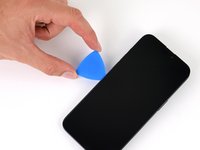
    1. iPhone 15 Pro Max Front Camera Assembly Replacement, Mark your opening picks: étape 3, image 1 de 3 iPhone 15 Pro Max Front Camera Assembly Replacement, Mark your opening picks: étape 3, image 2 de 3 iPhone 15 Pro Max Front Camera Assembly Replacement, Mark your opening picks: étape 3, image 3 de 3
      • If inserted too far, an opening pick can damage your device. Follow this step to mark your pick and prevent damage.

      • Measure 3 mm from the tip and mark the opening pick with a permanent marker.

      • You can also mark the other corners of the pick with different measurements.

      • Alternatively, tape a coin to a pick 3 mm from the tip.

      Demander à FixBot

      Ajouter un commentaire

    1. iPhone 15 Pro Max Front Camera Assembly Replacement, Remove the pentalobe screws: étape 4, image 1 de 1
      • Use a P2 pentalobe driver to remove the two 7.2 mm-long screws on either side of the charging port.

      Demander à FixBot

      Ajouter un commentaire

    1. iPhone 15 Pro Max Front Camera Assembly Replacement, Heat the bottom edge: étape 5, image 1 de 1
      • Use a hair dryer or heat gun to heat the bottom edge of the screen until it's hot to the touch.

      • Be careful not to heat the phone hotter than this—the battery is susceptible to heat damage.

      Demander à FixBot

      Ajouter un commentaire

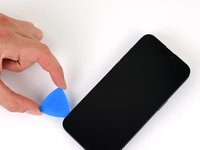
    2. iPhone 15 Pro Max Front Camera Assembly Replacement, Insert an opening pick: étape 6, image 1 de 3 iPhone 15 Pro Max Front Camera Assembly Replacement, Insert an opening pick: étape 6, image 2 de 3 iPhone 15 Pro Max Front Camera Assembly Replacement, Insert an opening pick: étape 6, image 3 de 3
      • Apply a suction handle to the bottom edge of the screen.

      • Pull up on the handle with a strong, steady force to create a gap between the screen and the frame.

      • Insert the tip of an opening pick into the gap.

      Demander à FixBot

      Ajouter un commentaire

    3. iPhone 15 Pro Max Front Camera Assembly Replacement, Screen information: étape 7, image 1 de 1
      • As you slice the adhesive securing the screen in the next steps, be careful of the following areas:

      • There are two delicate cables connecting the screen to the phone: one just above the action button, and the other near the middle of the left edge.

      • There are multiple spring contacts around the perimeter of the phone. Be extra careful not to insert your pick deeper than suggested in these locations to avoid bending the contacts.

      Demander à FixBot

      Ajouter un commentaire

    4. iPhone 15 Pro Max Front Camera Assembly Replacement, Separate the bottom edge adhesive: étape 8, image 1 de 3 iPhone 15 Pro Max Front Camera Assembly Replacement, Separate the bottom edge adhesive: étape 8, image 2 de 3 iPhone 15 Pro Max Front Camera Assembly Replacement, Separate the bottom edge adhesive: étape 8, image 3 de 3
      • Don't insert your opening pick deeper than 3 mm along the bottom edge.

      • Slide your pick back and forth along the bottom edge to separate the adhesive.

      • Leave your pick inserted in the bottom right corner to prevent the adhesive from re-sealing.

      Demander à FixBot

      Ajouter un commentaire

    5. iPhone 15 Pro Max Front Camera Assembly Replacement, Heat the right edge: étape 9, image 1 de 1
      • Heat the right edge of the screen until it's hot to the touch.

      Demander à FixBot

      Ajouter un commentaire

    6. iPhone 15 Pro Max Front Camera Assembly Replacement, Position the opening pick: étape 10, image 1 de 3 iPhone 15 Pro Max Front Camera Assembly Replacement, Position the opening pick: étape 10, image 2 de 3 iPhone 15 Pro Max Front Camera Assembly Replacement, Position the opening pick: étape 10, image 3 de 3
      • Don't insert your pick deeper than 5 mm along the right edge.

      • Slide your pick around the bottom right corner of the screen and toward the power button until you feel a hard stop at a clip securing the screen.

      • Rotate your pick so the flat edge is under the screen.

      Demander à FixBot

      Ajouter un commentaire

    7. iPhone 15 Pro Max Front Camera Assembly Replacement, Release the right clip: étape 11, image 1 de 3 iPhone 15 Pro Max Front Camera Assembly Replacement, Release the right clip: étape 11, image 2 de 3 iPhone 15 Pro Max Front Camera Assembly Replacement, Release the right clip: étape 11, image 3 de 3
      • Twist the pick to increase the gap between the screen and the frame until the right clip releases.

      • Insert a second opening pick to the right of the first pick.

      Demander à FixBot

      Ajouter un commentaire

    8. iPhone 15 Pro Max Front Camera Assembly Replacement, Separate the right edge adhesive: étape 12, image 1 de 3 iPhone 15 Pro Max Front Camera Assembly Replacement, Separate the right edge adhesive: étape 12, image 2 de 3 iPhone 15 Pro Max Front Camera Assembly Replacement, Separate the right edge adhesive: étape 12, image 3 de 3
      • Slide the first pick back to the bottom right corner of the screen.

      • Slide the second pick to the top right corner of the screen to separate the adhesive.

      • Leave these picks inserted to prevent the adhesive from resealing.

      Demander à FixBot

      Ajouter un commentaire

    9. iPhone 15 Pro Max Front Camera Assembly Replacement, Heat the top edge: étape 13, image 1 de 1
      • Heat the top edge of the screen until it's hot to the touch.

      Demander à FixBot

      Ajouter un commentaire

    10. iPhone 15 Pro Max Front Camera Assembly Replacement, Separate the top edge adhesive: étape 14, image 1 de 3 iPhone 15 Pro Max Front Camera Assembly Replacement, Separate the top edge adhesive: étape 14, image 2 de 3 iPhone 15 Pro Max Front Camera Assembly Replacement, Separate the top edge adhesive: étape 14, image 3 de 3
      • Don't insert your pick deeper than 3 mm along the top edge.

      • Slide your pick around the top right corner and along the top edge to release the two clips and adhesive securing it.

      Demander à FixBot

      Ajouter un commentaire

    11. iPhone 15 Pro Max Front Camera Assembly Replacement, Heat the left edge: étape 15, image 1 de 1
      • Heat the left edge of the screen until it's hot to the touch.

      Demander à FixBot

      Ajouter un commentaire

    12. iPhone 15 Pro Max Front Camera Assembly Replacement, Separate the left edge adhesive: étape 16, image 1 de 3 iPhone 15 Pro Max Front Camera Assembly Replacement, Separate the left edge adhesive: étape 16, image 2 de 3 iPhone 15 Pro Max Front Camera Assembly Replacement, Separate the left edge adhesive: étape 16, image 3 de 3
      • Don't insert your pick deeper than 2 mm along the left edge to avoid the two cables connecting the screen to the phone.

      • Rotate your pick around the top left corner of the screen.

      • Slide your pick to the bottom left corner of the screen to separate the adhesive.

      Demander à FixBot

      Ajouter un commentaire

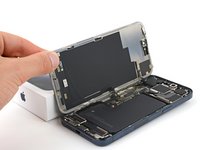
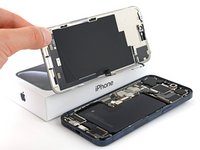
    1. iPhone 15 Pro Max Front Camera Assembly Replacement, Swing open the screen: étape 17, image 1 de 3 iPhone 15 Pro Max Front Camera Assembly Replacement, Swing open the screen: étape 17, image 2 de 3 iPhone 15 Pro Max Front Camera Assembly Replacement, Swing open the screen: étape 17, image 3 de 3
      • Gently swing open the screen to the left of the phone.

      • If the screen feels stuck, go back around the perimeter to check for missed sections of adhesive or stuck clips.

      • Rest the screen against a box or similar object so it doesn't strain the cables.

      Demander à FixBot

      Ajouter un commentaire

    2. iPhone 15 Pro Max Front Camera Assembly Replacement, Unfasten the logic board cover: étape 18, image 1 de 2 iPhone 15 Pro Max Front Camera Assembly Replacement, Unfasten the logic board cover: étape 18, image 2 de 2
      Outil utilisé dans cette étape :
      FixMat
      $36.95
      • Throughout this repair, keep track of each screw and make sure it goes back exactly where it came from.

      • Use a tri-point Y000 driver to remove the six screws securing the logic board cover:

      • One 2.1 mm‑long screw

      • Five 1.5 mm‑long screws

      Demander à FixBot

      Ajouter un commentaire

    3. iPhone 15 Pro Max Front Camera Assembly Replacement, Remove the logic board cover: étape 19, image 1 de 3 iPhone 15 Pro Max Front Camera Assembly Replacement, Remove the logic board cover: étape 19, image 2 de 3 iPhone 15 Pro Max Front Camera Assembly Replacement, Remove the logic board cover: étape 19, image 3 de 3
      Outil utilisé dans cette étape :
      Tweezers
      $4.99
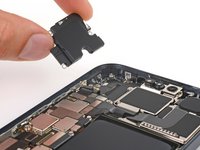
      • Use tweezers or your fingers to grab and slide the logic board cover toward the bottom of the phone to clear the sensor cable.

      • Remove the cover.

      Demander à FixBot

      Ajouter un commentaire

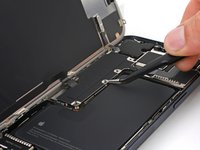
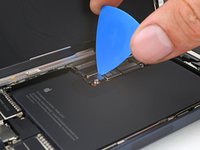
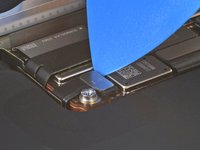
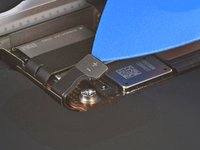
    4. iPhone 15 Pro Max Front Camera Assembly Replacement, Disconnect the battery: étape 20, image 1 de 3 iPhone 15 Pro Max Front Camera Assembly Replacement, Disconnect the battery: étape 20, image 2 de 3 iPhone 15 Pro Max Front Camera Assembly Replacement, Disconnect the battery: étape 20, image 3 de 3
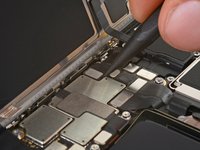
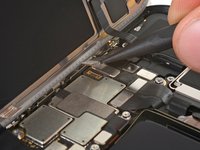
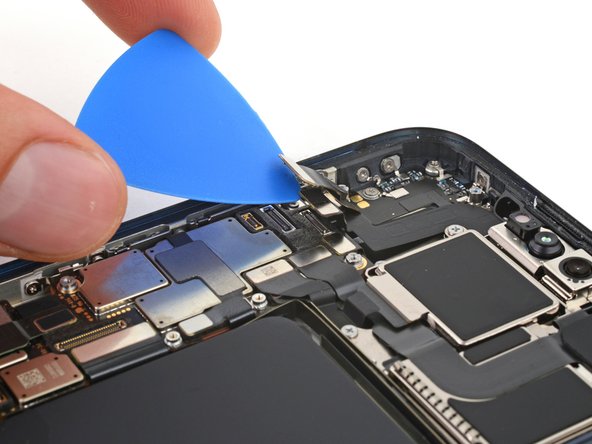
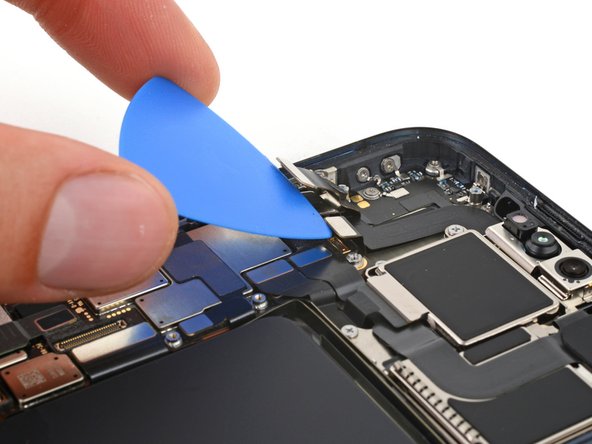
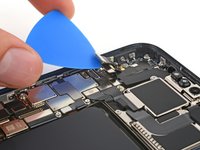
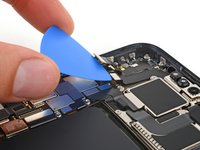
      • Use the tip of an opening pick to pry up and disconnect the battery press connector.

      • To reconnect a press connector, align it over its socket and gently press down on one side until it clicks into place, then press down on the other side. Make sure it sits flat, as the insulating rubber around the sockets might prevent it from connecting fully.

      Demander à FixBot

      Ajouter un commentaire

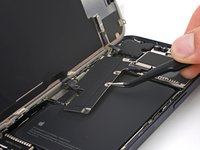
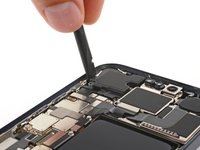
    1. iPhone 15 Pro Max Front Camera Assembly Replacement, Disconnect the ambient light sensor: étape 21, image 1 de 2 iPhone 15 Pro Max Front Camera Assembly Replacement, Disconnect the ambient light sensor: étape 21, image 2 de 2
      • Use the point of a spudger to pry up and disconnect the ambient light sensor press connector from the top left of the logic board.

      Demander à FixBot

      Ajouter un commentaire

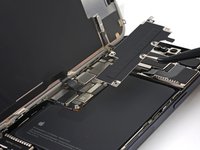
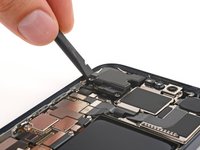
    2. iPhone 15 Pro Max Front Camera Assembly Replacement, Disconnect the screen: étape 22, image 1 de 2 iPhone 15 Pro Max Front Camera Assembly Replacement, Disconnect the screen: étape 22, image 2 de 2
      • Disconnect the screen press connector.

      Demander à FixBot

      Ajouter un commentaire

    3. iPhone 15 Pro Max Front Camera Assembly Replacement, Remove the screen: étape 23, image 1 de 2 iPhone 15 Pro Max Front Camera Assembly Replacement, Remove the screen: étape 23, image 2 de 2
      • Remove the screen.

      • During reassembly, stop here and use this guide to install new screen adhesive.

      • Be careful not to damage any of the spring contacts as you clean the frame.

      Demander à FixBot

      Ajouter un commentaire

    1. iPhone 15 Pro Max Front Camera Assembly Replacement, Unfasten the earpiece speaker: étape 24, image 1 de 1
      • Use a Phillips #000 driver to remove the two screws securing the earpiece speaker:

      • One 1.8 mm screw

      • One 2.4 mm screw

      Demander à FixBot

      Ajouter un commentaire

    2. iPhone 15 Pro Max Front Camera Assembly Replacement, Remove the earpiece speaker: étape 25, image 1 de 3 iPhone 15 Pro Max Front Camera Assembly Replacement, Remove the earpiece speaker: étape 25, image 2 de 3 iPhone 15 Pro Max Front Camera Assembly Replacement, Remove the earpiece speaker: étape 25, image 3 de 3
      • Insert the flat end of your spudger between the left edge of the earpiece speaker and the frame.

      • Pry up until you can grab the speaker with your fingers.

      • Remove the speaker.

      • During reassembly, insert the speaker at a downward angle so the gasket slides into its recess in the top edge of the frame.

      Demander à FixBot

      Ajouter un commentaire

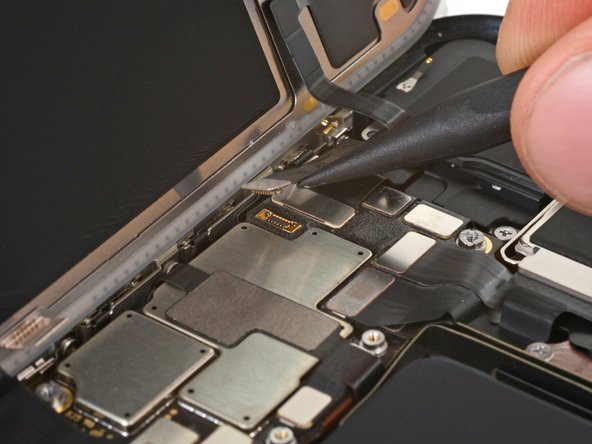
    1. iPhone 15 Pro Max Front Camera Assembly Replacement, Disconnect the front camera assembly: étape 26, image 1 de 3 iPhone 15 Pro Max Front Camera Assembly Replacement, Disconnect the front camera assembly: étape 26, image 2 de 3 iPhone 15 Pro Max Front Camera Assembly Replacement, Disconnect the front camera assembly: étape 26, image 3 de 3
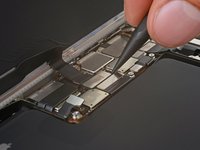
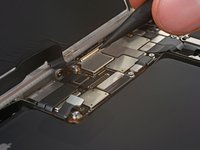
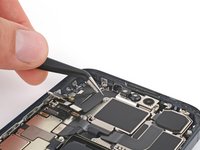
      • Use the tip of an opening pick to pry up and disconnect the microphone, front camera, and proximity sensor press connectors from the top of the logic board (three connectors in total).

      Demander à FixBot

      Ajouter un commentaire

    2. iPhone 15 Pro Max Front Camera Assembly Replacement, Remove the front camera assembly: étape 27, image 1 de 2 iPhone 15 Pro Max Front Camera Assembly Replacement, Remove the front camera assembly: étape 27, image 2 de 2
      Outil utilisé dans cette étape :
      Tweezers
      $4.99
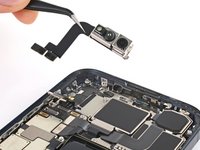
      • Use tweezers or your fingers to pull the front camera assembly out of its recess in the frame and remove it.

      • Be careful not to touch the camera or sensor lenses.

      Demander à FixBot

      Ajouter un commentaire

Conclusion

To reassemble your device, follow these instructions in reverse order.

After your repair, depending on the replacement part, you may be able to calibrate it using Apple's Repair Assistant, available as of iOS 18. Update your device, navigate to Settings → General →About → Parts & Service History, tap Restart & Finish Repair, and follow the onscreen prompts.

Take your e-waste to an R2 or e-Stewards certified recycler.

Repair didn’t go as planned? Try some basic troubleshooting, or ask our Answers community for help.

Annulation : je n'ai pas terminé ce tutoriel.

6 autres ont terminé cette réparation.

Auteur

avec

Clay Eickemeyer

Membre depuis le 09/19/22

109 136 Réputation

471 tutoriels rédigés

Équipe

Guide Team Membre de l'équipe Guide Team

Staff

10 membres

62 190 tutoriels rédigés

0 commentaires de tutoriel

Ajouter un commentaire

Nombre de vues :

Dernières 24 heures : 20

7 derniers jours : 136

30 derniers jours : 700

Total : 15,357