Introduction
Consultez ce tutoriel pour changer votre écran iPhone 15 cassé ou fissuré.
Remarque : Étant donné que vous ne pouvez pas déconnecter la batterie pendant cette réparation, veillez à ne pas utiliser d'outils métalliques pour soulever l'écran et à ne pas toucher les contacts apparents de votre iPhone.
Remarque : En raison des restrictions d'appariement des pièces d'Apple, sur iOS 17.6 et versions antérieures, True Tone et la luminosité automatique sont désactivés après un changement d'écran, même lorsque vous utilisez un écran Apple d'origine. Sur iOS 18 et les versions plus récentes, vous pouvez associer un nouvel écran iPhone 15 d'origine à l'aide de l'assistant de réparation d'Apple pour récupérer toutes ses fonctions.
Ce dont vous avez besoin
-
-
Débranchez tout câble de votre iPhone.
-
Maintenez enfoncés le bouton de marche et l'un des boutons de volume, puis faites glisser le bouton off, pour éteindre votre téléphone.
-
-
-
Si votre écran ou votre vitre arrière sont fortement fissurés, placez des bandes de ruban adhésif qui se chevauchent sur le verre, pour vous protéger et faciliter le démontage.
-
-
-
Mesurez 3 mm à partir de la pointe et tracez une ligne sur le médiator avec un marqueur permanent.
-
-
-
Utilisez un tournevis Pentalobe P2 pour retirer les deux vis de 7,7 mm de long, de part et d'autre du port de charge.
-
-
-
Utilisez un sèche-cheveux ou un pistolet à air chaud pour chauffer le bord inférieur de l’écran, jusqu'à ce qu'il soit chaud au toucher.
-
-
-
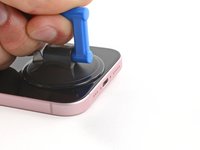
Appliquez une ventouse sur le bord inférieur de l'écran.
-
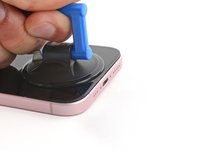
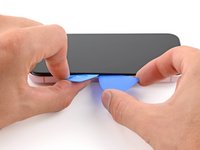
Tirez la ventouse vers le haut avec une force constante et régulière, afin de créer un espace entre l'écran et le châssis.
-
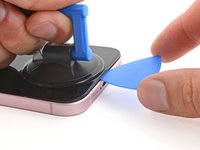
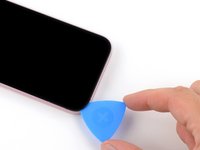
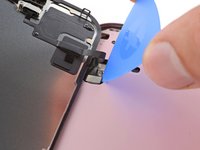
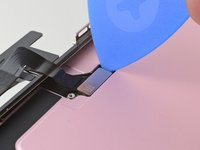
Insérez la pointe d'un médiator dans cet espace.
-
-
-
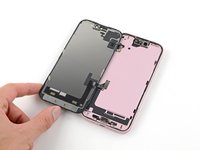
Deux nappes délicates relient l'écran au téléphone, l'une juste au-dessus du bouton du silencieux, l'autre à mi-chemin entre le bouton de baisse du volume et le bas du téléphone.
-
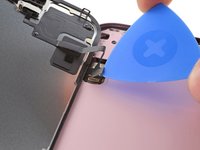
Plusieurs contacts à ressort sont présents sur le pourtour du téléphone. Faites très attention à ne pas insérer votre médiator plus profondément que recommandé à ces endroits, afin de ne pas déformer les contacts.
-
-
-
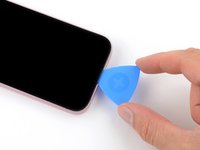
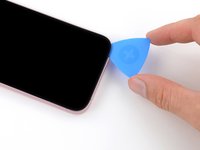
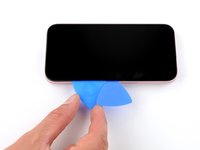
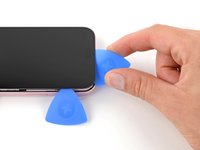
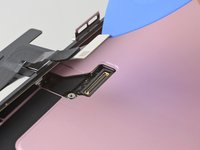
Faites glisser votre médiator d'avant en arrière le long du bord inférieur, pour trancher l'adhésif.
-
Laissez votre médiator dans le coin inférieur droit pour éviter que l'adhésif adhère à nouveau.
-
-
-
Chauffez le bord droit de l'écran jusqu'à ce qu'il soit chaud au toucher.
-
-
-
-
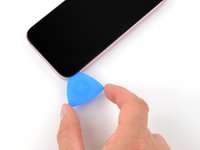
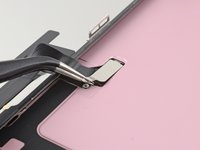
Faites glisser votre médiator autour du coin inférieur droit de l'écran et vers le bouton de marche, jusqu'à ce que vous sentiez une butée au niveau d'un clip de l'écran.
-
Tournez votre médiator de manière à ce que le bord plat se trouve sous l'écran.
-
-
-
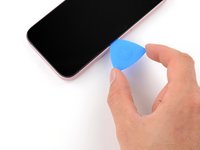
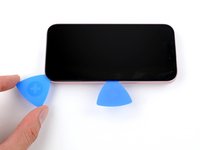
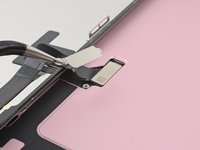
Tenez le médiator d'une main et faites-le pivoter pour augmenter l'espace entre l'écran et le châssis, puis détachez le clip droit.
-
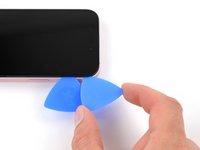
Insérez un deuxième médiator à droite du premier.
-
-
-
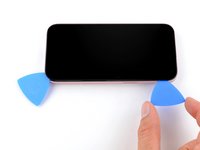
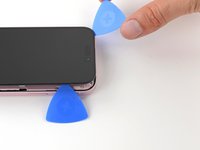
Faites glisser le premier médiator vers le coin inférieur droit de l'écran.
-
Faites glisser le deuxième médiator vers le coin supérieur droit de l’écran, pour trancher l'adhésif.
-
Laissez ces médiators en place pour éviter que l'adhésif recolle.
-
-
-
Chauffez le bord supérieur de l'écran jusqu'à ce qu'il soit chaud au toucher.
-
-
-
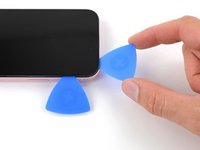
Insérez un troisième médiator dans le coin supérieur droit, juste au-dessus du médiator précédent.
-
Faites glisser votre médiator tout autour du coin supérieur droit et le long du bord supérieur, jusqu'à ce que vous butiez contre le clip supérieur gauche de l'écran.
-
-
-
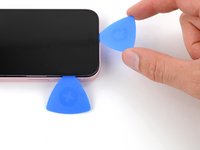
Tournez votre médiator de manière à ce que son bord plat se trouve sous l'écran.
-
Faites pivoter votre médiator pour détacher le clip supérieur gauche de l'écran.
-
Faites glisser votre médiator vers le coin supérieur gauche.
-
-
-
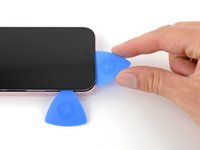
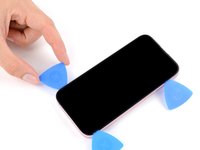
Chauffez le bord gauche de l'écran jusqu'à ce qu'il soit chaud au toucher.
-
-
-
Faites glisser votre médiator le long du coin supérieur gauche de l'écran et du bord gauche, pour détacher les clips et décoller l'adhésif qui le fixe.
-
-
-
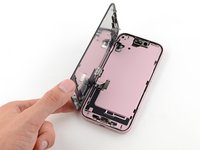
Ouvrez délicatement l'écran en le faisant pivoter autour du bord gauche du téléphone.
-
-
-
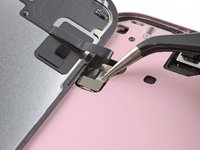
Utilisez un tournevis Tri-point Y000 pour retirer la vis de 0,9 mm de long qui fixe le cache du connecteur des capteurs avant.
-
-
Outil utilisé dans cette étape :Tweezers$4.99
-
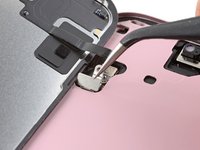
Utilisez la pincette pour soulever le cache à un angle de 90 degrés.
-
Détachez le cache de son emplacement sur la carte mère.
-
Retirez le cache.
-
-
-
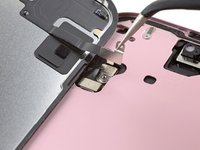
Utilisez la pointe d'un médiator pour soulever et déconnecter le connecteur à emboîter des capteurs avant.
-
-
-
Utilisez votre tournevis Tri-point Y000 pour retirer la vis de 0,9 mm de long, qui fixe le cache du connecteur de l'écran.
-
-
-
Utilisez une pincette pour soulever le cache et le détacher de son crochet sur la carte mère.
-
Retirez le cache.
-
-
-
Utilisez la pointe d'un médiator pour soulever et déconnecter le connecteur à emboîter de l'écran.
-


Pour remonter votre téléphone, suivez ce tutoriel pour remettre de l'adhésif et installer votre écran.
Après votre réparation écran iPhone 15, en fonction de la pièce de rechange, vous pourrez peut-être la calibrer à l'aide de l'assistant de réparation d'Apple, disponible à partir d'iOS 18. Mettez à jour votre appareil, accédez à Réglages → Général → Informations → Historique des pièces et des réparations, touchez Redémarrer et finaliser la réparation, puis suivez les invites à l'écran.
Déposez vos déchets électroniques dans un point de recyclage certifié.
Votre réparation iPhone 15 ne s’est pas déroulée comme prévu ? Consultez nos conseils basiques de diagnostic ou notre Forum pour obtenir de l’aide.
Annulation : je n'ai pas terminé ce tutoriel.
18 autres ont terminé cette réparation.
Merci à ces traducteurs :
100%


Ces traducteurs nous aident réparer le monde ! Vous voulez contribuer ?
Commencez à traduire ›

Équipe

11 commentaires de tutoriel
Is it safe to remove the screen of Iphone 15 or even 14 without disconnecting the battery? Thank you.
Hi Laurentiu,
In the case of the iPhone 15 series and the iPhone 14 vanilla models, their design is intentional so that you may replace the screen without disconnecting the battery. To mitigate any ESD-related risks, don't use any metal prying tools, use ESD-safe tools, and discharge and shut down your device before opening it up. Read more about ESD here.
Good luck!
Ok, I got you, thank you very much. So it doesn't matter if we change the screen and battery is still unplugged, even if we use lcd or led screen, if we use the right tools.
This may not be true for all devices, but Apple devices are quite robust. You should have no problem swapping a screen out on an iPhone 15. Just make sure that the press connectors are fully connected, since the insulating foam around the sockets may prevent them from laying flush!
Why is iPhone 15 Screen Replacement not sold in Canada?