Aller au contenu principal

Motorola Edge 5G UW (2022) Battery Replacement

Ce dont vous avez besoin

  1. Motorola Edge 5G UW (2022) Battery Replacement, Heat the left edge: étape 1, image 1 de 1
    • Completely power off your phone before you begin.

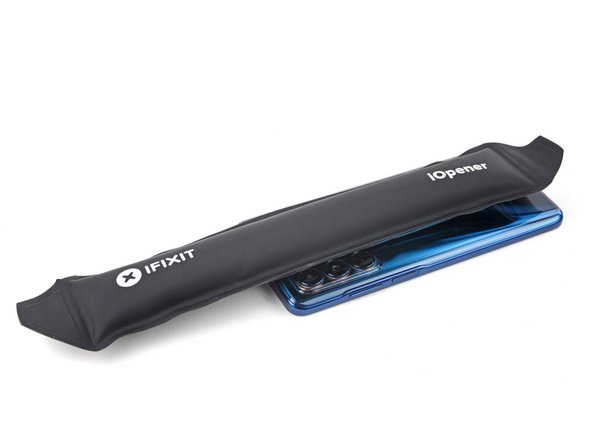
    • Heat an iOpener and apply it to the back cover's left edge for two minutes.

    • A hair dryer, heat gun, or hot plate may also be used, but be careful not to overheat the phone—the back cover and internal battery are both susceptible to heat damage.

  2. Motorola Edge 5G UW (2022) Battery Replacement, Separate the left adhesive: étape 2, image 1 de 3 Motorola Edge 5G UW (2022) Battery Replacement, Separate the left adhesive: étape 2, image 2 de 3 Motorola Edge 5G UW (2022) Battery Replacement, Separate the left adhesive: étape 2, image 3 de 3
    • Apply a suction cup to the back of the phone, as close to the bottom left corner as possible.

    • Pull up on the suction cup with a strong, steady force to create a gap between the back cover and the midframe on the left edge.

    • Depending on the age of your phone, this may be difficult. If you're having trouble, apply more heat to the edge and try again.

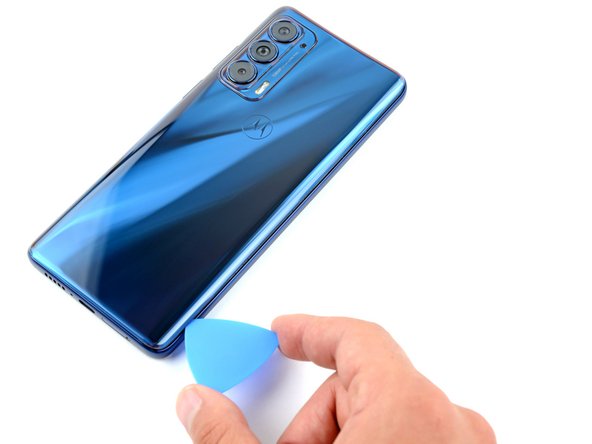
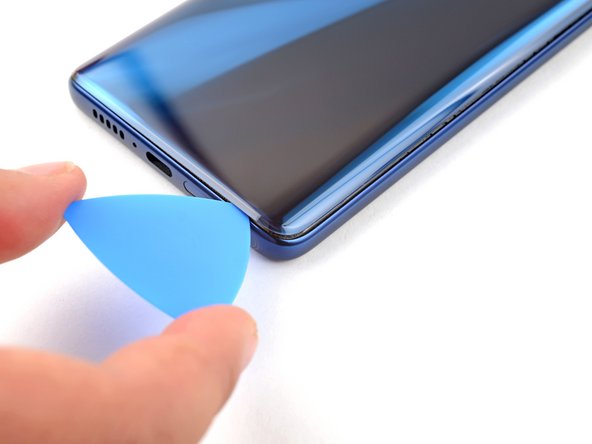
    • Insert an opening pick into the gap.

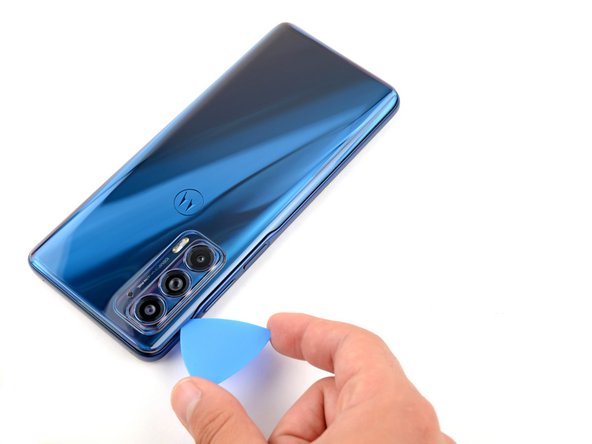
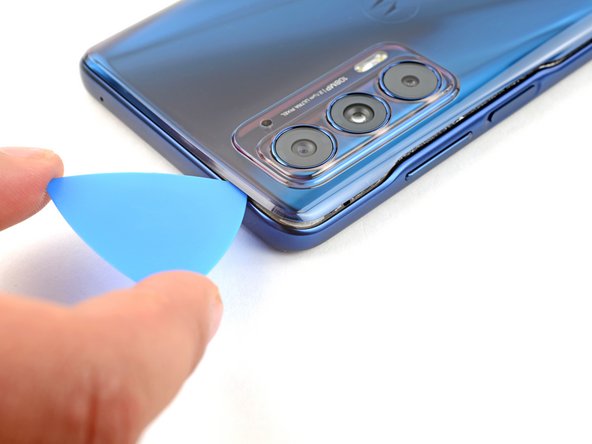
  3. Motorola Edge 5G UW (2022) Battery Replacement, Slice the left adhesive: étape 3, image 1 de 2 Motorola Edge 5G UW (2022) Battery Replacement, Slice the left adhesive: étape 3, image 2 de 2
    • Slide the pick along the left edge of the phone to slice the adhesive securing the back cover to the frame.

    • Leave the pick inserted in the top left corner to prevent the adhesive from resealing.

  4. Motorola Edge 5G UW (2022) Battery Replacement, Heat the top edge: étape 4, image 1 de 1
    • Apply a heated iOpener to the back cover's top edge for two minutes.

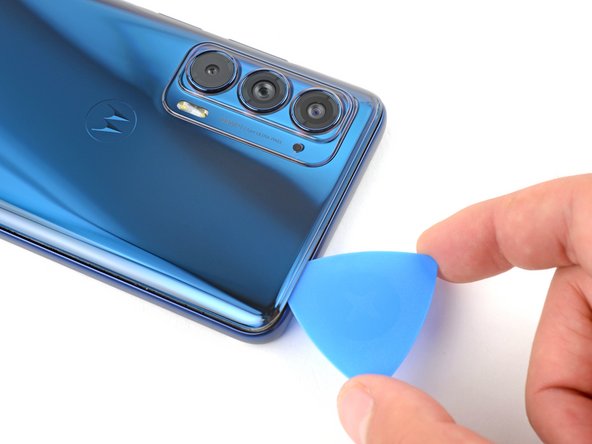
  5. Motorola Edge 5G UW (2022) Battery Replacement: étape 5, image 1 de 2 Motorola Edge 5G UW (2022) Battery Replacement: étape 5, image 2 de 2
    • Rotate the pick around the top left corner to slice the adhesive.

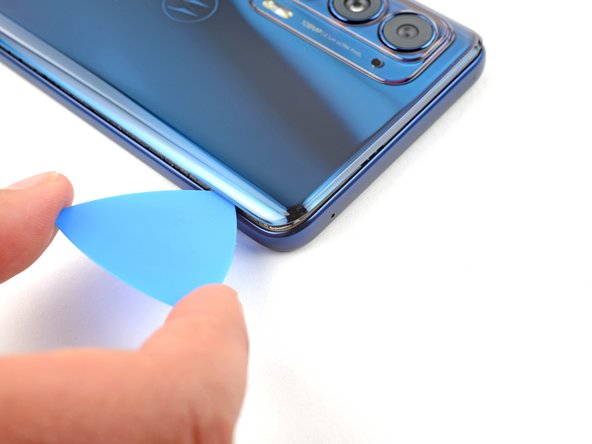
  6. Motorola Edge 5G UW (2022) Battery Replacement: étape 6, image 1 de 2 Motorola Edge 5G UW (2022) Battery Replacement: étape 6, image 2 de 2
    • Slide the pick along the top edge to slice the adhesive.

    • Leave the opening pick inserted in the top right corner to prevent the adhesive from resealing.

  7. Motorola Edge 5G UW (2022) Battery Replacement: étape 7, image 1 de 1
    • Apply a heated iOpener to the back cover's right edge for two minutes.

  8. Motorola Edge 5G UW (2022) Battery Replacement: étape 8, image 1 de 2 Motorola Edge 5G UW (2022) Battery Replacement: étape 8, image 2 de 2
    • Rotate the pick around the top right corner to slice the adhesive.

  9. Motorola Edge 5G UW (2022) Battery Replacement: étape 9, image 1 de 2 Motorola Edge 5G UW (2022) Battery Replacement: étape 9, image 2 de 2
    • Slide the pick along the right edge to slice the adhesive.

    • Leave the pick inserted in the bottom right corner to prevent the adhesive from resealing.

  10. Motorola Edge 5G UW (2022) Battery Replacement: étape 10, image 1 de 1
    • Apply a heated iOpener to the back cover's bottom edge for two minutes.

  11. Motorola Edge 5G UW (2022) Battery Replacement: étape 11, image 1 de 2 Motorola Edge 5G UW (2022) Battery Replacement: étape 11, image 2 de 2
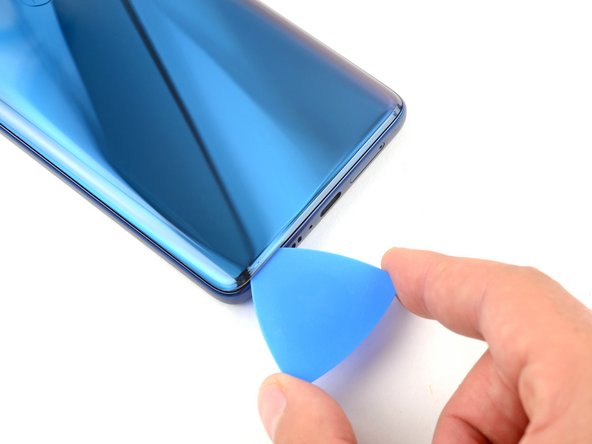
    • Rotate the pick around the bottom right corner to slice the adhesive.

  12. Motorola Edge 5G UW (2022) Battery Replacement: étape 12, image 1 de 2 Motorola Edge 5G UW (2022) Battery Replacement: étape 12, image 2 de 2
    • Slide the pick along the bottom edge to slice the adhesive.

  13. Motorola Edge 5G UW (2022) Battery Replacement, Heat the camera adhesive: étape 13, image 1 de 2 Motorola Edge 5G UW (2022) Battery Replacement, Heat the camera adhesive: étape 13, image 2 de 2
    • There's a significant amount of adhesive to the right of the cameras that secures the back cover to the motherboard cover.

    • Apply a heated iOpener to the right of the cameras for two minutes.

  14. Motorola Edge 5G UW (2022) Battery Replacement, Slice the adhesive around the camera: étape 14, image 1 de 2 Motorola Edge 5G UW (2022) Battery Replacement, Slice the adhesive around the camera: étape 14, image 2 de 2
    • Insert an opening pick between the back cover and motherboard cover on the top right edge.

    • Gently pull up on the back cover while sliding the opening pick back and forth along the right side of the cameras to slice the adhesive.

    • The back cover should detach from the phone at this point.

  15. Motorola Edge 5G UW (2022) Battery Replacement, Remove the back cover: étape 15, image 1 de 2 Motorola Edge 5G UW (2022) Battery Replacement, Remove the back cover: étape 15, image 2 de 2
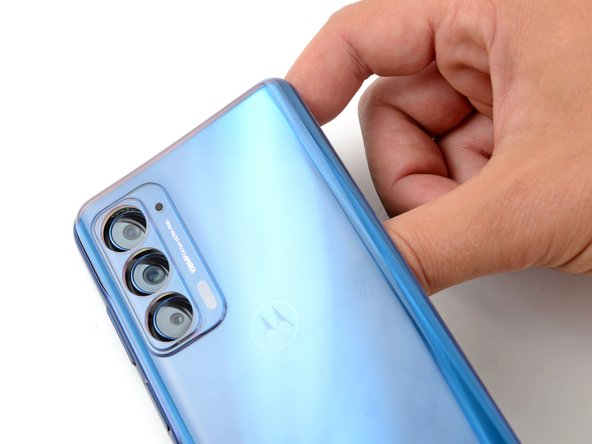
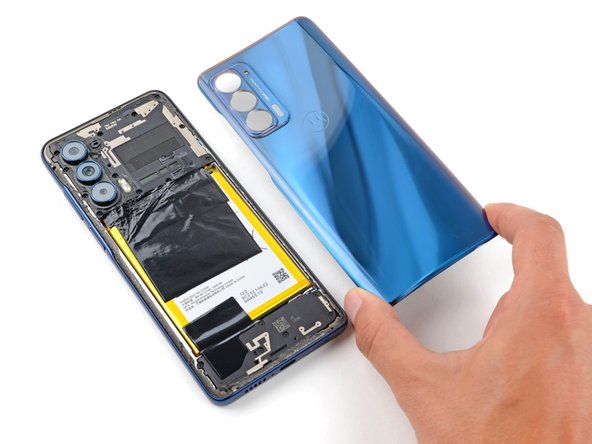
    • Lift the back cover from the phone and remove it.

    • If the back cover is still stuck to the midframe, slide an opening pick around the edges of the phone until the cover separates completely.

    • During reassembly:

    • This is a good point to test your phone's functionality before sealing it up. Use this guide to run a hardware test. Be sure to power your phone back down completely before you continue working.

    • Follow this guide to replace the back cover adhesive.

  16. Motorola Edge 5G UW (2022) Battery Replacement, Unfasten the motherboard cover: étape 16, image 1 de 2 Motorola Edge 5G UW (2022) Battery Replacement, Unfasten the motherboard cover: étape 16, image 2 de 2
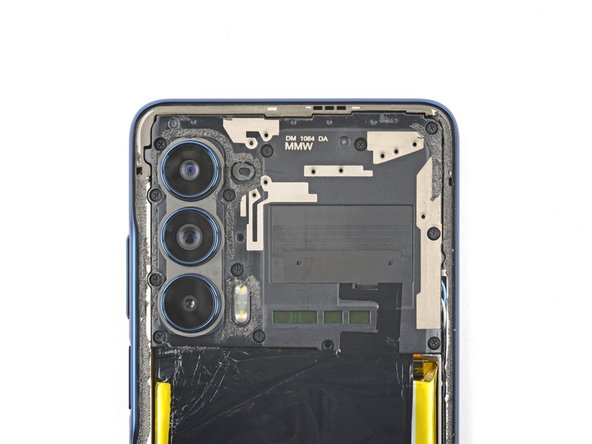
    • Use a Phillips screwdriver to remove the 13 4 mm screws securing the motherboard cover.

  17. Motorola Edge 5G UW (2022) Battery Replacement, Release the motherboard cover clips: étape 17, image 1 de 2 Motorola Edge 5G UW (2022) Battery Replacement, Release the motherboard cover clips: étape 17, image 2 de 2
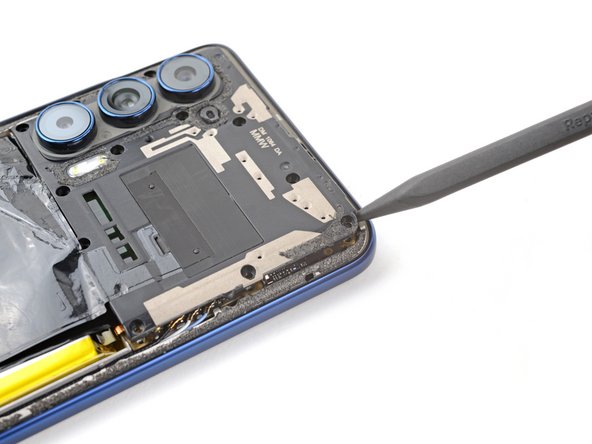
    • Insert a spudger between the motherboard cover and midframe on the top right edge of the phone.

    • Pry up with the spudger to release the clips securing the motherboard cover.

    • During reassembly, press down around the perimeter of the motherboard cover to engage the clips.

  18. Motorola Edge 5G UW (2022) Battery Replacement, Remove the motherboard cover: étape 18, image 1 de 3 Motorola Edge 5G UW (2022) Battery Replacement, Remove the motherboard cover: étape 18, image 2 de 3 Motorola Edge 5G UW (2022) Battery Replacement, Remove the motherboard cover: étape 18, image 3 de 3
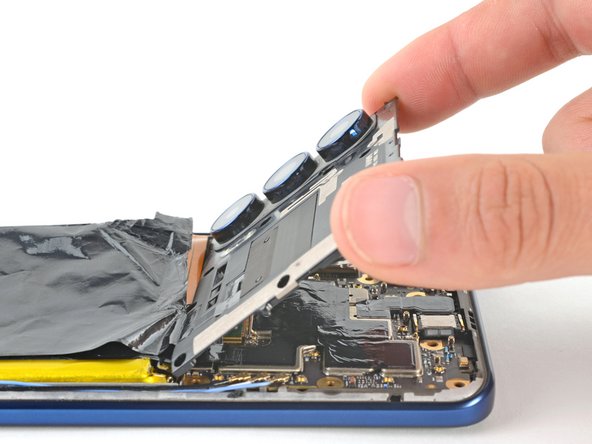
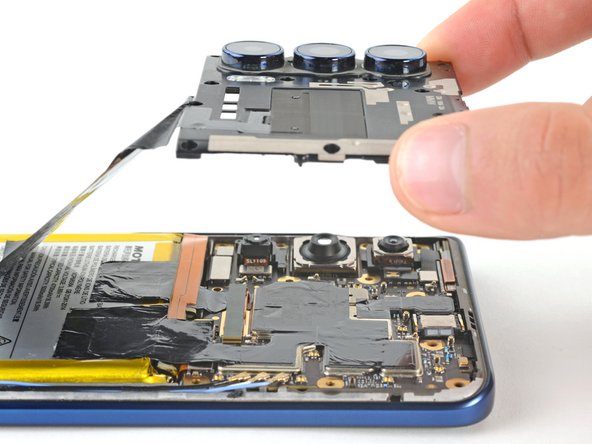
    • Gently pull the motherboard cover up and away from the phone and remove it.

    • Don't pull quickly or forcefully, as the heat spreader very loosely secures the motherboard cover to the battery.

  19. Motorola Edge 5G UW (2022) Battery Replacement, Disconnect the battery: étape 19, image 1 de 2 Motorola Edge 5G UW (2022) Battery Replacement, Disconnect the battery: étape 19, image 2 de 2
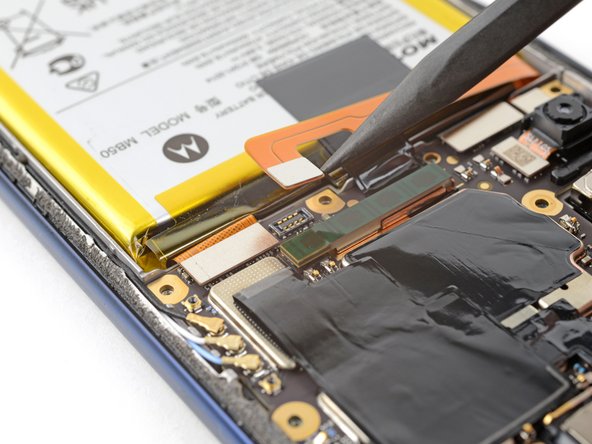
    • Use the pointed end of a spudger to pry up and disconnect the battery's press connector.

    • To re-attach press connectors like this one, carefully align and press down on one side until it clicks into place, then repeat on the other side. Don't press down on the middle. If the connector is misaligned, the pins can bend, causing permanent damage.

  20. Motorola Edge 5G UW (2022) Battery Replacement, Detach the daughterboard heat spreader: étape 20, image 1 de 2 Motorola Edge 5G UW (2022) Battery Replacement, Detach the daughterboard heat spreader: étape 20, image 2 de 2
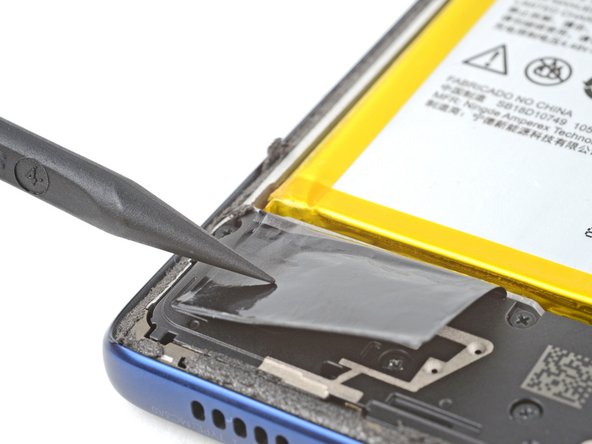
    • Insert the pointed end of a spudger under the heat spreader between the battery and daughterboard.

    • Gently left up and towards the bottom of the phone to detach the heat spreader.

  21. Motorola Edge 5G UW (2022) Battery Replacement, Apply isopropyl alcohol: étape 21, image 1 de 2 Motorola Edge 5G UW (2022) Battery Replacement, Apply isopropyl alcohol: étape 21, image 2 de 2
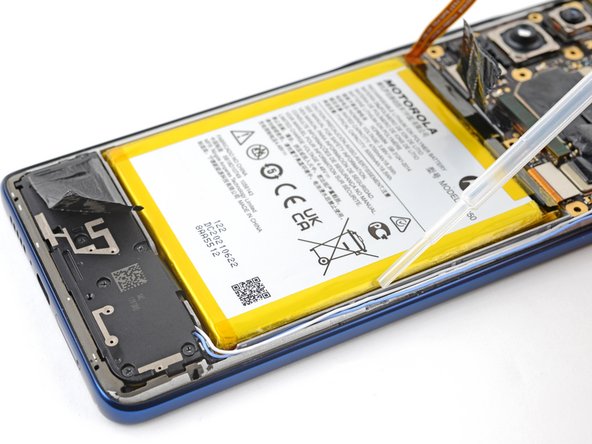
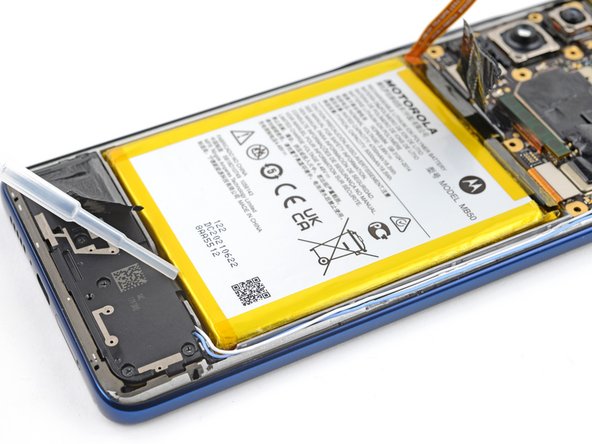
    • Apply a few drops of high-concentration (90% or higher) isopropyl alcohol to the gaps along the battery's edges.

    • Tilt the device as you apply alcohol to help it flow under the battery.

    • Wait one minute to allow the isopropyl alcohol to penetrate the adhesive.

    • Only apply a few drops initially and apply more as necessary. If you apply too much alcohol, it may overflow onto the motherboard and daughterboard.

  22. Motorola Edge 5G UW (2022) Battery Replacement, Separate the battery's adhesive: étape 22, image 1 de 3 Motorola Edge 5G UW (2022) Battery Replacement, Separate the battery's adhesive: étape 22, image 2 de 3 Motorola Edge 5G UW (2022) Battery Replacement, Separate the battery's adhesive: étape 22, image 3 de 3
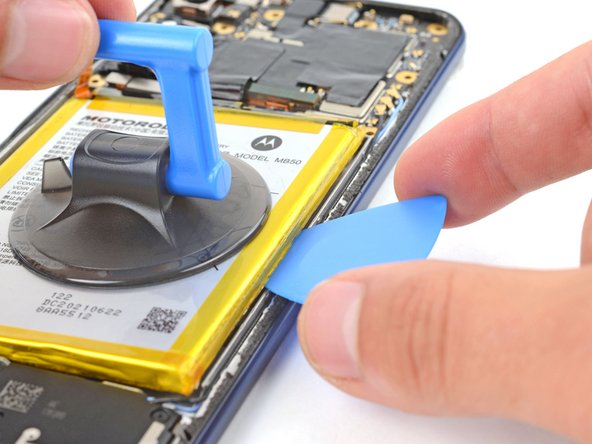
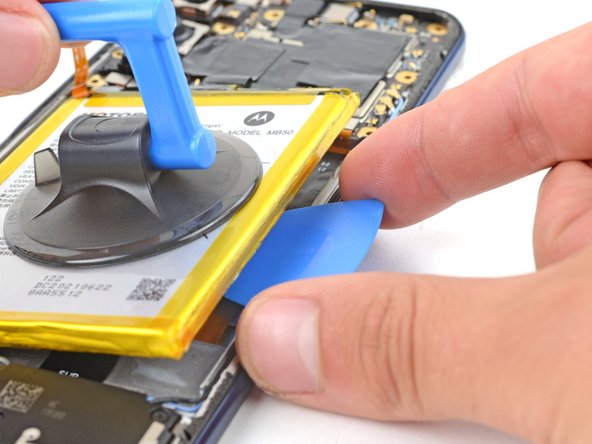
    • Take care not to puncture or bend the battery during the removal process—a punctured or bent battery may leak dangerous chemicals or cause a fire.

    • Apply a suction cup to middle of the battery.

    • Pull up on the suction cup with strong, steady force to separate the battery from the frame.

    • If the battery doesn't budge, apply a few more drops of isopropyl alcohol, wait one minute, and try again.

    • Insert an opening pick into the gap between the battery and the frame.

    • Continue to pull up on the suction cup with a strong, steady force while sliding the opening pick back and forth to slice the adhesive.

    • Continue this process until the battery separates from the frame, applying a few drops of alcohol as necessary.

  23. Motorola Edge 5G UW (2022) Battery Replacement, Remove the battery: étape 23, image 1 de 2 Motorola Edge 5G UW (2022) Battery Replacement, Remove the battery: étape 23, image 2 de 2
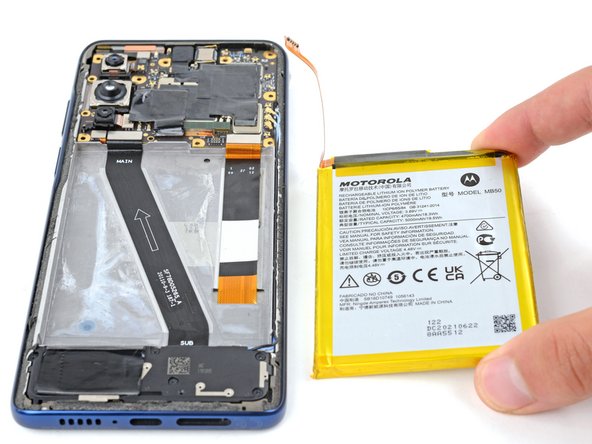
    • Remove the battery from the midframe.

    • Do not reinstall a damaged or deformed battery, as doing so is a potential safety hazard.

    • Follow this guide to install new battery adhesive.

  24. Motorola Edge 5G UW (2022) Battery Replacement, Transfer the battery's foam strip: étape 24, image 1 de 3 Motorola Edge 5G UW (2022) Battery Replacement, Transfer the battery's foam strip: étape 24, image 2 de 3 Motorola Edge 5G UW (2022) Battery Replacement, Transfer the battery's foam strip: étape 24, image 3 de 3
    Outil utilisé dans cette étape :
    Tweezers
    $4.99
    J'achète
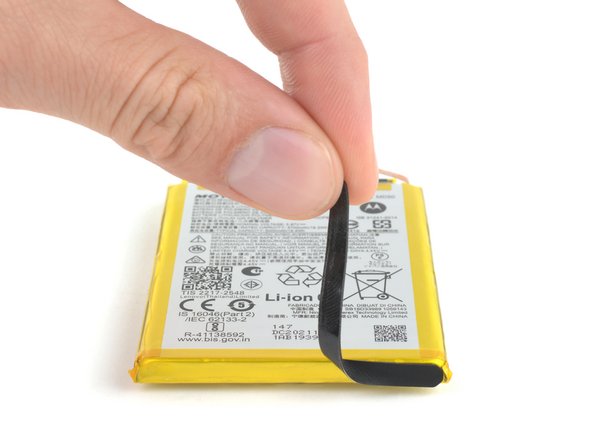
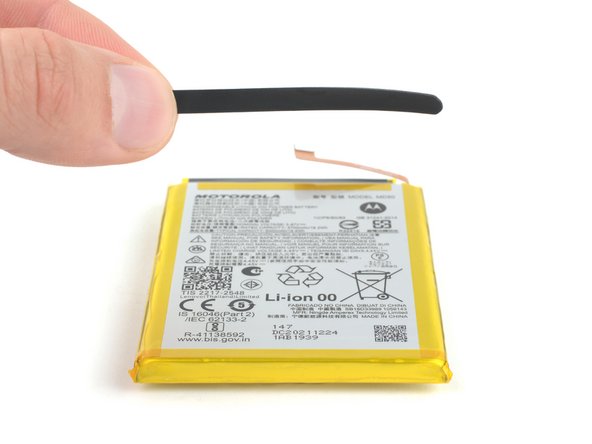
    • Use tweezers or your fingers to remove the foam strip from the battery's bottom edge.

    • Before installing your new battery, apply the foam strip to its bottom edge.

Conclusion

Compare your new replacement part to the original part—be sure to transfer remaining components and remove adhesive backings from the new part before installing.

To reassemble your device, follow the instructions in reverse order.

For optimal performance, calibrate your newly installed battery after completing this guide.

Take your e-waste to an R2 or e-Stewards certified recycler.

Repair didn’t go as planned? Try some basic troubleshooting, or ask our Answers community for help.

2 autres ont terminé cette réparation.

Spencer Day

Membre depuis le 09/14/22

54 854 Réputation

407 tutoriels rédigés

Équipe

iFixit Membre de l'équipe iFixit

Staff

136 membres

17 292 tutoriels rédigés

Un commentaire

Good guide,you help us solved an big issue

Eric Z - Réponse

Ajouter un commentaire

Nombre de vues :

Dernières 24 heures : 4

7 derniers jours : 22

30 derniers jours : 106

Total : 1,678