Aller au contenu principal

Samsung Galaxy Tab S7 Plus Screen Replacement

Ce dont vous avez besoin

  1. Samsung Galaxy Tab S7 Plus Screen Replacement, Heat the bottom edge: étape 1, image 1 de 1
    • Completely power off your device before you begin.

    • Apply a heated iOpener to the bottom edge of the device to loosen the adhesive underneath.

    • The display adhesive of the Galaxy Tab S7+ is extremely strong, and it's likely you need to reheat and reapply the iOpener several times before starting the display removal and during the removal procedure.

    • A hair dryer, heat gun, or hot plate may also be used, but be careful not to overheat the device.

  2. Samsung Galaxy Tab S7 Plus Screen Replacement, Screen removal information: étape 2, image 1 de 3 Samsung Galaxy Tab S7 Plus Screen Replacement, Screen removal information: étape 2, image 2 de 3 Samsung Galaxy Tab S7 Plus Screen Replacement, Screen removal information: étape 2, image 3 de 3
    • While you're waiting for the adhesive to loosen, note the following:

    • There's a long circuit board attached to the screen that sits parallel to the bottom edge.

    • Don't insert the pick more than 2 mm to avoid damaging the circuit board.

    • This image shows an example of the display separating from the glass panel.

    • Don't insert the pick more than 3 mm to avoid damaging the display.

  3. Samsung Galaxy Tab S7 Plus Screen Replacement, Insert an opening pick: étape 3, image 1 de 3 Samsung Galaxy Tab S7 Plus Screen Replacement, Insert an opening pick: étape 3, image 2 de 3 Samsung Galaxy Tab S7 Plus Screen Replacement, Insert an opening pick: étape 3, image 3 de 3
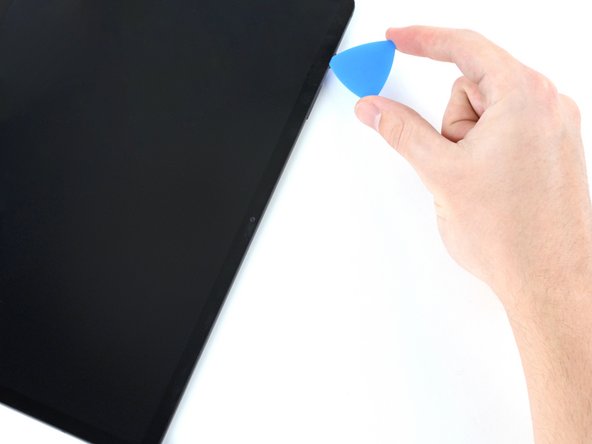
    • Once the screen is warm to touch, apply a suction handle to the bottom edge of the screen and as close to the edge as possible.

    • If your screen is badly cracked, covering it with a layer of clear packing tape may allow the suction cup to adhere. Alternatively, very strong tape may be used instead of the suction handle. If all else fails, you can superglue the suction cup to the screen.

    • Lift the screen with the suction handle to create a small gap between the screen and the frame.

    • Insert an opening pick into the gap between the frame and the screen.

    • Don't insert the pick more than 2 mm to avoid damaging the circuit board.

    • Leave the opening pick in place to prevent the adhesive from resealing.

  4. Samsung Galaxy Tab S7 Plus Screen Replacement, Separate the bottom adhesive: étape 4, image 1 de 3 Samsung Galaxy Tab S7 Plus Screen Replacement, Separate the bottom adhesive: étape 4, image 2 de 3 Samsung Galaxy Tab S7 Plus Screen Replacement, Separate the bottom adhesive: étape 4, image 3 de 3
    • Insert a new opening pick into the gap you created.

    • Slide the new pick along the bottom edge of the device towards the bottom-right corner.

  5. Samsung Galaxy Tab S7 Plus Screen Replacement, Heat the right edge: étape 5, image 1 de 1
    • Apply a heated iOpener to the right edge of the device to loosen the adhesive underneath.

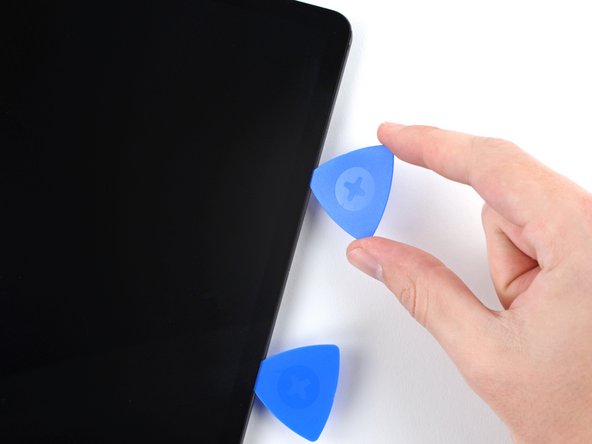
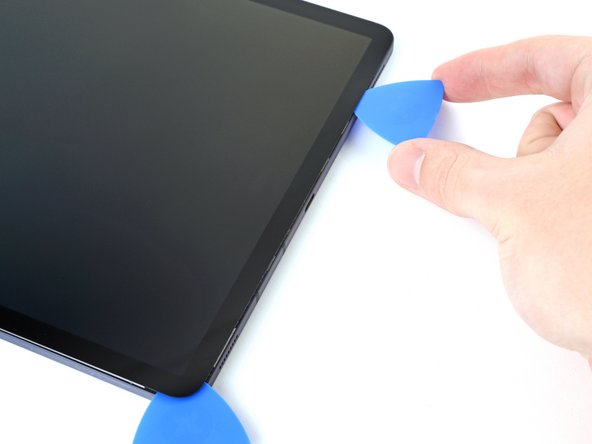
  6. Samsung Galaxy Tab S7 Plus Screen Replacement, Separate the bottom-right corner adhesive: étape 6, image 1 de 3 Samsung Galaxy Tab S7 Plus Screen Replacement, Separate the bottom-right corner adhesive: étape 6, image 2 de 3 Samsung Galaxy Tab S7 Plus Screen Replacement, Separate the bottom-right corner adhesive: étape 6, image 3 de 3
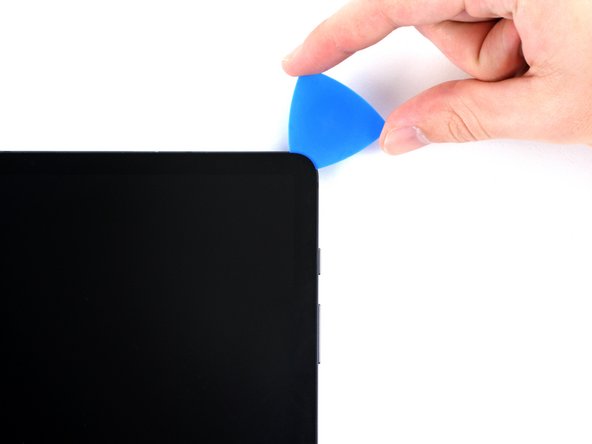
    • Rotate the opening pick around the bottom-right corner of the device.

    • Leave the opening pick in place to prevent the adhesive from resealing.

  7. Samsung Galaxy Tab S7 Plus Screen Replacement, Separate the right adhesive: étape 7, image 1 de 3 Samsung Galaxy Tab S7 Plus Screen Replacement, Separate the right adhesive: étape 7, image 2 de 3 Samsung Galaxy Tab S7 Plus Screen Replacement, Separate the right adhesive: étape 7, image 3 de 3
    • Insert a new opening pick into the gap you created.

    • Don't insert the pick more than 3 mm to avoid damaging the components along the right edge.

    • Slide the new pick along the right edge of the device towards the top-right corner.

  8. Samsung Galaxy Tab S7 Plus Screen Replacement, Heat the top edge: étape 8, image 1 de 1
    • Apply a heated iOpener to the top edge of the device to loosen the adhesive underneath.

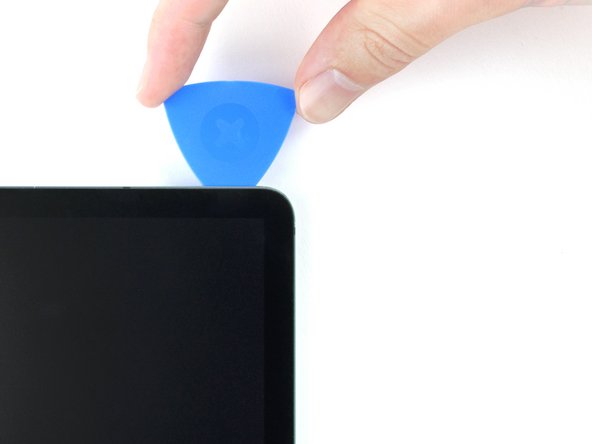
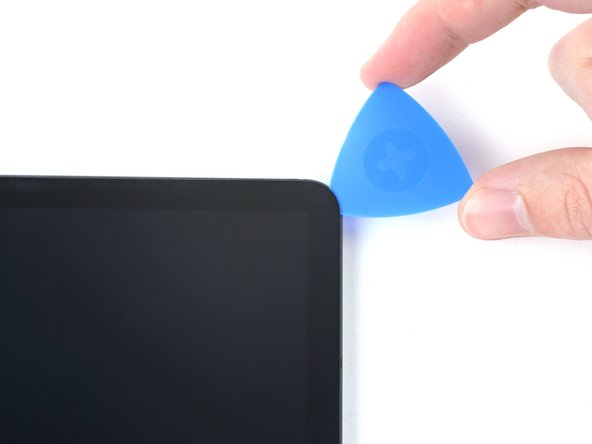
  9. Samsung Galaxy Tab S7 Plus Screen Replacement, Separate the top-right corner adhesive: étape 9, image 1 de 3 Samsung Galaxy Tab S7 Plus Screen Replacement, Separate the top-right corner adhesive: étape 9, image 2 de 3 Samsung Galaxy Tab S7 Plus Screen Replacement, Separate the top-right corner adhesive: étape 9, image 3 de 3
    • Rotate the opening pick around the top-right corner of the device.

    • Leave the opening pick in place to prevent the adhesive from resealing.

  10. Samsung Galaxy Tab S7 Plus Screen Replacement, Separate the top adhesive: étape 10, image 1 de 3 Samsung Galaxy Tab S7 Plus Screen Replacement, Separate the top adhesive: étape 10, image 2 de 3 Samsung Galaxy Tab S7 Plus Screen Replacement, Separate the top adhesive: étape 10, image 3 de 3
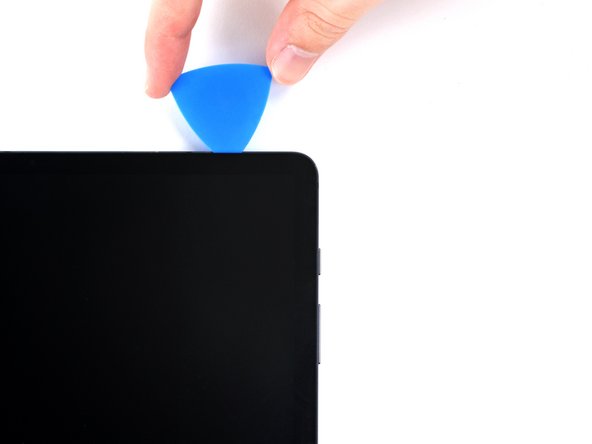
    • Insert a new opening pick into the gap you created.

    • Slide the new pick along the top edge of the device towards the top-left corner.

  11. Samsung Galaxy Tab S7 Plus Screen Replacement, Heat the left edge: étape 11, image 1 de 1
    • Apply a heated iOpener to the left edge of the device to loosen the adhesive underneath.

  12. Samsung Galaxy Tab S7 Plus Screen Replacement, Separate the top-left corner adhesive: étape 12, image 1 de 3 Samsung Galaxy Tab S7 Plus Screen Replacement, Separate the top-left corner adhesive: étape 12, image 2 de 3 Samsung Galaxy Tab S7 Plus Screen Replacement, Separate the top-left corner adhesive: étape 12, image 3 de 3
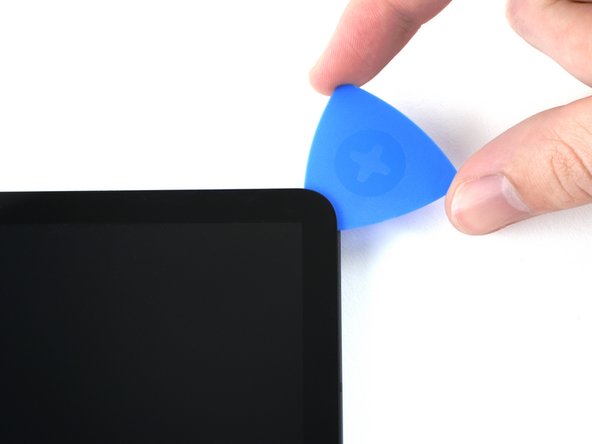
    • Rotate the opening pick around the top-left corner of the device.

    • Leave the opening pick in place to prevent the adhesive from resealing.

  13. Samsung Galaxy Tab S7 Plus Screen Replacement, Separate the left adhesive: étape 13, image 1 de 3 Samsung Galaxy Tab S7 Plus Screen Replacement, Separate the left adhesive: étape 13, image 2 de 3 Samsung Galaxy Tab S7 Plus Screen Replacement, Separate the left adhesive: étape 13, image 3 de 3
    • Insert a new opening pick into the gap you created.

    • Slide the new pick along the left edge of the device towards the bottom-left corner.

  14. Samsung Galaxy Tab S7 Plus Screen Replacement, Separate the bottom-left corner adhesive: étape 14, image 1 de 3 Samsung Galaxy Tab S7 Plus Screen Replacement, Separate the bottom-left corner adhesive: étape 14, image 2 de 3 Samsung Galaxy Tab S7 Plus Screen Replacement, Separate the bottom-left corner adhesive: étape 14, image 3 de 3
    • Rotate the opening pick around the bottom-left corner of the device.

    • Leave the opening pick in place to prevent the adhesive from resealing.

    • At this point, the perimeter of the screen should be separated from the frame. If there's still resistance around the edges of the screen, use an opening pick to cut the adhesive again.

  15. Samsung Galaxy Tab S7 Plus Screen Replacement, Remove the screen: étape 15, image 1 de 3 Samsung Galaxy Tab S7 Plus Screen Replacement, Remove the screen: étape 15, image 2 de 3 Samsung Galaxy Tab S7 Plus Screen Replacement, Remove the screen: étape 15, image 3 de 3
    Outil utilisé dans cette étape :
    Tweezers
    $4.99
    J'achète
    • Don't try to remove the screen all the way yet; it's still connected to the frame by a flex cable.

    • With the top of the device facing you, pull the screen up and away from you like you're opening a book.

    • Rest the screen upside down and parallel to the frame before continuing.

    • Don't twist the screen or move it too far away from the frame to avoid damaging the flex cable.

    • During reassembly:

    • This is a good point to power on your tablet and test all functions before sealing it up. Be sure to power your tablet back down completely before you continue working.

    • Remove any adhesive chunks with a pair of tweezers or your fingers. Use some high concentration (over 90%) isopropyl alcohol to wipe away any adhesive residue.

    • If you're using Samsung custom-cut adhesives, follow this guide. If you're using double-sided tape, follow this guide.

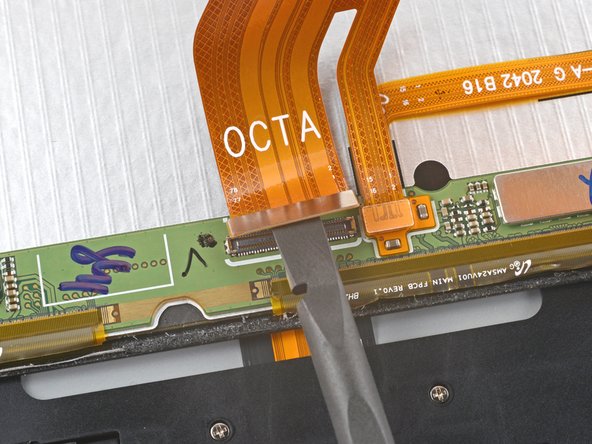
  16. Samsung Galaxy Tab S7 Plus Screen Replacement, Disconnect the display cable: étape 16, image 1 de 2 Samsung Galaxy Tab S7 Plus Screen Replacement, Disconnect the display cable: étape 16, image 2 de 2
    • Use the flat end of a spudger to pry up and disconnect the display cable's press connector secured to the screen.

    • To re-attach press connectors like this one, carefully align and press down on one side until it clicks into place, then repeat on the other side. Do not press down on the middle. If the connector is misaligned, the pins can bend, causing permanent damage.

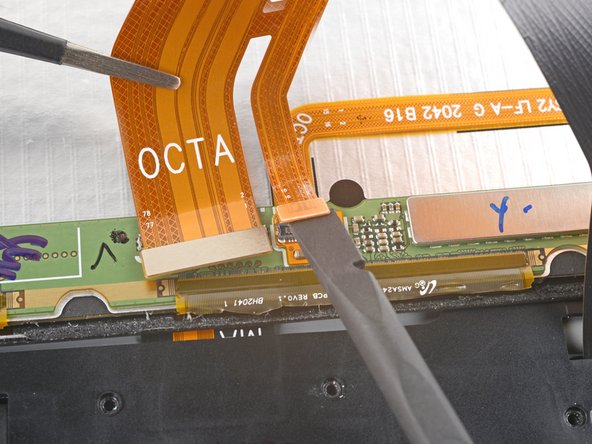
  17. Samsung Galaxy Tab S7 Plus Screen Replacement: étape 17, image 1 de 2 Samsung Galaxy Tab S7 Plus Screen Replacement: étape 17, image 2 de 2
    • Use tweezers, or you fingers, to hold the display cable in place.

    • Use the flat end of a spudger to pry up and disconnect the fingerprint sensor's press connector attached to the display cable.

    • Take note of the display cable's position; you will need to bend it in the same way when connecting a new screen.

  18. Samsung Galaxy Tab S7 Plus Screen Replacement, Remove the screen: étape 18, image 1 de 3 Samsung Galaxy Tab S7 Plus Screen Replacement, Remove the screen: étape 18, image 2 de 3 Samsung Galaxy Tab S7 Plus Screen Replacement, Remove the screen: étape 18, image 3 de 3
    • Remove the screen from the frame.

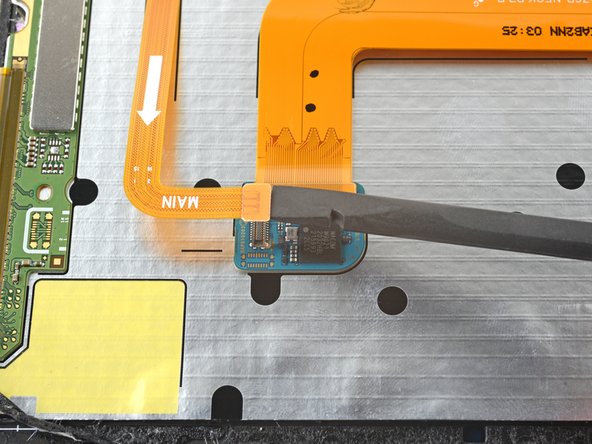
  19. Samsung Galaxy Tab S7 Plus Screen Replacement, Disconnect the fingerprint scanner cable: étape 19, image 1 de 2 Samsung Galaxy Tab S7 Plus Screen Replacement, Disconnect the fingerprint scanner cable: étape 19, image 2 de 2
    • Use the flat end of a spudger to pry up and disconnect the fingerprint scanner cable's press connector.

  20. Samsung Galaxy Tab S7 Plus Screen Replacement, Heat the fingerprint sensor cable: étape 20, image 1 de 1
    • The fingerprint sensor cable is secured to the screen by adhesive; use heat to avoid tearing the cable during the removal procedure.

    • Apply a heated iOpener to the bottom edge of the screen for two minutes.

    • A hair dryer, heat gun, or hot plate may also be used, but be careful not to overheat the device.

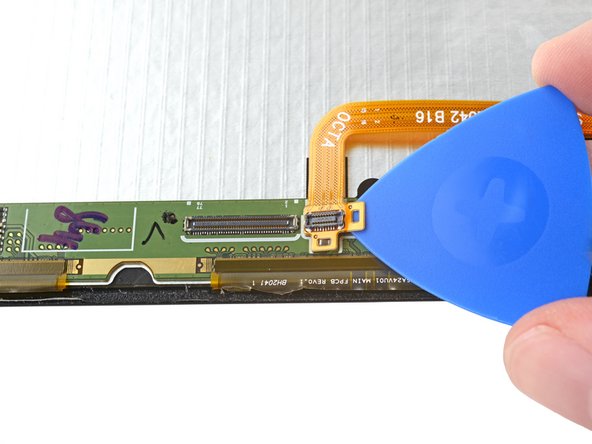
  21. Samsung Galaxy Tab S7 Plus Screen Replacement, Separate the connector's adhesive: étape 21, image 1 de 3 Samsung Galaxy Tab S7 Plus Screen Replacement, Separate the connector's adhesive: étape 21, image 2 de 3 Samsung Galaxy Tab S7 Plus Screen Replacement, Separate the connector's adhesive: étape 21, image 3 de 3
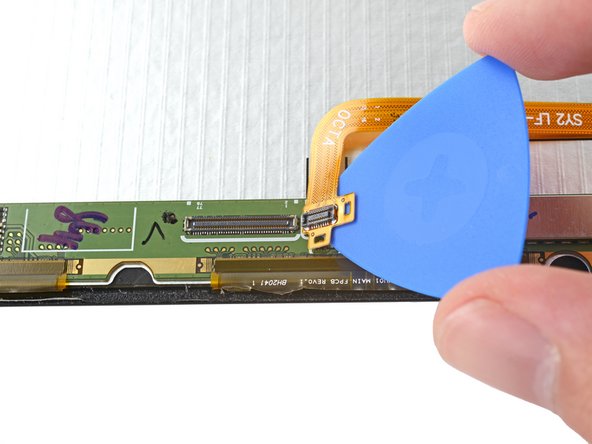
    • Insert an opening pick between the fingerprint cable's press connector and the circuit board near the bottom of the screen.

    • Slice the adhesive while prying up with the pick to separate the press connector from the screen.

  22. Samsung Galaxy Tab S7 Plus Screen Replacement: étape 22, image 1 de 3 Samsung Galaxy Tab S7 Plus Screen Replacement: étape 22, image 2 de 3 Samsung Galaxy Tab S7 Plus Screen Replacement: étape 22, image 3 de 3
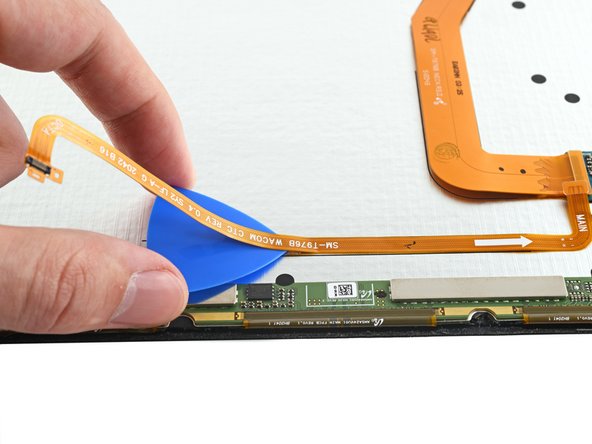
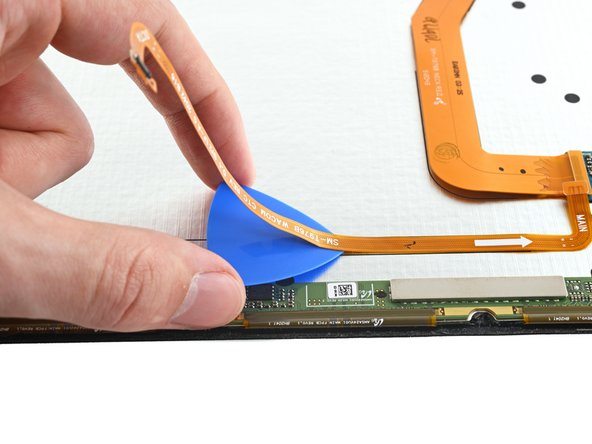
    • Slice with an opening pick along the bottom of the fingerprint sensor's cable to separate it from the screen.

  23. Samsung Galaxy Tab S7 Plus Screen Replacement, Remove the fingerprint sensor cable: étape 23, image 1 de 2 Samsung Galaxy Tab S7 Plus Screen Replacement, Remove the fingerprint sensor cable: étape 23, image 2 de 2
    Outil utilisé dans cette étape :
    Tweezers
    $4.99
    J'achète
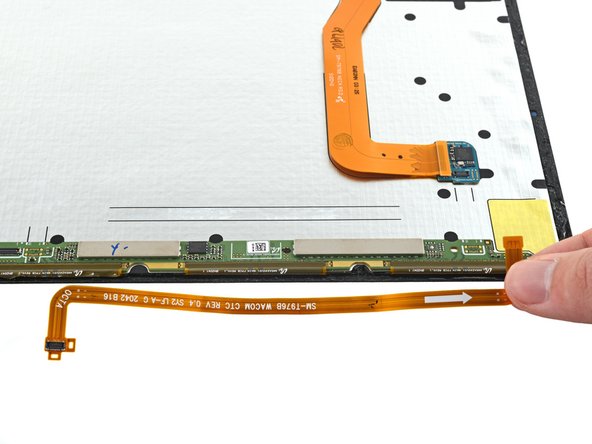
    • Use tweezers, or your fingers, to remove the fingerprint sensor cable.

    • Set the cable aside. You'll reuse it during reassembly.

  24. Samsung Galaxy Tab S7 Plus Screen Replacement, Only the screen remains: étape 24, image 1 de 1
Conclusion

Compare your new replacement part to the original part—you may need to transfer remaining components or remove adhesive backings from the new part before you install it.

To reassemble your device, follow the instructions in reverse order and perform the opposite actions, e.g., "reattach" instead of "removing." Skip steps that use heating and prying, and pay close attention to the 📌 bullets as you work through the steps.

After you've completed the repair, download the Samsung Members App from the Galaxy Store or the Play Store, and follow the Samsung Self-Repair document (beginning page 9) to make sure your device is fully functional.

Take your e-waste to an R2 or e-Stewards certified recycler.

Repair didn’t go as planned? Try some basic troubleshooting, or ask our Samsung Galaxy Tab S7+ Answers community for help.

8 autres ont terminé cette réparation.

Alex Diaz-Kokaisl

Membre depuis le 01/16/22

124 456 Réputation

581 tutoriels rédigés

Équipe

iFixit Membre de l'équipe iFixit

Staff

135 membres

17 277 tutoriels rédigés

5 commentaires

is the process for the Tab S7 FE the same as this one? and are the screens interchangeable?

Moe - Réponse

Hi Moe!

I'm not sure about the FE version. Based on the differences, I would wager the screen removal procedure is similar but not identical; however, it's unlikely that the screens are compatible.

Alex Diaz-Kokaisl - Réponse

does this come with the adhesive needed to reapply on the body

chris newsom - Réponse

Hi, where can I source the aforementioned Fingerprint Sensor Calibration Toolkit? I've looked around everywhere and nothing.

Logan Otto - Réponse

Will the S-Pen work again after mounting the new display? Is there any circuitry that one has to move from the old display to the new one?

Ivano Irrera - Réponse

Ajouter un commentaire

Nombre de vues :

Dernières 24 heures : 23

7 derniers jours : 237

30 derniers jours : 1,119

Total : 31,385