Aller au contenu principal

Cette version peut contenir des modifications incorrectes. Passez au dernier aperçu vérifié.

Ce dont vous avez besoin

  1. Cette étape n’est pas traduite. Aidez à la traduire

    : étape 1, image 1 de 2 : étape 1, image 2 de 2
    • If using the car's emergency scissor-jack, identify the designated placement locations for this specific jack.

    • The jack needs to be placed behind the front tire in one of the two slots indicated by the red markers.

    • The slots are one foot behind each front tire, and 8-10 inches inward from the outer edge of the car.

    • While on flat ground, put the jack in the slot closest to the front.

  2. Cette étape n’est pas traduite. Aidez à la traduire

    : étape 2, image 1 de 2 : étape 2, image 2 de 2
    • Do not go under the car unless the car is support by a jack stand.

    • Put a block in front of one of the rear tires and another block behind the same rear tire. This prevents the car from rolling in either direction while the front is jacked up.

    • To operate the jack stand, turn clockwise to lift up and turn counter clockwise to low down.

  3. Cette étape n’est pas traduite. Aidez à la traduire

    : étape 3, image 1 de 2 : étape 3, image 2 de 2
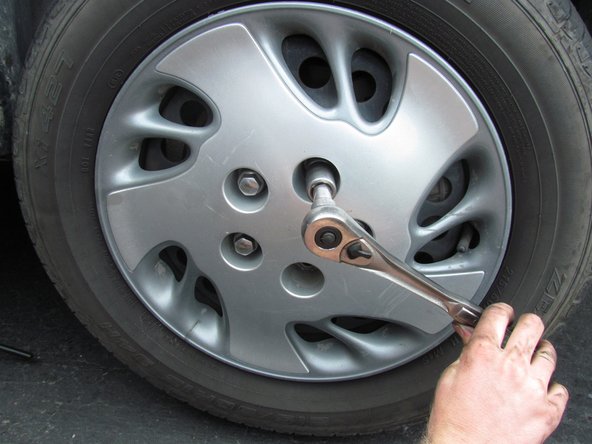
    • Loosen the plastic lug nuts, located on the hub-cap, with a 19mm socket.

    • When putting the hub-cap back onto the wheel, tighten the lugs until you feel firm resistance. Do not over tighten because the threads will strip.

  4. Cette étape n’est pas traduite. Aidez à la traduire

    : étape 4, image 1 de 2 : étape 4, image 2 de 2
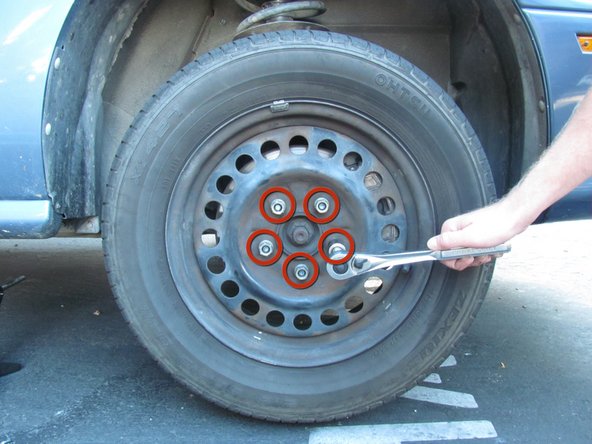
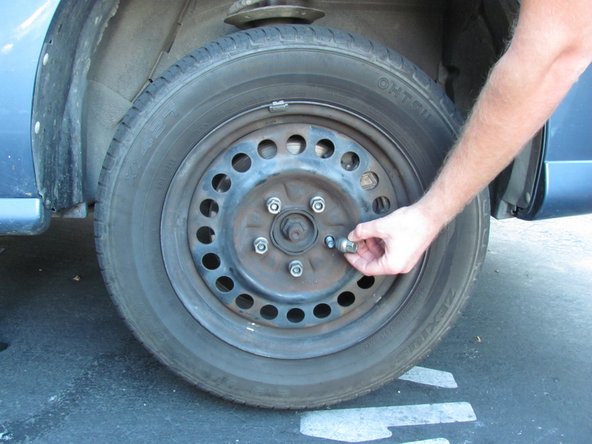
    • Loosen and remove the five metal lug nuts with a 19mm socket.

    • Torque the metal lug nuts to 100 ft-lbs when putting the wheels back on the car.

  5. Cette étape n’est pas traduite. Aidez à la traduire

    : étape 5, image 1 de 1
    • Remove the wheel from the hub.

  6. Cette étape n’est pas traduite. Aidez à la traduire

    : étape 6, image 1 de 3 : étape 6, image 2 de 3 : étape 6, image 3 de 3
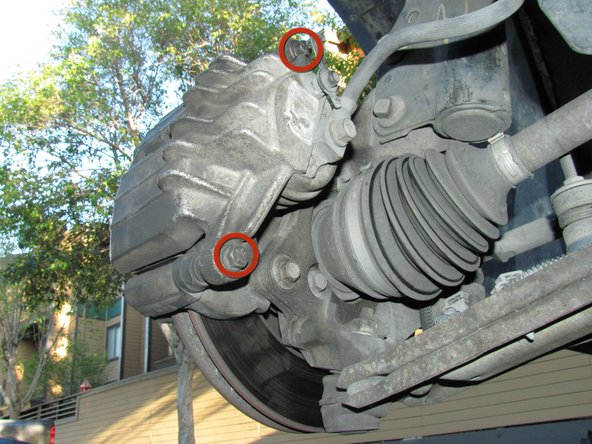
    • Loosen and remove the two bolts located on the backside of the caliper with a 12mm socket.

    • Torque the two bolts to 33 ft-lbs when putting the caliper back on the mounting bracket.

    • Remove the caliper from the mounting bracket.

    • Do not allow the caliper to hang freely. This will causes stretching or internal blocking of the brake line.

    • TIP: Using hang wire to hang the caliper on the spring mount to keep it out of the way.

  7. Cette étape n’est pas traduite. Aidez à la traduire

    : étape 7, image 1 de 2 : étape 7, image 2 de 2
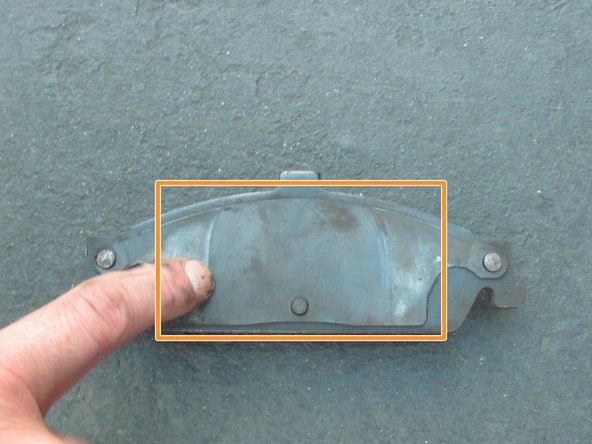
    • Use a pry bar to remove the old brake pad from the bracket.

    • Use the same procedure for removing the pads on the other sides.

    • TIP: Using C-clamp to compress the caliper to refit the new brake pads

    • After removing the pads, you can check the rotor for irregular wear or damage. Run your finger across the face of the rotor to feel for grooves or chipping.

  8. Cette étape n’est pas traduite. Aidez à la traduire

    : étape 8, image 1 de 3 : étape 8, image 2 de 3 : étape 8, image 3 de 3
    • Pull the two caliper pins out of the mounting bracket by hand.

    • If needed, apply "Brake Lubricant" to the two caliper pins. This fights corrosion buildup and allows the pins to slide off more smoothly.

    • Before putting the new brake pads on, apply "Disc Brake Quiet" compound to the metal backing of the pads to keep them from squeaking.

Ligne d'arrivée

8 autres ont terminé cette réparation.

Sank Yang

Membre depuis le 10/03/12

484 Réputation

5 tutoriels rédigés

Équipe

Cal Poly, Team 9-15, Amido Fall 2012 Membre de l'équipe Cal Poly, Team 9-15, Amido Fall 2012

CPSU-AMIDO-F12S9G15

4 membres

5 tutoriels rédigés

0 commentaires

Ajouter un commentaire

Nombre de vues :

Dernières 24 heures : 1

7 derniers jours : 6

30 derniers jours : 39

Total : 27,378