Introduction
Le retrait de l'écran nécessite de couper l'adhésif à l'aide d'un outil spécial pour ouvrir l'iMac. Une fois la réparation terminée, suivez notre tutoriel de bandes adhésives pour décoller l'ancien adhésif et le remplacer par de nouvelles bandes adhésives double-face.
Ce dont vous avez besoin
-
Outil utilisé dans cette étape :iMac Intel 27" Cardboard Service Wedge$4.99
-
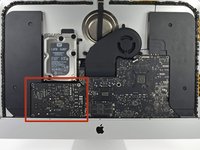
Si la charnière n'est pas bloquée, l'iMac sera mal équilibré et vous aurez du mal à le manipuler. Vous pouvez effectuer une réparation en posant l'iMac à l'horizontale, mais ce sera plus rapide et plus facile avec une cale de maintien pour iMac.
-
Si vous utilisez la cale de maintien en carton iFixit, suivez ces instructions pour la monter.
-
-
-
Outil utilisé dans cette étape :Plastic Cards$2.99
-
Posez l'iMac à l'envers sur une table.
-
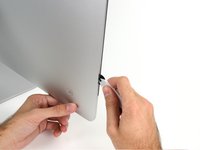
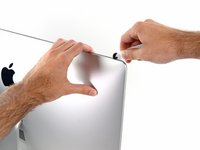
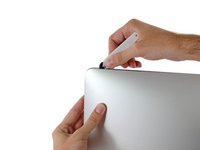
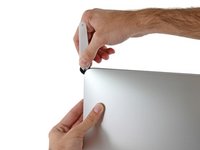
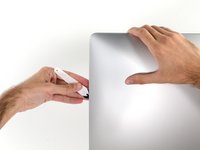
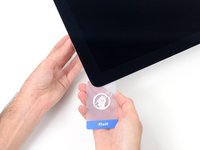
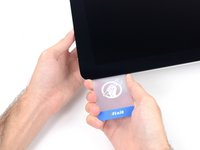
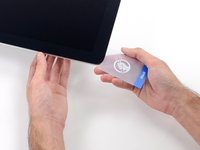
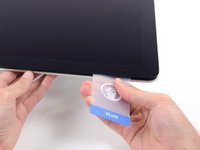
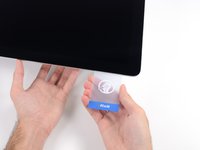
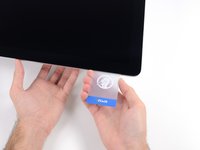
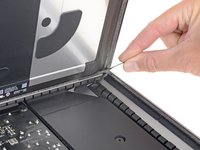
En partant de l'angle supérieur droit de l'iMac, insérez une carte en plastique entre l'écran et le châssis.
-
-
-
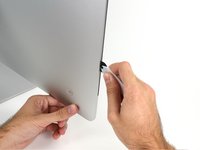
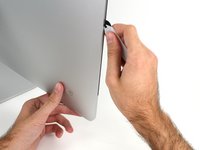
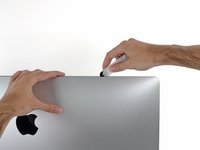
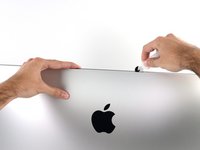
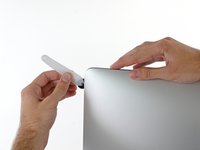
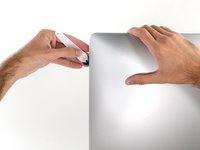
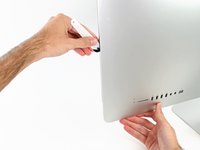
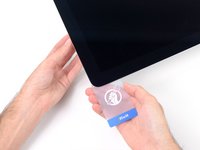
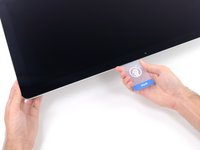
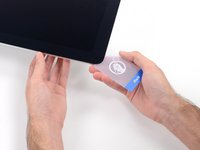
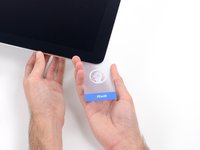
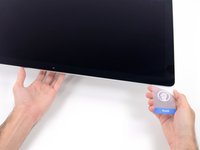
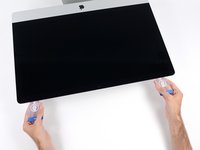
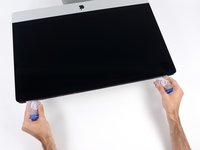
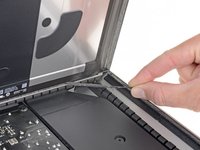
Insérez les deux cartes près des angles de l'iMac, comme illustré, puis tournez-les délicatement pour élargir l'interstice entre l'écran et le boîtier.
-
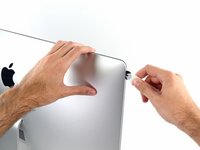
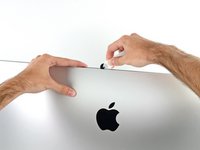
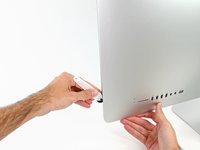
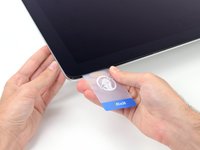
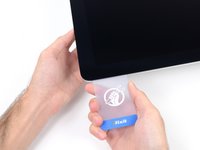
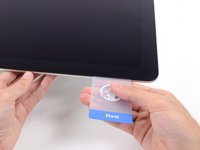
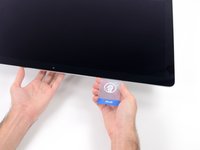
Si l'écran et le boîtier restent collés à certains endroits, utilisez l'une des cartes pour découper la mousse adhésive et les séparer.
-
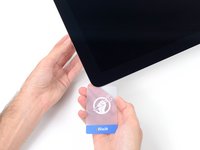
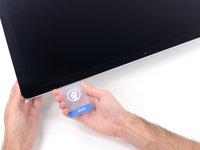
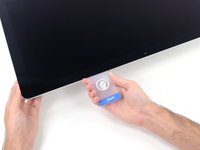
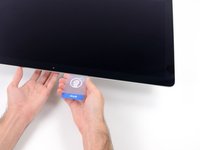
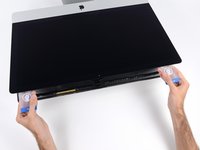
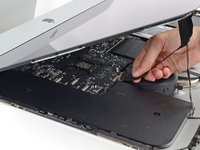
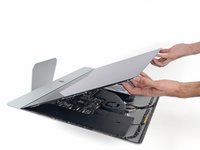
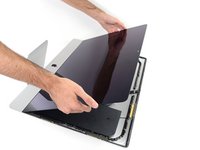
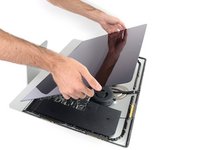
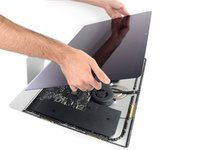
Commencez à soulever le haut de l'écran pour le séparer du châssis.
-
-
-
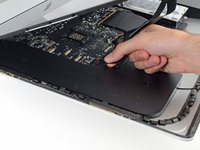
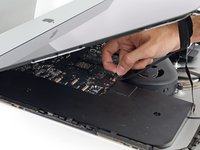
S'il y a un câble ou une nappe sous le ruban adhésif, retirez toujours le ruban en premier.
-
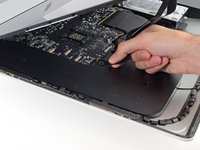
Si la nappe est collée au châssis, utilisez d'abord un iOpener chauffé ou un sèche-cheveux pour ramollir l'adhésif. Vous pouvez ensuite faire glisser un médiator sous la nappe pour la décoller. Ne tirez jamais directement sur les connecteurs délicats.
-
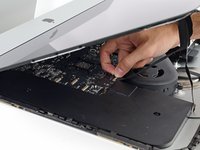
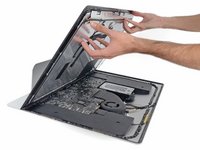
Faites glisser un médiator sous les coussinets en mousse pour les séparer de l'écran et retirez-les délicatement. Vous devrez peut-être utiliser du ruban adhésif double-face pour les rattacher au nouvel écran.
-


Pour remonter votre appareil, suivez ces instructions en sens inverse et utilisez notre tutoriel de bandes adhésives pour recoller la vitre d'écran.
Déposez vos déchets électroniques dans un point de recyclage certifié.
Votre réparation iMac Intel 27" EMC 2639 ne s’est pas déroulée comme prévu ? Consultez nos conseils basiques de diagnostic ou notre Forum pour obtenir de l’aide.
Annulation : je n'ai pas terminé ce tutoriel.
44 autres ont terminé cette réparation.
Merci à ces traducteurs :
100%

Annika Faelker nous aide à réparer le monde ! Vous voulez contribuer ?
Commencez à traduire ›

12 commentaires
I'd like to note, that it is in no way necessary to save the wedge for when the screen is removed. In fact, the wedge is used when removing the LCD, because the rear housing may tilt when removing it, and the wedge counters this.
So, for your own sake, DO NOT lay down the iMac, but in stead, leave it standing upright, with the wedge in place, when removing the display, and let it stay there until you're done with servicing your iMac.
Also, from step 18 through 22, the iMac needs to be standing upright, NOT lying down, as you can easily damage the glass when lifting it like that.
Since there is not antenna wire to cut around the frame, I used a razor blade and and stopped at the camera and it worked like a charm. Where the guide used the card on the bottom edge for the final cut, I used a razor blade also and it only took one cut verses going back and forth with a card.
When I used a tool, the adhesive kept sticking together again as the guide mentions. The razor cut the adhesive down the center itself, so it was one easy pass and on sticky adhesive.
If you take a small chip out of the glass on the edge or crack, just get cell phone protector and cut it to size. You can also go to home depot and they have a glass specific crazy glue that you can first put in the crack or chip (do not put on the casing part. I cleaned with crazy glue first). Use a razor to get the glue into the crack, let dry and then clean off and put on the screen protector. I used rubbing alcohol first to clean the glass and chip area.
Not a perfect solution, but better than $700+ for a display.
When you cutting the edge you can also put some books under the display part to keep it level and easy to go around as you cut. If you cut the bottom all the way with the razor, you will have a clean cut and you can pull it towards you while the unit is as described in the guide steps 18-22. I do not like the idea of standing up the unit as there is more pressure on the bottom edge of the glass from the displaly