Introduction
Suivez les instructions de ce tutoriel iFixit pour apprendre comment utiliser l'Anti-Clamp lors d'une réparation électronique.
À la fois pince et ventouse téléphone, elle sera votre alliée lors de la première étape cruciale : ouvrir le téléphone, la tablette, ou autre.
Ce dont vous avez besoin
-
-
Si l'écran de votre appareil est fissuré ou que sa surface est glissante, suivez ce tutoriel pour appliquer le ruban adhésif inclus.
-
Si votre appareil peut être ouvert à la fois depuis l'écran et la coque arrière, suivez ce tutoriel pour appliquer le ruban adhésif inclus.
-
-
Outil utilisé dans cette étape :Clampy - Anti-Clamp$24.95
-
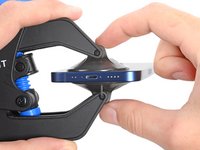
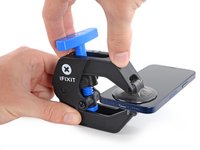
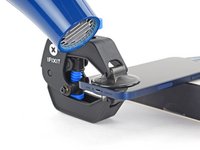
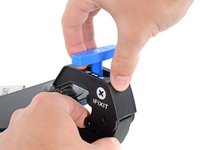
Tirez la poignée bleue vers l'arrière, en direction de l'icône de déverrouillage, pour désengager les bras de l'Anti-Clamp.
-
-
-
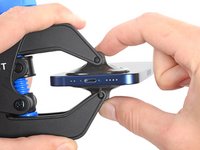
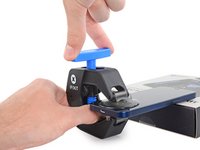
Faites tourner l'Anti-Clamp sur le côté, pour qu'il puisse pincer le bord par lequel vous allez commencer. Référez-vous à votre tutoriel d'origine pour savoir par quel bord commencer.
-
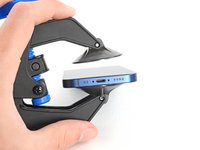
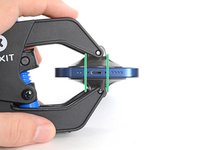
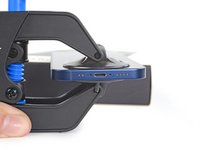
Centrez les ventouse près du bord, au-dessus de la surface lisse de votre appareil.
-
-
-
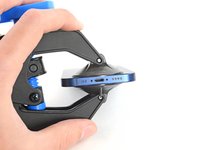
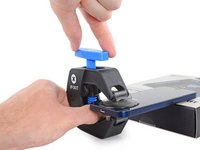
Pressez les ventouses ensemble pour les fixer à l'appareil.
-
-
-
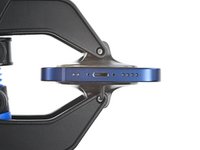
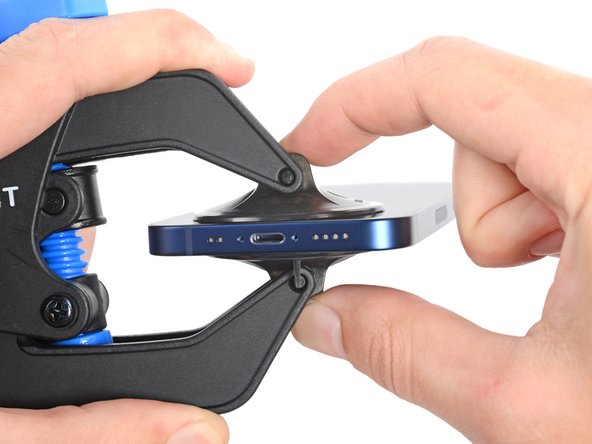
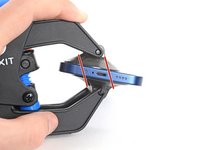
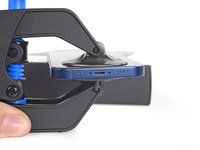
L'Anti-Clamp fonctionne de manière optimale lorsque ses ventouses sont alignées l'une par rapport à l'autre.
-
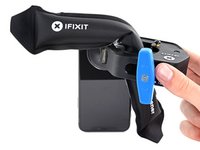
Si l'alignement est incorrect, les ventouses risquent de se détacher trop tôt. Retirez-les de l'appareil à l'aide de leurs languettes de retrait et recentrez-les.
-
-
-
-
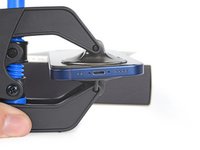
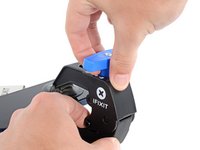
Poussez la poignée bleue vers l'avant pour verrouiller les bras.
-
-
-
Placez un support sous votre appareil pour que l'Anti-Clamp tienne droit sans être maintenu en place.
-
-
-
Tournez la poignée dans le sens des aiguilles d'une montre d'un tour complet (360 degrés) ou jusqu'à ce que les ventouses commencent à s'étirer.
-
-
-
Pour les appareils plus petits, insérez un iOpener chauffé dans les bras de l'Anti-Clamp pour chauffer votre appareil.
-
Pour les appareils plus grands, comme les modèles d'iPhone 12 et plus récents, utilisez un sèche-cheveux ou un pistolet thermique pour ramollir l'adhésif le long du bord où vous allez commencer.
-
-
-
Attendez une minute pour permettre à l'adhésif de se détacher et d'ouvrir un interstice.
-
Si, après plusieurs séances de chauffe, l'appareil ne montre aucun signe d'ouverture, tournez la poignée d'un quart de tour.
-
-
-
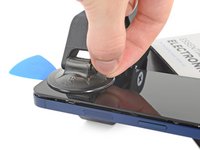
Insérez un médiator dans l'interstice ouvert par l'Anti-Clamp.
-
-
-
Tirez la poignée bleue vers l'arrière, jusqu'à l'icône de déverrouillage, pour débloquer les bras.
-
Retirez les ventouses de l'appareil à l'aide de leurs languettes.
-
Retirez l'Anti-Clamp et posez votre appareil sur une surface plane.
-
-
-
Retournez à votre tutoriel d'origine et continuez le démontage, en sautant toutes les étapes qui ouvrent l'appareil à l'aide d'une ventouse.
-


Vous trouverez d'autres tutoriels sur les compétences en réparation électronique ici.
Pour transformer votre Anti-Clamp en Clampy rigolo, suivez ce tutoriel.
Annulation : je n'ai pas terminé ce tutoriel.
124 autres ont terminé cette réparation.
Merci à ces traducteurs :
100%


Ces traducteurs nous aident réparer le monde ! Vous voulez contribuer ?
Commencez à traduire ›


11 commentaires de tutoriel
Very clear step-by-step guide. The next time I do a battery replacement I intend to use one of these.
Engaging the Opening Mode the first time takes a bit of a push, don't be afraid, keep pushing until you hear a click. Seems to be easier to engage after the first time.
Hi Ed,
Thanks for the helpful feedback! I've implemented your note into the guide step.
I used mine to open a Samsung Galaxy Tab A7 tablet. Very frustrating, seemed like you needed three hands to put it in place (though later I found a better procedure). The OEM case glue was quite powerful (used a heating pad to get the tablet Very hot). The Anti-Clamp had difficulty holding to the back of the case and kept losing its grip. I didn't try the packing tape trick, just now noticed it. I mainly used the top suction cup just by itself.
The replacement battery had a very long battery cable and didn't lay flat, which caused a bright spot on the display where the cable "kink" was. So time to remove the case again. This time I stuck each suction cup individually, screen side first, the case - firmly pressing each cup flat after placement. No need to "fight" the Anti-Clamp to get it in place, plus I think I got a better hold with the cups. The B-7000 glue I used was much easier to break loose than the OEM case glue.
To loosen the suction cups I slid an opening pick under the edge of the cup.