Aller au contenu principal
Pour réparer ensemble - Je crée un compte

MNT Pocket Reform Processor Module Replacement

Ce dont vous avez besoin

    1. MNT Pocket Reform Processor Module Replacement, Shut down the laptop: étape 1, image 1 de 3 MNT Pocket Reform Processor Module Replacement, Shut down the laptop: étape 1, image 2 de 3 MNT Pocket Reform Processor Module Replacement, Shut down the laptop: étape 1, image 3 de 3
      • If you've installed an operating system, follow the appropriate steps to safely shut down the laptop.

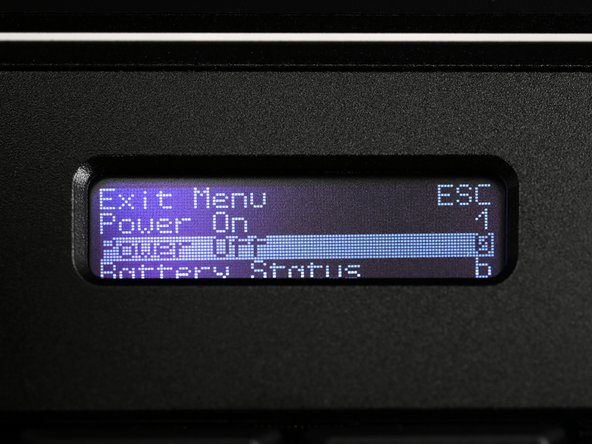
      • If you've not yet installed an operating system, or the laptop is not responsive, you can shut it down with these steps:

      • Turn on the OLED screen by pressing the Hyper key (diagonal arrow) and Enter at the same time.

      • Use the arrow keys to select Power Off on the OLED screen.

      • Press Enter to shut down the laptop.

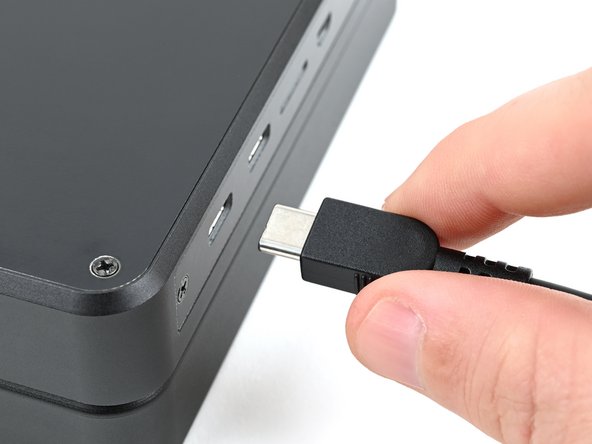
      • Disconnect all cables from the laptop.

      Demander à FixBot

      Ajouter un commentaire

    2. MNT Pocket Reform Processor Module Replacement, Turn off the standby power: étape 2, image 1 de 2 MNT Pocket Reform Processor Module Replacement, Turn off the standby power: étape 2, image 2 de 2
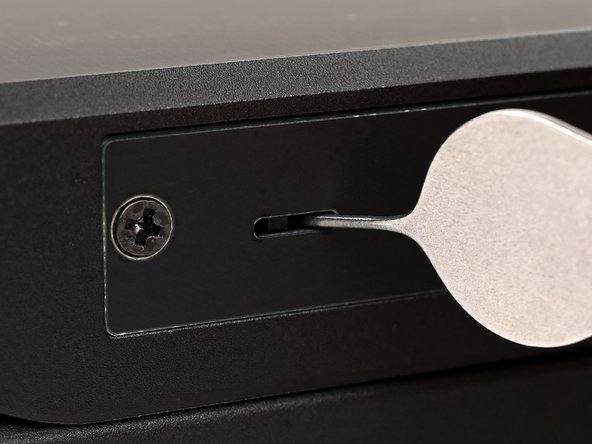
      • Use a small tool, like a SIM eject tool or a bent paperclip, to turn off the standby power switch by sliding the switch away from the headset jack.

      • The standby power switch is located in a small recess on the same side as the headset jack.

      Demander à FixBot

      Ajouter un commentaire

    1. MNT Pocket Reform Processor Module Replacement, Remove the bottom cover screws: étape 3, image 1 de 2 MNT Pocket Reform Processor Module Replacement, Remove the bottom cover screws: étape 3, image 2 de 2
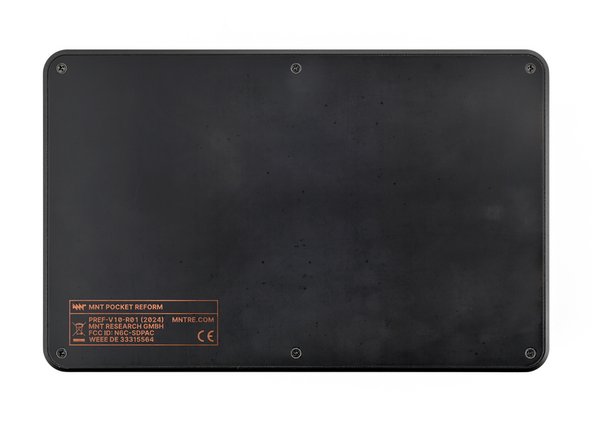
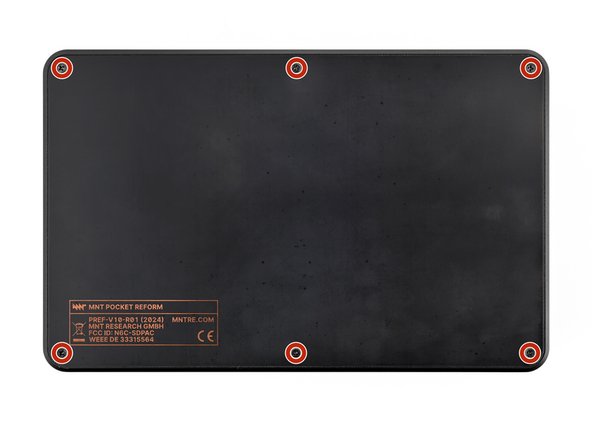
      • Place the laptop on your work surface so the bottom cover, with the regulatory info box, is facing up.

      • Use a Phillips screwdriver to remove the six 4.8 mm‑long screws securing the bottom cover.

      Demander à FixBot

      Ajouter un commentaire

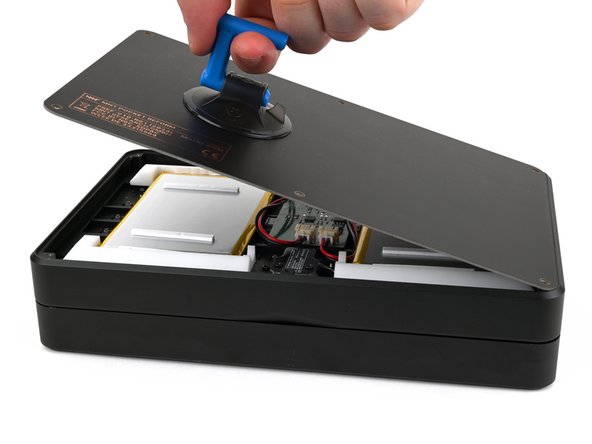
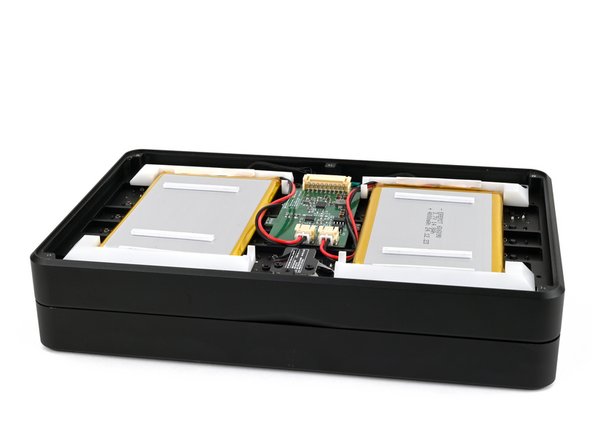
    2. MNT Pocket Reform Processor Module Replacement, Remove the bottom cover: étape 4, image 1 de 3 MNT Pocket Reform Processor Module Replacement, Remove the bottom cover: étape 4, image 2 de 3 MNT Pocket Reform Processor Module Replacement, Remove the bottom cover: étape 4, image 3 de 3
      • The bottom cover is made of printed circuit board (PCB) material. Press gently but firmly near an edge when applying the suction handle to avoid breaking the cover.

      • Apply a suction handle to the bottom cover.

      • Use the suction handle to lift the bottom cover off of the laptop.

      • Alternatively, you can use a thin prying tool to lift the cover, or tilt the laptop until the cover falls out.

      • During reassembly, place the bottom cover on the laptop so the info box is opposite the hinges.

      Demander à FixBot

      Ajouter un commentaire

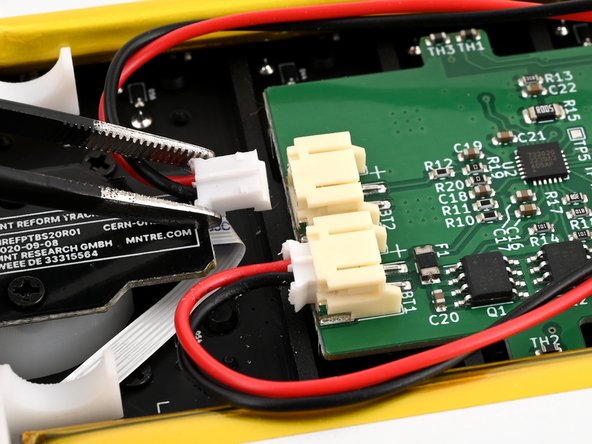
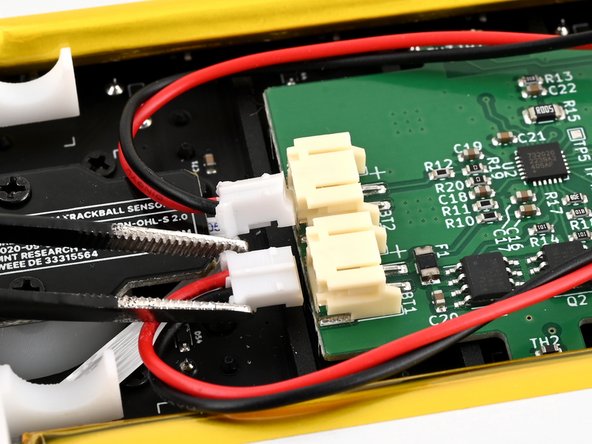
    1. MNT Pocket Reform Processor Module Replacement, Disconnect the batteries: étape 5, image 1 de 3 MNT Pocket Reform Processor Module Replacement, Disconnect the batteries: étape 5, image 2 de 3 MNT Pocket Reform Processor Module Replacement, Disconnect the batteries: étape 5, image 3 de 3
      • Be careful not to damage the lithium-polymer batteries when working around them with metal tools. If the batteries are damaged or deformed in any way, take appropriate precautions.

      • Use a pair of tweezers or your fingers to disconnect the batteries' sliding connectors from the charger board.

      Demander à FixBot

      Ajouter un commentaire

    2. MNT Pocket Reform Processor Module Replacement, Remove the batteries: étape 6, image 1 de 3 MNT Pocket Reform Processor Module Replacement, Remove the batteries: étape 6, image 2 de 3 MNT Pocket Reform Processor Module Replacement, Remove the batteries: étape 6, image 3 de 3
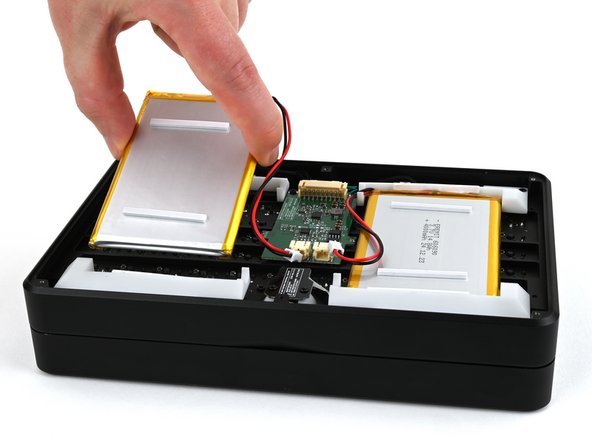
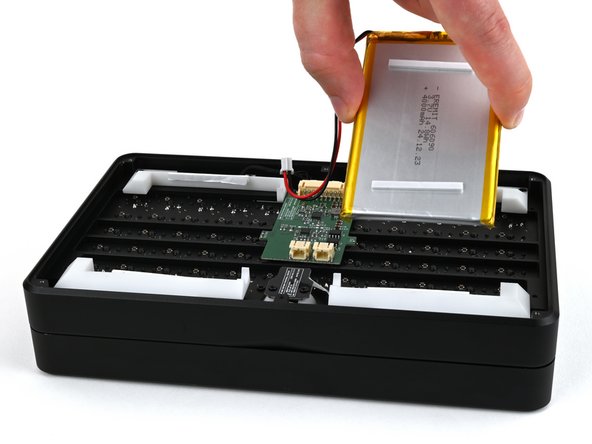
      • Lift the batteries out of the frame.

      • During reassembly, install the batteries so the foam stickers face up, the sides of the batteries with wires are towards the hinges, and the wires run towards the middle of the laptop.

      Demander à FixBot

      Ajouter un commentaire

    1. MNT Pocket Reform Processor Module Replacement, Secure the bottom cover: étape 7, image 1 de 3 MNT Pocket Reform Processor Module Replacement, Secure the bottom cover: étape 7, image 2 de 3 MNT Pocket Reform Processor Module Replacement, Secure the bottom cover: étape 7, image 3 de 3
      • Place the bottom cover on the laptop.

      • Use a Phillips screwdriver to secure the bottom cover with the six 4.8 mm‑long screws.

      Demander à FixBot

      Ajouter un commentaire

    1. MNT Pocket Reform Processor Module Replacement, Remove the top cover: étape 8, image 1 de 2 MNT Pocket Reform Processor Module Replacement, Remove the top cover: étape 8, image 2 de 2
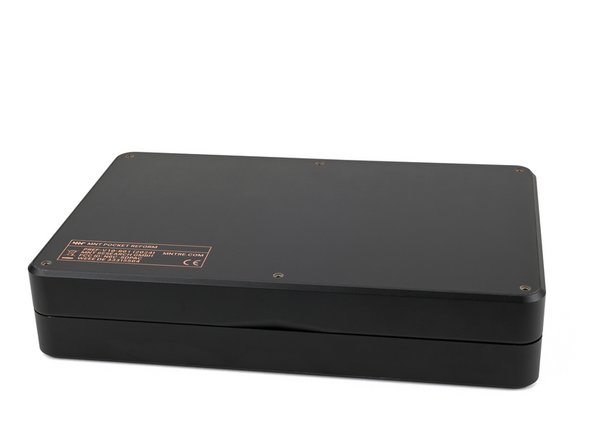
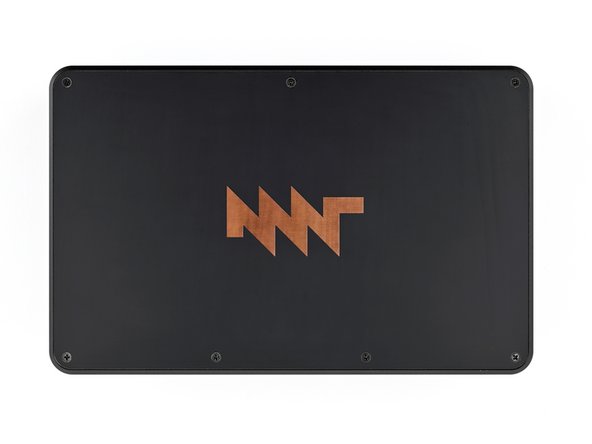
      • Place the laptop on your work surface so the top cover with the MNT logo is facing up.

      • Use a Phillips screwdriver to remove the seven 4.8 mm‑long screws securing the top cover.

      Demander à FixBot

      Ajouter un commentaire

    2. MNT Pocket Reform Processor Module Replacement: étape 9, image 1 de 3 MNT Pocket Reform Processor Module Replacement: étape 9, image 2 de 3 MNT Pocket Reform Processor Module Replacement: étape 9, image 3 de 3
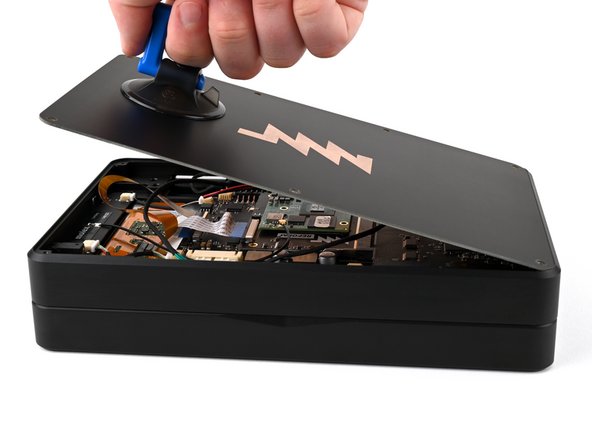
      • The top cover is made of printed circuit board (PCB) material. Press gently but firmly near an edge when applying the suction handle to avoid breaking the cover.

      • Apply a suction handle to the top cover.

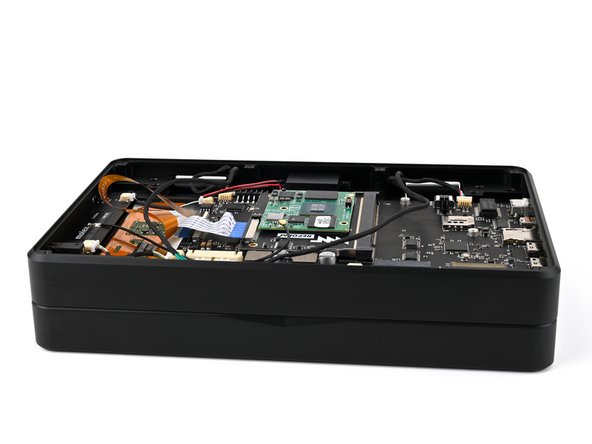
      • Use the suction handle to lift the top cover off of the laptop.

      • Alternatively, you can use a thin prying tool to lift the cover, or tilt the laptop until the cover falls out.

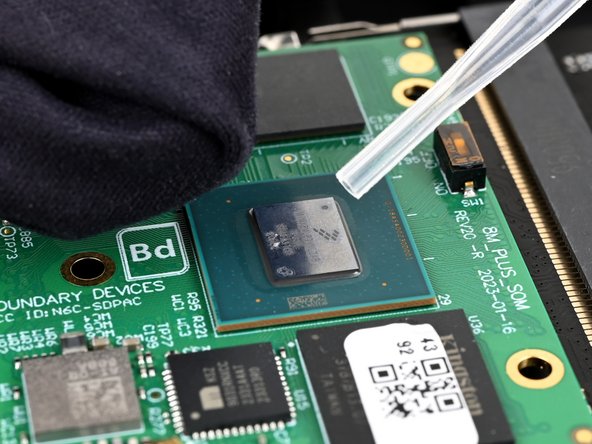
      • There's a thermal pad between the top cover and the processor that may stick to the top cover during removal.

      Demander à FixBot

      Ajouter un commentaire

    1. MNT Pocket Reform Processor Module Replacement, Thermal pad info: étape 10, image 1 de 3 MNT Pocket Reform Processor Module Replacement, Thermal pad info: étape 10, image 2 de 3 MNT Pocket Reform Processor Module Replacement, Thermal pad info: étape 10, image 3 de 3
      • If the thermal pad is damaged in any way, follow the thermal pad replacement guide to apply a new thermal pad during reassembly.

      • If the thermal pad stuck to the top cover and is in good condition, you can proceed with this repair and simply reinstall the top cover with the thermal pad.

      • If the thermal pad stuck to the processor and is in good condition, use a pair of tweezers or your fingers to remove the thermal pad and set it aside. Then, follow the reassembly instructions below.

      • During reassembly:

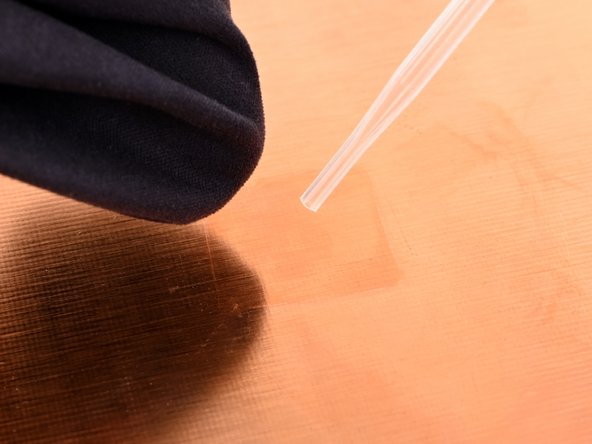
      • Use high concentration (greater than 90%) isopropyl alcohol and a coffee filter or lint-free cloth to clean the new processor and the area of the cover that will contact the thermal pad.

      • Apply the thermal pad to the processor on the new processor module.

      • Proceed with re-installing the top cover.

      Demander à FixBot

      Ajouter un commentaire

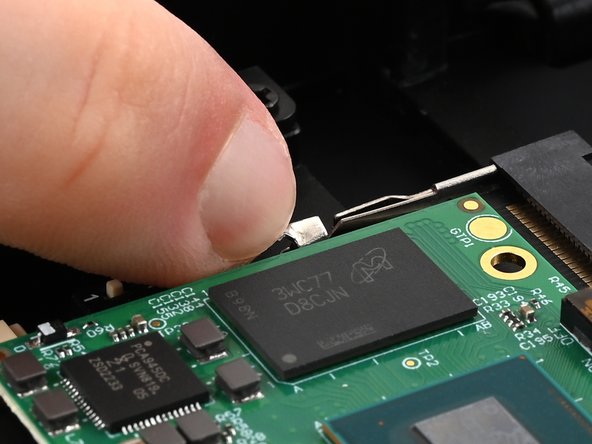
    2. MNT Pocket Reform Processor Module Replacement, Disconnect the WiFi antenna: étape 11, image 1 de 2 MNT Pocket Reform Processor Module Replacement, Disconnect the WiFi antenna: étape 11, image 2 de 2
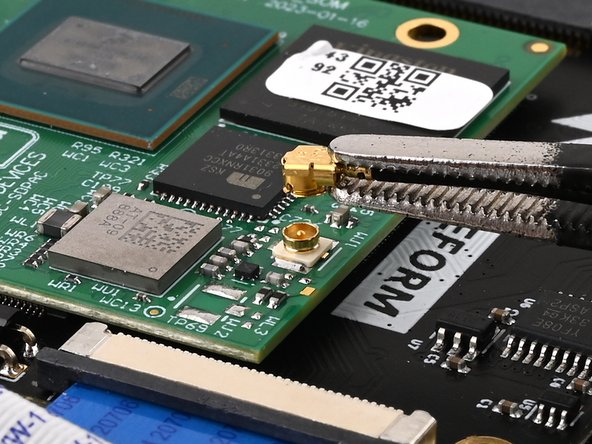
      • Slide one arm of a pair of tweezers under the antenna coaxial cable connector, as close to the metal head as possible.

      • Lift the connector straight up and off the processor module to disconnect it.

      • Be sure to lift the coaxial connector straight up off of the socket to avoid bending the connector.

      • During reassembly, align the connector over the socket and use your finger to press it into place. A tool like a spudger can slide off and damage the surface-mounted components around the connector.

      Demander à FixBot

      Ajouter un commentaire

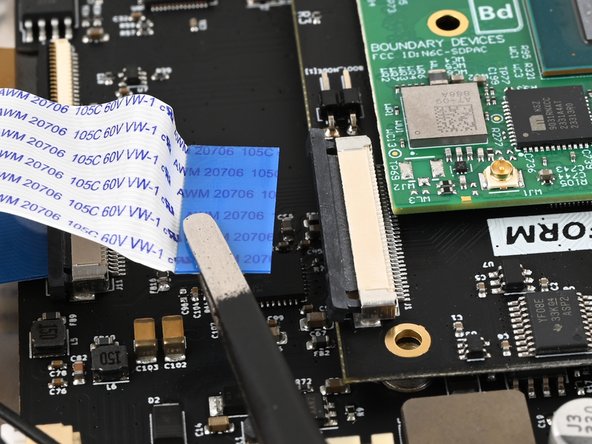
    3. MNT Pocket Reform Processor Module Replacement, Disconnect the ribbon cable: étape 12, image 1 de 3 MNT Pocket Reform Processor Module Replacement, Disconnect the ribbon cable: étape 12, image 2 de 3 MNT Pocket Reform Processor Module Replacement, Disconnect the ribbon cable: étape 12, image 3 de 3
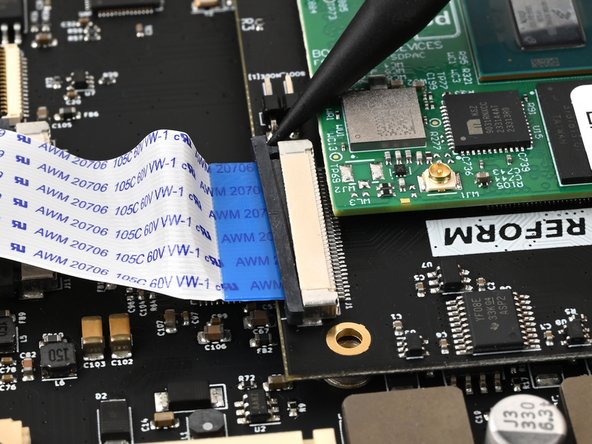
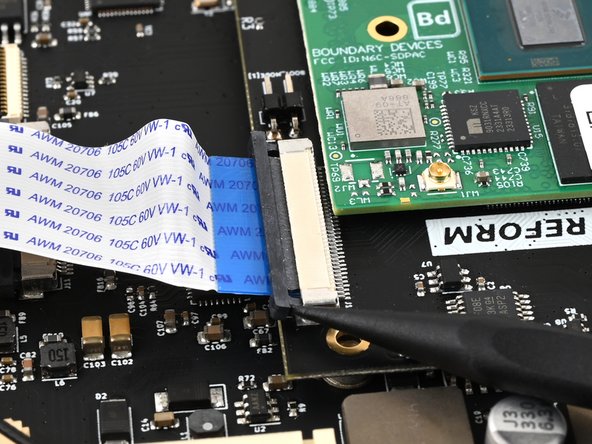
      • Use a spudger to push on alternating sides of the locking tab that holds the interconnect ribbon cable in place on the processor module until the locking tab clicks into its open position.

      Demander à FixBot

      Ajouter un commentaire

    4. MNT Pocket Reform Processor Module Replacement: étape 13, image 1 de 2 MNT Pocket Reform Processor Module Replacement: étape 13, image 2 de 2
      • Use a pair of tweezers or your fingers to grip the blue tab on the ribbon cable and pull it out of the connector.

      Demander à FixBot

      Ajouter un commentaire

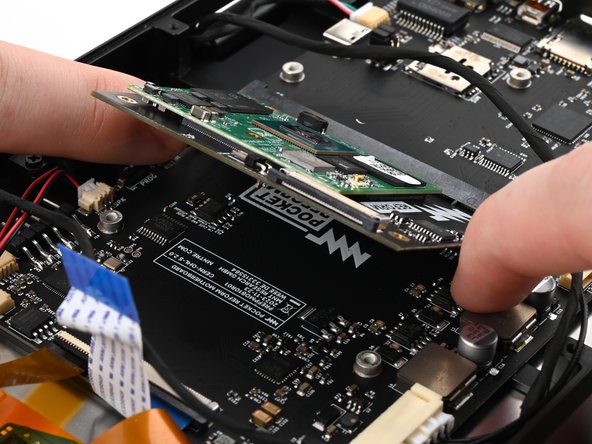
    5. MNT Pocket Reform Processor Module Replacement, Remove the processor module: étape 14, image 1 de 3 MNT Pocket Reform Processor Module Replacement, Remove the processor module: étape 14, image 2 de 3 MNT Pocket Reform Processor Module Replacement, Remove the processor module: étape 14, image 3 de 3
      • Use your fingers to pull the two metal tabs on the short sides of the processor module away from the module at the same time.

      • The processor module will spring up once both tabs are released.

      Demander à FixBot

      Ajouter un commentaire

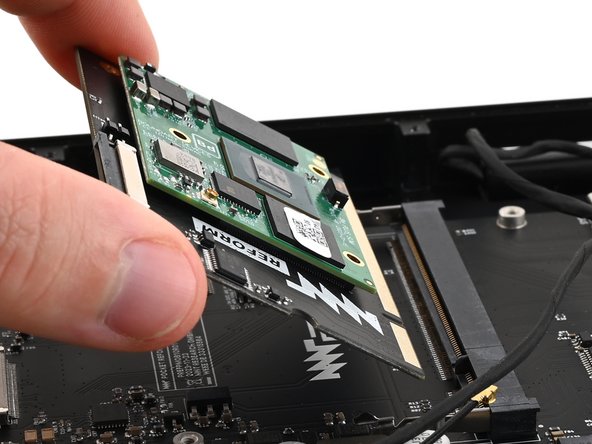
    6. MNT Pocket Reform Processor Module Replacement: étape 15, image 1 de 2 MNT Pocket Reform Processor Module Replacement: étape 15, image 2 de 2
      • Pull the processor module out of its socket on the motherboard.

      • During reassembly, insert the processor module at an angle of about 45º before pressing it down and engaging the clips. The module should slide in easily. If it doesn't reposition it and try again.

      Demander à FixBot

      Ajouter un commentaire

Conclusion

To reassemble your device, follow these instructions in reverse order.

Repair didn’t go as planned? Try some basic troubleshooting, or ask our Answers community for help.

Take your e-waste to an R2 or e-Stewards certified recycler.

Annulation : je n'ai pas terminé ce tutoriel.

Spencer Pennington

Membre depuis le 09/09/23

26 676 Réputation

126 tutoriels rédigés

Équipe

Guide Team Membre de l'équipe Guide Team

Staff

10 membres

32 609 tutoriels rédigés

0 commentaires de tutoriel

Ajouter un commentaire

Nombre de vues :

Dernières 24 heures : 1

7 derniers jours : 5

30 derniers jours : 20

Total : 416