Aller au contenu principal
Pour réparer ensemble - Je crée un compte

Mac mini Late 2018 Memory (RAM) Replacement

Ce dont vous avez besoin

Vidéo d'introduction

    1. Mac mini Late 2018 Memory (RAM) Replacement, Bottom Cover: étape 1, image 1 de 1
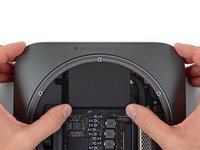
      • Power off and unplug your Mac mini before you begin.

      • Use an opening tool to pry the bottom cover up off of the Mac mini.

      Demander à FixBot

      Ajouter un commentaire

    2. Mac mini Late 2018 Memory (RAM) Replacement: étape 2, image 1 de 2 Mac mini Late 2018 Memory (RAM) Replacement: étape 2, image 2 de 2
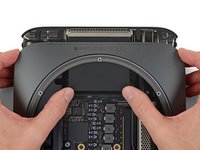
      • Lift and remove the bottom cover.

      • To reinstall the cover:

      • Align it carefully so that the words "Mac mini" can be read when the ports are facing you.

      • Then, press down on the cover to snap its three hidden clips into place.

      Demander à FixBot

      Ajouter un commentaire

    1. Mac mini Late 2018 Memory (RAM) Replacement, Antenna Plate: étape 3, image 1 de 1
      Outil utilisé dans cette étape :
      Magnetic Project Mat
      $19.95
      • Remove six TR6 Torx security screws securing the antenna plate, of the following lengths:

      • Three 4.1 mm shoulder screws

      • Three 1.8 mm screws

      • Throughout this repair, keep track of each screw and make sure it goes back exactly where it came from to avoid damaging your Mac.

      Demander à FixBot

      Ajouter un commentaire

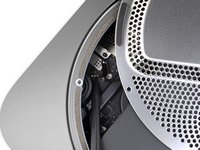
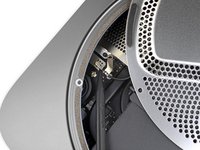
    2. Mac mini Late 2018 Memory (RAM) Replacement: étape 4, image 1 de 2 Mac mini Late 2018 Memory (RAM) Replacement: étape 4, image 2 de 2
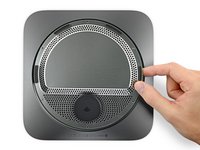
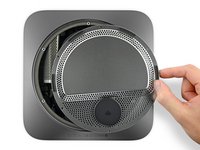
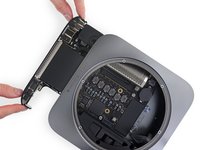
      • Do not completely remove the antenna plate; it is still connected to the Mac mini by an antenna cable.

      • With the Mac mini's ports facing you, carefully lift the antenna plate and slide it about an inch to the right.

      Demander à FixBot

      Ajouter un commentaire

    3. Mac mini Late 2018 Memory (RAM) Replacement: étape 5, image 1 de 2 Mac mini Late 2018 Memory (RAM) Replacement: étape 5, image 2 de 2
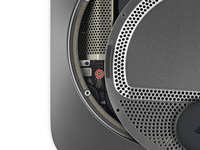
      • Use a T6 Torx driver to remove the 2.8 mm screw securing the antenna cable to the Mac mini's logic board.

      Demander à FixBot

      Ajouter un commentaire

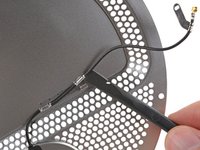
    4. Mac mini Late 2018 Memory (RAM) Replacement: étape 6, image 1 de 3 Mac mini Late 2018 Memory (RAM) Replacement: étape 6, image 2 de 3 Mac mini Late 2018 Memory (RAM) Replacement: étape 6, image 3 de 3
      Outil utilisé dans cette étape :
      Tweezers
      $4.99
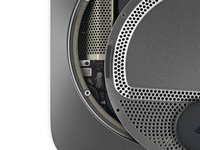
      • The antenna cable connector and socket are fragile.

      • Use the point of a spudger or fine tweezers to gently pry the antenna cable connector straight up off its socket on the logic board.

      • To reconnect the cable, use tweezers to position it carefully over its socket on the logic board, and then press it straight down until it snaps into place.

      • If you need more slack in the cable, you can temporarily pry it from the clips securing it to the antenna plate.

      Demander à FixBot

      Ajouter un commentaire

    5. Mac mini Late 2018 Memory (RAM) Replacement: étape 7, image 1 de 1
      • Remove the antenna plate from the Mac mini.

      Demander à FixBot

      Ajouter un commentaire

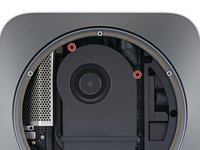
    1. Mac mini Late 2018 Memory (RAM) Replacement, Fan: étape 8, image 1 de 2 Mac mini Late 2018 Memory (RAM) Replacement, Fan: étape 8, image 2 de 2
      • Use a T6 Torx driver to remove the four 7.2 mm screws securing the fan:

      • Two screws securing the fan to the logic board

      • Two screws with rubber shoulders securing the fan to the exhaust vent

      • Rubber grommets secure these screws to the fan, so they may not come out completely. Just make sure they are fully loosened.

      Demander à FixBot

      Ajouter un commentaire

    2. Mac mini Late 2018 Memory (RAM) Replacement: étape 9, image 1 de 2 Mac mini Late 2018 Memory (RAM) Replacement: étape 9, image 2 de 2
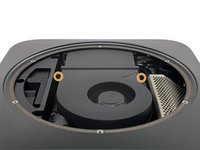
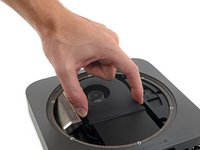
      • Don't try to remove the fan completely in this step—just lift it so you can access the cable underneath.

      • Lift the fan from the flat edge where it meets the exhaust vent, being careful not to strain the fan cable underneath.

      Demander à FixBot

      Ajouter un commentaire

    3. Mac mini Late 2018 Memory (RAM) Replacement: étape 10, image 1 de 2 Mac mini Late 2018 Memory (RAM) Replacement: étape 10, image 2 de 2
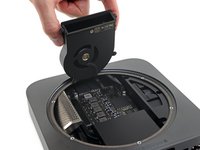
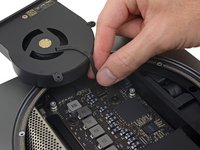
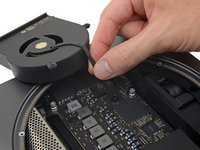
      • Grasp the fan cable by all six wires and gently lift to unplug it from the logic board.

      • If the cable won't disconnect, don't force it, or you may pull the socket off the board. Try holding the socket down with your thumb, then pinch the cable close to the socket with your index finger and gently lift.

      Demander à FixBot

      Ajouter un commentaire

    4. Mac mini Late 2018 Memory (RAM) Replacement: étape 11, image 1 de 1
      • Remove the fan.

      Demander à FixBot

      Ajouter un commentaire

    1. Mac mini Late 2018 Memory (RAM) Replacement, Logic Board Assembly: étape 12, image 1 de 1
      • Grasp the power supply cable and lift to disconnect it from the logic board, wiggling as needed to loosen it up.

      Demander à FixBot

      Ajouter un commentaire

    2. Mac mini Late 2018 Memory (RAM) Replacement: étape 13, image 1 de 2 Mac mini Late 2018 Memory (RAM) Replacement: étape 13, image 2 de 2
      • Carefully lift the connector for the LED indicator light straight up to disconnect it from its socket on the logic board.

      • Take care not to pry under the socket, or you may break it off the board.

      Demander à FixBot

      Ajouter un commentaire

    3. Mac mini Late 2018 Memory (RAM) Replacement: étape 14, image 1 de 2 Mac mini Late 2018 Memory (RAM) Replacement: étape 14, image 2 de 2
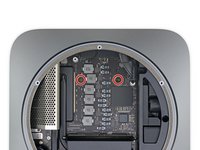
      • Use a T10 Torx driver to remove the two 7.5 mm screws securing the logic board.

      Demander à FixBot

      Ajouter un commentaire

    4. Mac mini Late 2018 Memory (RAM) Replacement: étape 15, image 1 de 3 Mac mini Late 2018 Memory (RAM) Replacement: étape 15, image 2 de 3 Mac mini Late 2018 Memory (RAM) Replacement: étape 15, image 3 de 3
      • In this step, you'll push the logic board free from the clips holding it to the frame. Push only where directed or you may damage the fragile cooling fins.

      • Place a thumb at each end of the exhaust vent, over the fan screw holes.

      • Push firmly in the direction of the ports until the logic board unclips and begins to slide out of the Mac mini.

      Demander à FixBot

      Ajouter un commentaire

    5. Mac mini Late 2018 Memory (RAM) Replacement: étape 16, image 1 de 2 Mac mini Late 2018 Memory (RAM) Replacement: étape 16, image 2 de 2
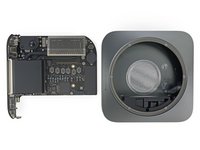
      • Slide the logic board out of the case.

      • When reinstalling the logic board, make sure to hold the thin LED indicator light cable out of the way so it doesn't get damaged.

      Demander à FixBot

      Ajouter un commentaire

    1. Mac mini Late 2018 Memory (RAM) Replacement, RAM: étape 17, image 1 de 1
      • Use a T5 Torx driver to remove the four 2.8 mm screws securing the RAM shield.

      Demander à FixBot

      Ajouter un commentaire

    2. Mac mini Late 2018 Memory (RAM) Replacement: étape 18, image 1 de 1
      • Lift the RAM shield and slide it off of the RAM assembly.

      Demander à FixBot

      Ajouter un commentaire

    3. Mac mini Late 2018 Memory (RAM) Replacement: étape 19, image 1 de 2 Mac mini Late 2018 Memory (RAM) Replacement: étape 19, image 2 de 2
      • Two clips secure each RAM module in place, one on each side. Using your fingers, spread the clips away from the RAM module.

      • Optionally, you can slide the rubber covers off the metal clips—make you slide them back on after installing the RAM module.

      • When released, the RAM modules will pop up at a slight angle.

      Demander à FixBot

      Ajouter un commentaire

    4. Mac mini Late 2018 Memory (RAM) Replacement: étape 20, image 1 de 1
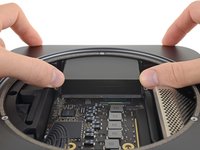
      • Slide each RAM module straight out to remove it.

      • When handling the RAM modules, touch only the outside edges. Take care not to touch the gold-colored contact points along the bottom edge.

      Demander à FixBot

      Ajouter un commentaire

    5. Mac mini Late 2018 Memory (RAM) Replacement: étape 21, image 1 de 3 Mac mini Late 2018 Memory (RAM) Replacement: étape 21, image 2 de 3 Mac mini Late 2018 Memory (RAM) Replacement: étape 21, image 3 de 3
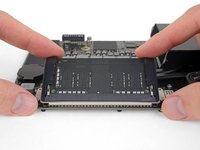
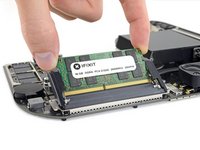
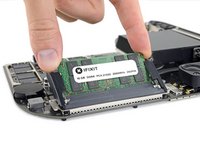
      • To install new RAM modules:

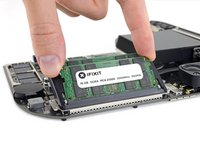
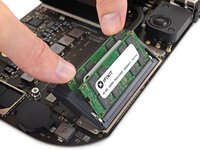
      • Make sure the module is oriented correctly and the notch on the bottom is aligned, and then slide it in at about the same angle as you took it out. Press evenly until the gold contacts are no longer visible.

      • Repeat for the second module.

      Demander à FixBot

      Ajouter un commentaire

    6. Mac mini Late 2018 Memory (RAM) Replacement: étape 22, image 1 de 3 Mac mini Late 2018 Memory (RAM) Replacement: étape 22, image 2 de 3 Mac mini Late 2018 Memory (RAM) Replacement: étape 22, image 3 de 3
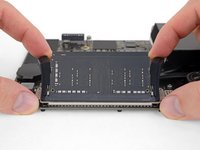
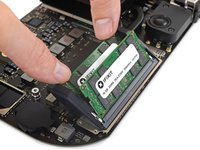
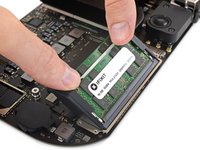
      • Finally, press the top edge of each RAM module to swing it down toward the logic board until the retaining clips on each side snap into place.

      • If the rubber guards interfere with the clips, spread the rubber guards away from the RAM with one hand and use the other to angle the RAM modules into place. Then, release the guards.

      • Check the clips and make sure both modules are fully seated and secure.

      Demander à FixBot

      Ajouter un commentaire

Conclusion

To reassemble your device, follow the above steps in reverse order.

Take your e-waste to an R2 or e-Stewards certified recycler.

Repair didn’t go as planned? Check out our Answers community for troubleshooting help.

Annulation : je n'ai pas terminé ce tutoriel.

399 autres ont terminé cette réparation.

Rod Bland

Membre depuis le 03/25/13

2 717 Réputation

1 tutoriel rédigé

153 commentaires de tutoriel

Thank you so much! I’m curious about CPU. Is it possible to replace it?

cjoonh - Réponse Partager

No, the CPU is soldered to the logic board.

Hiking with Camera - Réponse Partager

Looks like the SSD is replaceable as well. Any idea on what kind of standard it follows?

QiF - Réponse Partager

looks like soldered to me. either way, with that T2 chip on board one shall not pass through…

Peter Marencik - Réponse Partager

Ajouter un commentaire

Nombre de vues :

Dernières 24 heures : 51

7 derniers jours : 458

30 derniers jours : 2,198

Total : 530,765