Introduction
Le retrait de l'écran de l'iMac Intel 27 "Retina 5K Display nécessite de couper l'adhésif avec un outil d'ouverture spécialisé pour iMac. Une fois que vous avez terminé votre réparation, vous devrez suivre notre tutoriel de remplacement des bandes adhésives afin de réinstaller la vitre d'écran.
Avant de commencer tout travail sur votre iMac : débranchez l'ordinateur et maintenez le bouton d'alimentation enfoncé pendant dix secondes pour décharger les condensateurs de l'alimentation.
Soyez très prudent pour ne pas toucher les câbles du condensateur ou les joints de soudure exposés à l'arrière de l'alimentation.
Ce dont vous avez besoin
-
-
Si la charnière n'est pas bloquée, l'iMac sera mal équilibré et vous aurez du mal à le manipuler. Vous pouvez effectuer une réparation en posant l'iMac à l'horizontale, mais ce sera plus rapide et plus facile avec une cale de maintien pour iMac.
-
Si vous utilisez la cale de maintien en carton iFixit, suivez ces instructions pour la monter.
-
-
-
-
Posez l'iMac à l'envers sur une table.
-
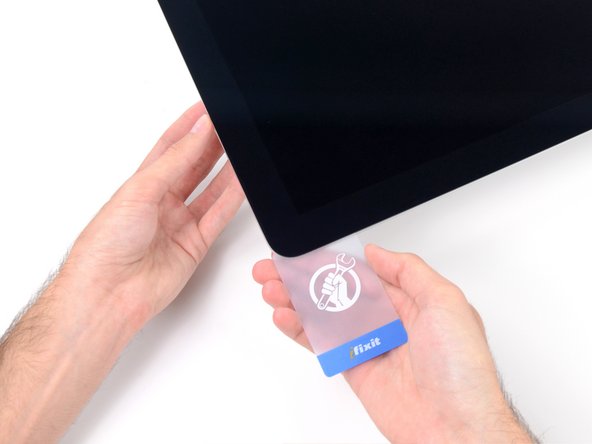
En partant de l'angle supérieur droit de l'iMac, insérez une carte en plastique entre l'écran et le châssis.
-
-
-
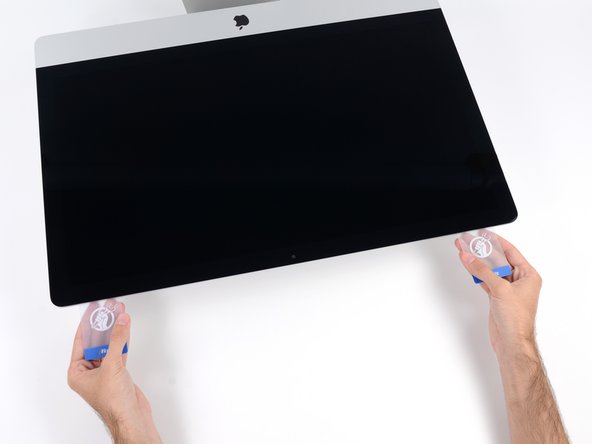
Insérez les deux cartes près des angles de l'iMac, comme illustré, puis tournez-les délicatement pour élargir l'interstice entre l'écran et le boîtier.
-
Si l'écran et le boîtier restent collés à certains endroits, utilisez l'une des cartes pour découper la mousse adhésive et les séparer.
-
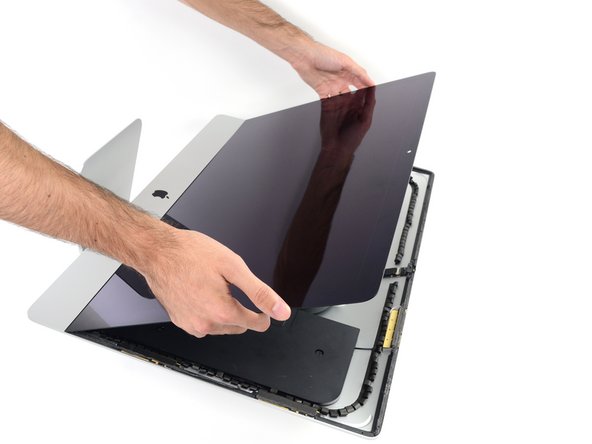
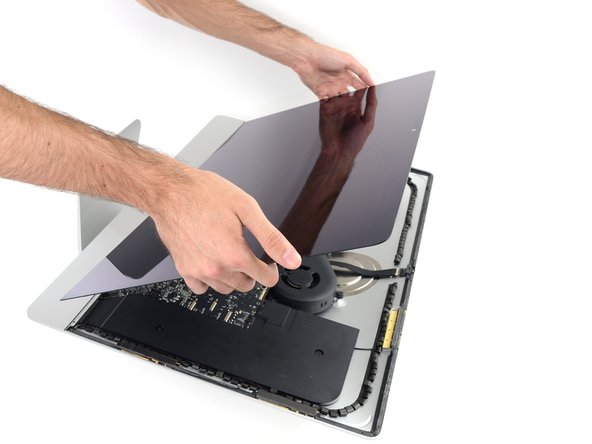
Commencez à soulever le haut de l'écran pour le séparer du châssis.
-
-
-
S'il y a un câble ou une nappe sous le ruban adhésif, retirez toujours le ruban en premier.
-
Si la nappe est collée au châssis, utilisez d'abord un iOpener chauffé ou un sèche-cheveux pour ramollir l'adhésif. Vous pouvez ensuite faire glisser un médiator sous la nappe pour la décoller. Ne tirez jamais directement sur les connecteurs délicats.
-
Faites glisser un médiator sous les coussinets en mousse pour les séparer de l'écran et retirez-les délicatement. Vous devrez peut-être utiliser du ruban adhésif double-face pour les rattacher au nouvel écran.
-
Pour remonter votre appareil, suivez ces instructions en sens inverse et utilisez notre tutoriel pour bandes adhésives afin de réinstaller la vitre d'écran.
Amenez vos déchets électroniques à un recycleur certifié.
La réparation ne s'est pas déroulée comme prévu ? Essayez un [[Troubleshooting Problems After a Repair|diagnostic de base|new_window=true], ou demandez de l'aide à notre Forum.
Annulation : je n'ai pas terminé ce tutoriel.
55 autres ont terminé cette réparation.
Merci à ces traducteurs :
100%
Ces traducteurs nous aident réparer le monde ! Vous voulez contribuer ?
Commencez à traduire ›
24 commentaires
If you cut around the display well and take your time to roll back and forth (using the iFixit roller opener tool), especially around the corners, you don't actually need to use any cards (Steps 9 - 17) to get the screen to come free of the body. On the top edge left and right, take each end of the screen gently and pry free with your fingers - GENTLY - and you will hear the remaining tape separating along the sides. Take care NOT to flex the screen as you do so.
If you are removing a cracked screen (as I was), be super careful to pry and swing the display EVENLY up from the body - this is an item of utmost importance, whether you use cards or not to get the last of the adhesive to release.
Finally, with the power and data cables disconnected and the display held up at around 80º, you will find that the adhesive along the bottom edge of the display assembly will take quite some work to free. As the guide says, you can use a plastic card; but I found it necessary to use a metal spuger (carefully so as not to touch the power supply board of course!) in order to free the lower adhesive and remove the display.
Overall, take your time and focus on "being one with the iMac" as you work, and you will find it quite trivial to remove this 27" retina display.
hello, I'm writing from Italy. I have a problem with the screen of the iMac 27 "5k retina late 2014, purchased the 12-22-2014, I do not know if the warranty covers this type of defect within two years. There are spots in the lower left, appear as sagging, I think it's the dust, but I assure you that the environment is clean with no smoke or whatever. Obviously the spots are inside, how can I fix it, other news of these spots? I have to completely change the display or can separate the glass from the monitor LED?
Many thanks
Enzo
this should be covered by warranty. call applecare.
vireshkj -
Hello,
Any Update? Mine has the same issue and it is out of warranty.
Would an air blower do the trick past point 17/18?


