Introduction
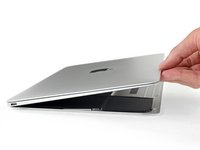
The upper case assembly includes the keyboard. Use this guide to replace the entire case/keyboard assembly as a single unit.
Ce dont vous avez besoin
-
-
Power on your Mac and launch Terminal.
-
Copy and paste the following command (or type it exactly) into Terminal:
-
sudo nvram AutoBoot=%00
-
Press [return]. If prompted, enter your administrator password and press [return] again. Note: Your return key may also be labeled ⏎ or "enter."
-
sudo nvram AutoBoot=%03
-
-
Outil utilisé dans cette étape :Magnetic Project Mat$19.95
-
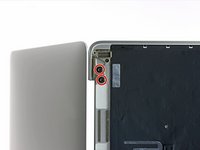
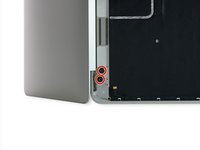
Remove the following eight screws securing the lower case:
-
Two 1.8 mm P5 Pentalobe screws
-
Four 2.9 mm P5 Pentalobe screws
-
Two 6.1 mm P5 Pentalobe screws
-
-
-
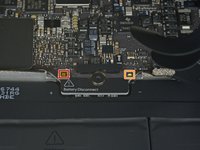
Use the flat end of a spudger to press and hold the small gold 'battery disconnect' button.
-
If the power LED is lit up, continue holding the button until the LED goes dark, and then release. This may take up to 10 seconds.
-
If the LED does not light, release the button after 5-10 seconds. Press and hold it again for 5-10 seconds, and release. Finally, press and hold it a third time for 5-10 seconds, and release.
-
-
-
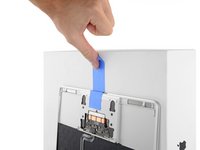
Use a spudger to carefully flip up the retaining flap on the trackpad cable ZIF connector.
-
-
-
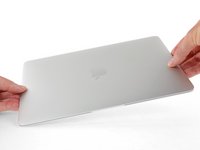
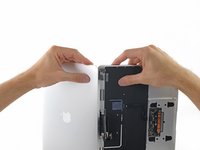
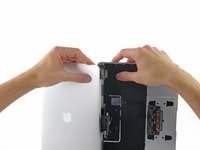
Carefully close the MacBook and flip it over once again, so that the Apple logo faces up.
-
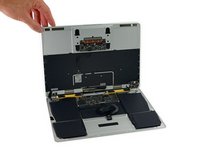
Lifting from the front edge, raise the upper case/display assembly to about a 90° angle, and prop it up against something sturdy so you don't have to hold it.
-
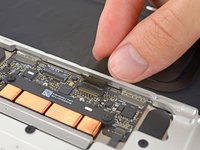
Add a piece of tape near the track pad to secure the upper case and prevent accidental movement.
-
-
Outil utilisé dans cette étape :Battery Blocker$3.99
-
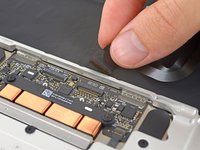
As an added precaution, you may physically disconnect the battery by inserting a battery isolation pick between the logic board and the battery connector.
-
-
-
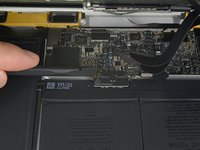
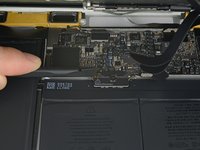
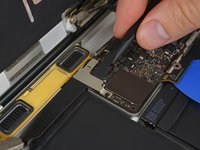
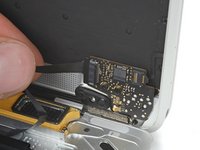
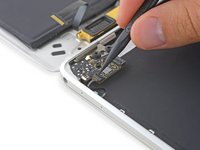
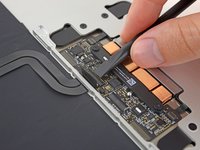
Remove the two screws securing the USB-C port cable bracket:
-
1.1 mm Phillips #00 screw
-
3.5 mm T5 Torx screw
-
-
-
Outil utilisé dans cette étape :Tweezers$4.99
-
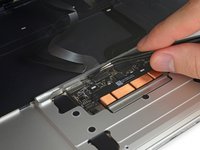
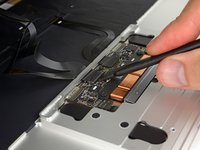
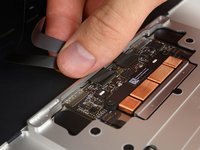
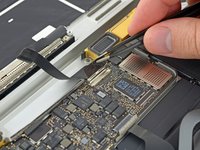
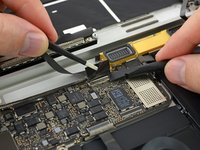
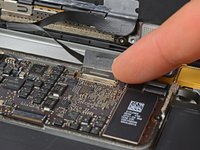
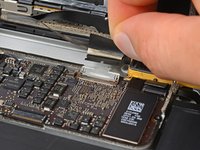
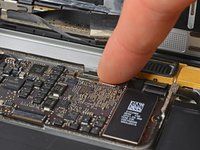
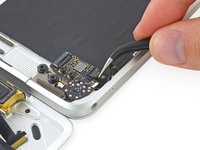
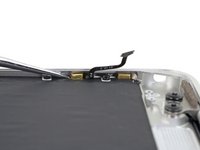
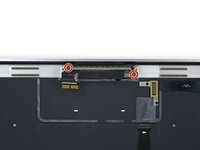
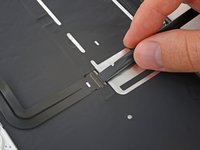
Use tweezers to peel back the tape covering the display cable connector.
-
-
-
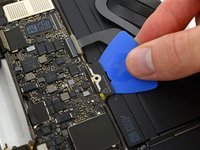
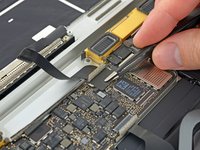
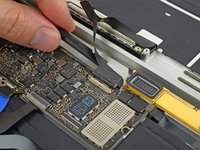
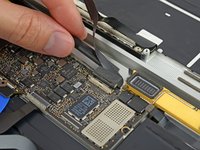
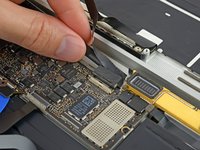
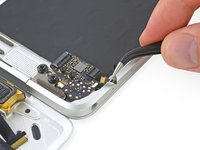
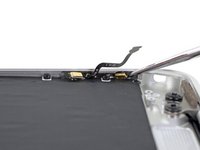
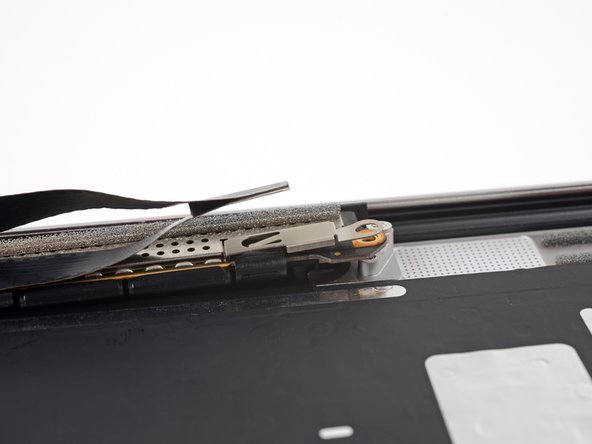
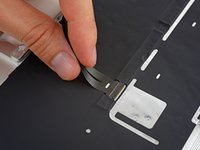
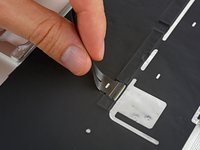
Use a spudger to flip open the ZIF connector retaining flap for the dual microphone assembly ribbon cable.
-
-
-
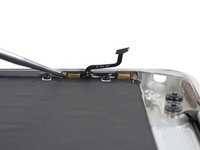
Prepare an iOpener and apply heat to the upper case directly behind the microphone assembly.
-
-
-
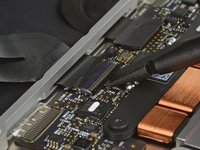
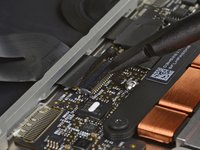
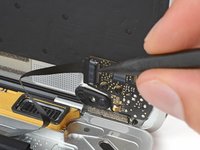
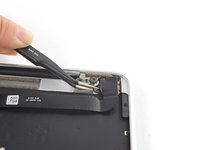
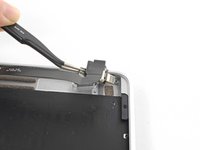
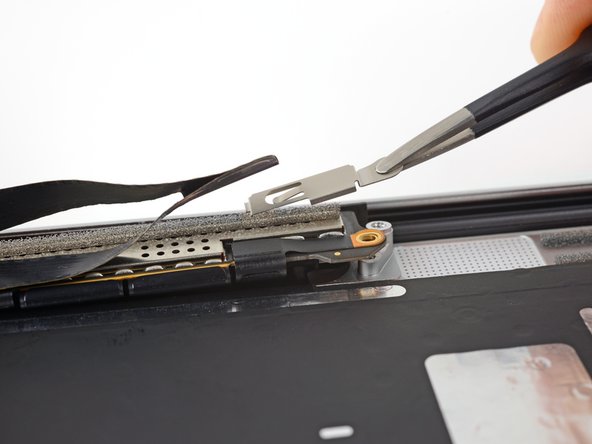
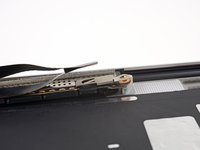
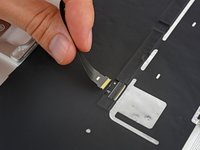
Remove the two 3.3 mm T5 Torx screws securing the display cable assembly.
-
-
-
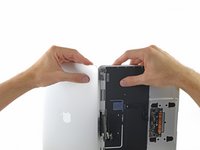
Holding the display assembly with one hand and the upper case with the other, push them together slightly to move the hinges out of their recesses in the the upper case.
-
Push the upper case forward while pulling back gently on the display.
-
Once the two display hinges have cleared the upper case, remove the display and set it aside.
-
-
Outil utilisé dans cette étape :Tweezers$4.99
-
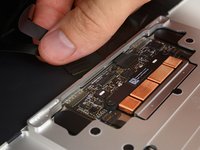
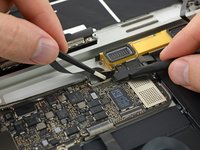
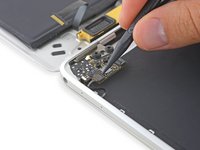
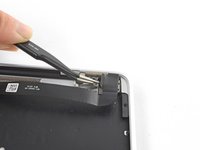
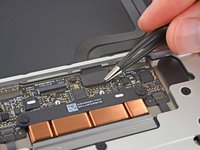
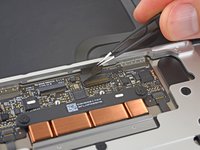
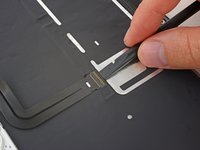
Use a pair of tweezers to remove the tape covering the keyboard ribbon cable connector on the trackpad.
-


To reassemble your device, follow these instructions in reverse order.
To reassemble your device, follow these instructions in reverse order.
Annulation : je n'ai pas terminé ce tutoriel.
11 autres ont terminé cette réparation.

Équipe

Tobias Isakeit - Repairability Engineer Membre de l'équipe Tobias Isakeit - Repairability Engineer
Business
1 membre
1 131 tutoriels rédigés
3 commentaires
kann ich mein deutsches Topcase mit einem z.B. UK Topcase austauschen
diese sind leichter zu kaufen und das andere Tastaturlayout wäre auch nicht das Problem
Hallo benny.joos98, es ist sehr wahrscheinlich möglich ein UK Topcase zu verwenden. Frage aber sicherheitshalber noch mal im Forum nach; eventuell hat bereits schon jemand diese Art von Tausch gemacht und kann mehr/genaueres darüber sagen: https://www.ifixit.com/Answers/Device/Re...