Introduction
Use this guide to replace the LCD on an iPad 5 LTE.
Parts of this guide were shot with a Wi-Fi model and as such the internals may look slightly different from the LTE model. The procedure is the same for both models except where noted.
Warning: the battery isolation method in this guide is outdated, and may result in irreversible damage to the battery pins of the logic board, effectively destroying it. If you choose to isolate the battery this way, heed all warnings and work extremely carefully. If you choose to complete the guide without isolating the battery, avoid using metal tools except when completely necessary (like when removing screws) to prevent shorting the battery and damaging sensitive circuit components.
Ce dont vous avez besoin
-
-
Heat an iOpener and apply it to the left edge of the device for two minutes.
-
-
-
While you're waiting for the adhesive to loosen, note the following areas that are sensitive to prying:
-
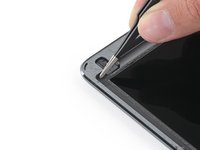
Front camera
-
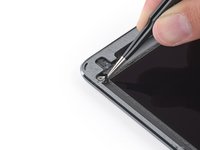
Antennas
-
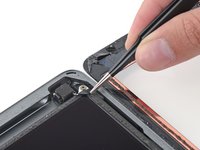
Display cables
-
-
Outil utilisé dans cette étape :Clampy - Anti-Clamp$24.95
-
Pull the blue handle backwards to unlock the Anti-Clamp's arms.
-
Place an object under your iPad so it rests level between the suction cups.
-
Position the suction cups near the middle of the left edge—one on the top, and one on the bottom.
-
Hold the bottom of the Anti-Clamp steady and firmly press down on the top cup to apply suction.
-
-
-
Wait one minute to give the adhesive a chance to release and present an opening gap.
-
If your screen isn't getting hot enough, you can use a hair dryer to heat along the left edge of the iPad.
-
Insert an opening pick under the digitizer when the Anti-Clamp creates a large enough gap.
-
Skip the next step.
-
-
-
Once the screen is warm to touch, apply a suction handle to the left edge of the screen and as close to the edge as possible.
-
Lift the screen with the suction handle to create a small gap between the digitizer and the frame.
-
Insert an opening pick into the gap between the digitizer and the frame.
-
-
-
Insert a second opening pick into the gap you just created.
-
Slide the pick toward the bottom-left corner of the device to separate the adhesive.
-
Leave the pick in the bottom-left corner to prevent the adhesive from re-sealing.
-
-
-
Heat an iOpener and apply it to the top edge of the device for two minutes.
-
-
-
Rotate the pick around the top-left corner of the device to separate the adhesive.
-
-
-
Slide the opening pick along the top edge of the device, stopping just before you reach the front camera.
-
-
-
-
Heat an iOpener and apply it to the right edge of the device for two minutes.
-
-
-
Rotate the pick around the top-right corner of the device to separate the adhesive.
-
-
-
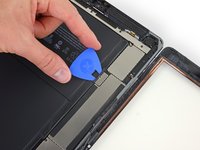
Insert a new opening pick and slide it to the middle of the iPad's right edge.
-
-
-
Heat an iOpener and apply it to the bottom edge of the device for two minutes.
-
-
-
Slide the bottom-left pick to the bottom-left corner to separate the adhesive.
-
Leave the pick in the bottom-left corner before moving to the next step.
-
-
-
Insert a new opening pick into the gap you just created on the bottom edge of the iPad.
-
Slide the pick over the antenna, stopping just before the home button.
-
Leave the pick to the left of the home button before continuing.
-
-
-
Heat an iOpener and apply it to the right edge of the device for two minutes.
-
-
-
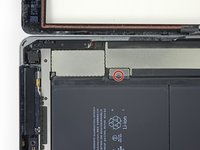
While supporting the digitizer, slide an opening pick between the two display cables to separate the last of the adhesive.
-
-
-
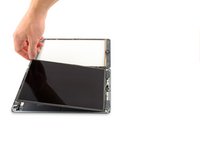
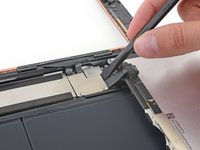
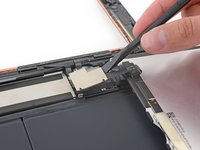
Use the flat end of a spudger to pry the LCD out of its recess just enough to grab it with your fingers.
-
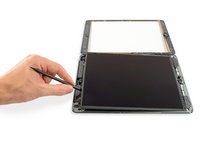
Flip the iPad LCD like a page in a book, lifting near the camera and turning it over the home button end of the rear case.
-
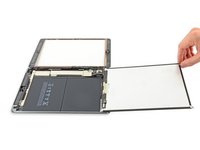
Lay the LCD on its face to allow access to the display cables.
-


To reassemble your device, follow these instructions in reverse order.
To reassemble your device, follow these instructions in reverse order.
Annulation : je n'ai pas terminé ce tutoriel.
Une autre personne a terminé cette réparation.


2 commentaires
Also this is a great tutorial!