Il est possible que cette traduction ne reflète pas les dernières mises à jour du tutoriel source. Aidez à mettre à jour la traduction ou bien consultez le tutoriel source.
Introduction
Apprenez à remplacer l’écran de l’iPhone 5. Cette pièce est fournie avec une caméra frontale, un haut-parleur interne et une plaque de protection de l'écran LCD pré-installés pour une réparation plus facile.
Tout ce que vous avez à faire c’est de retirer l'ancien écran et de transférer le bouton d’accueil sur le nouvel écran.
Après avoir remplacé avec succès votre écran, protégez-le des rayures avec un protège-écran.
Ce dont vous avez besoin
Vidéo d'introduction
-
-
Appliquez des bandes de ruban adhésif transparent sur l'écran de votre iPhone jusqu'à ce qu'il soit entièrement recouvert.
-
-
-
Éteignez votre téléphone avant de commencer le démontage.
-
Retirez les deux vis pentalobe de 3,6 mm de chaque côté du connecteur de charge Lightning.
I would recommend keeping multiple pieces of double-sided tape for each step that requires removing screws. Also perhaps label them, or take notes, so you know which piece of tape (and the screws attached to it) go with which step number. It's easy to confuse screws, especially if you go past these instructions to remove everything required to replace the ribbon cable that is necessary for the buttons.
To avoid misplacing screws or other elements, printout the instructions, apply transparent tape onto the print wherever you have colored circles marking different screws. Then, as you start removing screws, tape each one on top of its image on the instructions. At the end, to reinstall everything, proceed from the end of the instructions, removing each taped screw from its image, to return it to its original position. I have done this with many iFixit repair instructions, never losing or misplacing any screw!
bduault -
Ordered and received the Phillips #00 Screwdriver ($5.95 · 50+ In stock). It is a tiny Philips screwdriver. The screws next to the lightning port have tiny star-shaped holes. I will have to find a different screwdriver.
Unfortunately, the kit I ordered that was to come with a suction cup didn't include one; thanks for quality control, ifixit. Tape doesn't work. Now what?
I'm sorry to hear that. I have a suction cup being sent out today (Tue 3/11/14) and it will be there tomorrow for you.
I've managed to replace the battery successfully in my iPhone5, but something went wrong with a friend's (battery status is stuck, sometimes the phone reboots for no reason).
So, i decided to open it up again and reseat the ribbon cables in case they came loose.
I can't open it now. The Pentalobe screwdriver is worn out! I can't open these screws no matter what. I don't know what to do now as I can't be sure I haven't worn out the actual screws themselves, too. Any ideas?
I seem to be having a similar situation. Attempting to open the phone again and either the pentalobe screws or the screwdriver itself is stripped. Any suggestion is welcome for removing the screws.
Battery replacement went well and works great. But I must have a loose (hopefully not damaged) display ribbon.
Saltank, thanks to your comment I didn't overtighten those little screws! I would try to get a better quality driver from a local hardware store to see that helps, the one ifixit sent are not very good quality. If that doesn't work, you may have stripped the screws.
Wish I ordered a back case as well with my repair being so easy!
my phones screen displays the dead battery sign and the plug below it sign too, when your phones battery is dead. Bought a new battery and charged overnight...... any ideas?
Hi Steve! I'm experiencing the same issue. Were you able to fix it? Please let me know
Steve. Please contact me asap re: the issue on your phone. Thank you.
Now here's an issue that would seem to apply to many users doing this repair: if the screen is nonfunctional, how do you power-off the device? When I dropped my iPhone, the screen went almost completely dark, midnight blue, actually. I can use the power button at the top of the phone to turn the display on and off, but I can't get the phone to power off. Seems the only way to do it is to wait until the battery is exhausted.
Protip: take all the soda out of a case of pop and complete the repair in the empty cardboard tray. That way if you drop a screw it won't go flying off the table.
Ok, at the end of the repair, I tried to use the new pentalobe screws that came with ifixit replacement battery but they did not seem to fit. So, reverted to the original pentalobe screws for the final step to close up the phone. Beside that, everything went smooth. I also skipped the steps about detaching the frontpanel (seems not necessary if only replacing the battery)
Weirdly I had to use two different screw attachments to remove the pentalobe screws so possible they use different screw heads for each one sometimes.
The “Pentalobe” screws require the STAR DRIVE driver, NOT a Phillips driver.
Hi, i am trying to remove the serews, i have all the tools neded for it but when i try to unscrew them, they turn but they don’t came out, any ideas of what to do? Tank you.
Hi Joel,
Chances are, the threads may be slightly stripped. You can try to wedge the point of some tweezers behind the screw head to pry the screw out.
This was the second repair in the same iphone5. First was the screen, and all the screws came easily. After a year, I wanted to change the battery. From the two Pentalobe screws, one came easy. The other just turn but did not come out. I search and tried to glue the screw with superglue to the screw-driver, but did not work. Finally, I separated the glass from the phone, removed the button, and pushed the screw from inside to outside. It came just enough I could catch it with tweezers and turned meanwhile pulling. Finally came out. I know, not the best solution, but I did not find another way. I put the battery and works.
-
-
-
Peu importe l'outil que vous utilisez, assurez-vous de soulever l'écran en entier.
-
Si la vitre commence à se décoller du plastique comme vous pouvez le voir sur la première photo, glissez un outil d'ouverture en plastique entre le cadre en plastique et le châssis du smartphone afin de détacher les clips en métal.
-
-
-
Tirez la poignée bleue vers l'arrière pour débloquer les bras de l'Anti-Clamp.
-
Insérez le côté droit ou gauche de votre iPhone entre les bras.
-
Positionnez les ventouses près du bord inférieur de l'iPhone, juste au-dessus du bouton home : une sur le dessus, l'autre en dessous.
-
Appuyez sur les deux ventouses pour qu'elles adhèrent bien à l'endroit voulu.
The iSclack is a marvel. I've had it in my toolkit for a while but this was its first use. I recommend this tool.
-
-
-
Tirez la poignée bleue vers l'avant pour bloquer les bras.
-
Tournez la poignée dans le sens horaire, de 360 degrés ou jusqu'à ce que les ventouses commencent à s'étirer.
-
Insérez un médiator sous l'écran dès que l'Anti-Clamp a créé un espace suffisant.
-
Sautez les deux étapes suivantes.
Step 4 is a bit dangerous, as the Display is pulled out very fast and (depending on the position, the suction cups are placed at) it could stress the cabels connecting display and mainboard. So, please, hold the phone with finger and thumb at the top, to avoid the display is pulled out to fast.
I sure wish they did a better job showing in the video how hard it is to take of the front screen without the iSclack tool!
I had to position the suction cup _over_ the home button in order to get the screen far enough away from the frame to slide my trim tool in there. Putting it down above the home button just wasn't working at all...
Was someone able to answer this question? I have the same issue
without this suction cup clamp thing, removing (and replacing) the screen was the hardest part of this job. Especially when the screen is cracked badly as the suction cup loses suction due to air leaking through the cracks. In this case, use tape over the screen to create a smooth surface. ***Also, the screens have rubber running along the side, so use a heat gun or hair dryer to make the rubber softer for removal of cracked screen and installation of replacement screen
-
-
-
Placez une ventouse sur l'écran, juste au-dessus du bouton home.
I found it was easier to start opening from the top left of the display and working straight down towards the home button as there are no clips in this particular area. I realize there are cables on the right side right next to the area, however, this way requires less force as a starting point. Let me know what you think.
This part was the most frustrating part of the guide, granted I didn't do the whole thing. I was expecting to slip the plastic separator tool in-between the case and the display. This did not happen and I ate away at the tool in the process. For me after much pushing on the top edge of the case and pulling the screen away it released all of a sudden. I managed to make a dead stop at 90 degrees, but felt like I almost ripped off the ribbon cables(I didn't).
No matter how hard I tried, I could not get the screen to separate far enough to where the pry tool could get it. Reading through some of the other comments, I followed 2 other people's advice to work the bottom left corner above the headphone input and then use a pushpin at the same time. (this is not recommended, but it worked!) I made a couple of hard to see marks in the corner but was finally able to get the screen off. I also did NOT take off the connectors to the screen and skipped the next few steps all the way down to step 14. Looks like a lot of people damaged their phones that disconnected the top screen.
I'd recommend to use packaging tape to attach the upper edge of the display to the back of the phone so you won't rip off the ribbon cables if the display suddenly comes loose.
I took the suction cup off of an old navigation Tom Tom and it worked great!
My battery needed replacement because the battery had swollen and was warping the glass. Looking at it from the side it looks like gasket that was partly sticking to glass and partly to the case. This is actually part of the glass frame and you need to make sure to separate it from the case not the glass. I did it wrong and ended up removing the glass but there was a metal case covering the inside. I eventually got the rest of the top off but now I'll have replace it all because I can't find a good way to glue the glass to plastic.
I initially had trouble, but focusing on the area of the faceplate right above the headphone jack worked for me. There's a slight divot that allows you to slip in the prying tool earlier than in other places around the faceplate. Once I got the prying tool in there, I was able to pop out the bottom, and then continue up the sides.
IMPORTANT TO NOTE: The top of the screen is attached to delicate cables inside the phone! Pull up carefully and keep a hand on the top of the screen so it doesn't pop up.
My iPhone 5 only had a weak battery. Now it has a cracked glass panel. Suction cup is strong - so strong the glass breaks before the suction cup lets go. Apparently some of the tolerances in Apple's design occasionally add up to make a front panel assembly that refuses to let go. Phone not worth repairing at this point as it only cost $190 refurbished to begin with. A note of warning - you might want to have this done by an experienced tech - go ahead and spend the $100 or so to have someone experience replace the battery and keep the rest of your phone intact.
The suction cup with the blue plastic handle that came with the kit did not work, but I still had the cup with the silver ring that came with an iPad repair kit and it worked nicely. Also, I found that the guitar style picks that came with the iPad kit worked best for getting the screen started.
I used a heavy duty iFixIt suction cup (used for repairing an old iMac) for the job. Worked like a charm.
-
-
-
-
Tout en tenant l'iPhone avec une main, tirez sur la ventouse pour séparer légèrement l'écran du boîtier arrière.
-
À l'aide d'un outil en plastique, commencez à pousser le boîtier délicatement vers le bas tout en tirant sur la ventouse vers le haut.
The suction cup didn't work, because of my destroyed front glass.
So i take "tesa powers trips".
With that help, i had enough force to pull up the front display from the rear case.
Suction cup didn't work for me. I tried for half hour with my nerd biceps. In the end, I inserted an xacto blade below the home button to create a gap big enough for me to put in a guitar pick and finally able to pry it open. In the process I scratched the frame so you have to be very careful if you decide to take this approach.
Where can you buy "Tesa Powerstrips?
The glass on my phone was completely destroyed, making the suction cup entirely useless. I was pretty close to giving up when i tried putting a strip of clear packing tape on the screen and squishing out all the bubbles. Put the suction cup on this and it worked perfectly.
Used a suction cup from my Garmin Navi. The one you use to stick it to your windshield. It has a nice plastic "handle" and made things a lot easier... almost too easy that I nearly pulled the screen off the cables. Go easy on this step.
I'd Advise Against The Suction Cup Here As It Will Separate The Glass From The Black/White Framing That You're Actually Supposed To Pry Under. I Found When Using The Suction Cup, The Glass Came Up, But The Framing Stayed Stuck. If You're Replacing The Entire Display It's Not As Much Of A Problem, But If You're Installing Any Other Part Or A Custom Housing, You'll Notice Your Screen Has A Bit Of "Play" When Pressing Down.
While holding down on the lower sides of the iPhone, I found inserting the plastic separator just to the right of the audio jack while gently applying pressure down and back from the edge popped the bottom of the display assembly up. Keep in mind to do this while pulling back on the suction cup ring, like the guide says constant, but gentle force at the same time. Another note is to have the suction cup ring vertical to align with the length of the display, that made the process much easier.
You rock! I was having trouble getting the thing to budge, but the moment I put the plastic tool near the audio jack, the screen immediately popped up.
Justin -
This should be in the guide. The front panel is actually recessed a bit here making it much easier to get a tool in at this point. No way I would have opened it without this tip. Thanks!
dave -
Thank you so much! This should DEFINITELY be added to the main guide.
After struggling for half an hour and nearly giving up, I was able to easily lift up the screen once I tried to wedge it near the headphone jack!
Thanks so much!
This was the key for me. Thank you so much for this tip :)
I was having a lot of trouble. Should be in the guide.!!
Coact -
Thank you very much, this worked for me!
I've been using a metal flat opening tool along with the suction cup to pop these bad boys open - remember the tape on the screen trick if you have a smashed screen - so the suction cup can grip and stops the glass going everywhere!
I had trouble with this step too, since I had to apply quite a lot of force on the suction cup when pulling up on the screen while holding down on the frame with my fingernails. Eventually it popped free, but came almost to 90 degrees before I was able to stop it. No damage, but nerve-wracking, and if there was a better technique, it would be good to figure it out and share the information here.
Be very gentle! I overdid it and, though the repair was successful, there's now a bit of play when pressing on the top right quadrant of the screen.
When i was reassembling, the screen broke form the pressure. I recommend putting the screen towards your working surface and press your phone downwards. That way your screen is always straight.
Need extra careful while pulling the screen.
Once there is a gap between the screen and the frame, insert the plastic opening tools and move it around the screen. But don't use it for top area (near to power button) as there is a location for flexible ribbon cable.
Once the bottom part is free, the screen will pop out easily.
I had trouble opening the screen due to a warped suction cup that was bent up at one spot and also due to my cracked screen. My solution: used double sided tape between the suction cup and the glass. I had some command strips, but I think any double-sided tape could work.
The suction cup will hold if you put a piece of tape over the cracked screen.
BE VERY, VERY CAREFUL, HERE!!
-The repair went horribly wrong during this step, for me. I pulled-up on the suction cup, gradually increasing force. Instead of just opening a gap to get the plastic prying tool into, the whole thing gave way at once. This damaged the connection between the display assembly and the rest of the iPhone.
-During this step, I would recommend placing a rubber band around the phone, over the home button and one near the top of the iPhone for good measure. Even better, invest in the "iSclack". In my case, it would have saved me about fifty bucks and three days without a functional iPhone.
-When I reassembled, The screen was blank, but I could still sync with iTunes. I may have been able to replace only the cables, but I wasn't sure how extensive the damage was and I was done messing around with it. I replaced the whole display assembly, and now it works just fine.
-This was STILL cheaper than buying a new phone, and I learned a lot. Overall, it was a good experience.
my phones screen displays the dead battery sign and the plug below it sign too, when your phones battery is dead. Bought a new battery and charged overnight...... any ideas?
Was someone able to answer this question? I have the same issue
1. This is very difficult, you have to use much more strength than it appears and it's very easy to rip out the connector cords. Mine did not rip, thankfully.
2. Upon replacing the screen, I had to do this 3 times, I would not recommend putting the screws back in but turning on the phone and testing all screens before putting the panel back.
3. When I finally managed to ensure all displays were working, I was pushing the screen back in and cracked the glass just below the home button. This part is very sensitive as it is the thinnest portion of the glass so be careful and ensure you push from the top and go all the way around. I also had to do this twice because after cracking the glass on the first try, I also realised the top was not fully pushed back.
We highly recommend using the iSclack tool for opening the phone up. It simply pops it up with very little effort, and you won't risk damaging your screen or device.
I was in no mood to pay for the special tool and wait for it. Took the "right of headphone jack" suggestion and pushed down vertically at the edge of the frame with a "ice pick" sharp tool, " I had two of them. Who cares if you scratch the frame a little, I usually have my phone in a protective case anyhow. I kept working with this until the corner was up, and then the rest of the display was loose without any further work.
My phone is in pristine condition for a 5 year old phone, I have no cracks to speak of on the glass and the suction cup that ifixit sent me doesn't stick to the glass.
Holding the other side (top of the phone) down with another hand is extremely important. Plenty of people have damaged their screens by pulling the panel right off, ripping all the cables.
I made a series of gentle pulls and the front panel came up without problems. The opening started to appear next to the audio jack, as other people indicated. Then, I used the pry that came with the kit and the panel opened easily.
Upon reassembly, I cracked the glass at this step. The top of the screen seemed to have too play in it and on my phone—I suspect from right side brackets that may have been damaged already. Was nearly finished and applied too much pressure? to the top of the screen area to get it back into position. Snap!
I pulled and pulled on the suction cup with no results then read the comments! Ugh! Found a kiosk at the mall that will replace battery for $15. Should have saved the cost of tools. They were very pretty and well packaged though! Good fortune to all that succeeded.
This went easy. Place the opening tool in the seam near the earphone jack to pry as others have stated. Also, as insurance I wrapped a rubber band around the top end of the phone (covering the listening speaker and camera lens) so if the cover suddenly popped open when pulling the suction ring, (which it did!) the cover would not pop entirely off and damage the connector ribbon inside.
I used the suction cup that came with the replacement battery kit. It took me quite a while to get the screen loose, but ultimately it came open. They are not kidding when they said this device is tighter that most. I also use the iOpener to get the battery to let go. The iOpener worked like a charm.
-
-
-
Continuez à faire levier en glissant l'outil sur les côtés du panneau frontal tout en défaisant les clips le long des côtés gauche et droit.
I didn’t see any side clips! Could they have fallen out previously because my screen was bulging out from the case? Or did I miss them somewhere? I managed to separate the front panel from the body, but there is yet another metallic looking panel on the body. The back of the panel still attached to the front part is mirror shiny on the back of that panel.
Hey Tom! Unfortunately you only separated part of the display panel, try to reseat the display and open it again, paying special attention to step 3 which shows you where you should be prying to get those clips on the metal rail out of the phone body.
The thin glass front panel has partially separated from the plastic frame along both sides. Should I try to put a small amount of adhesive to keep it from popping out? It was pushed out by an expanding battery!
-
-
-
Une fois que vous avez défait les clips en bas et sur les cotés du panneau frontal, éloignez la partie inférieure du boîtier arrière .
-
Ouvrez votre écran à un angle de 90° environ et calez-le avec un objet pour le soutenir pendant que vous travaillez sur l'iPhone.
-
Rajoutez un élastique pour bien maintenir l'écran lorsque vous travaillez. Ceci évite de forcer inutilement sur le nappes.
When reinserting the screen, be sure to start from the top and insert the plastic tabs on the screen into the case before advancing the rest of the screen into place, finishing at the bottom. The screen will snap into place once lined up to complete the insertion.
This is actually very important, I was having trouble getting the front panel to go on by starting at the top. I started from the bottom instead and the bottom ended up secure, but not the top. I then tried to take the front panel back off, but because the top portion was already loose the force required to pull off the bottom led to one of the ribbon cables at the top of phone breaking.
When reattaching the screen, please start from the top. BEFORE you try to push the bottom of the screen down and snap it in, use some pressure from the bottom edge to push the screen towards the top of the phone. I suggest that by the time you get to the middle of the phone (starting from the top), you do this. It will allow for getting the clips at the bottom by the sync cable clipped in and will sit nicely and allow for you to use overall pressure to make sure the whole screen is secured. I didn't do this and I damaged the seal on the right side of the phone and almost separated my screen from the digitizer trying to reseparate it to reattach the screen. Be very carefull to follow these steps I listed. If you do this while reattaching the screen, you'll have no problem.
I also agree with it being not necessary to remove the complete front panel. I just kept it attached and kept it at an angle as I pulled with gentle, continuous force (at a 45 degree angle as suggested) on the battery pull tab. It eventually came loose, I set the new battery in and everything works perfectly.
That's the way I did it too. I put a piece of packing tape from the screen, over the top of the phone, and onto the back. That kept me from putting any pressure on the ribbon cable should the phone slip and the whole screen try to lift away from the backing.
Be careful taking the front panel off. I tried to pull it very careful but it ripped. One of the cables was damaged but luckily, it was the cable that goes out with the old front panel. It also ripped 4.1 mm Phillips screw from step 13 and it jumped to the floor. I was lucky and recovered it from the floor.
In the end everything was fine and phone works great. But remember to be super careful.
Hello guys, I would like to first thank iFixit for these amazing repair guides they have always worked for me! Thank you!.
When reassembling the phone make sure to put the screen from top to bottom, but be aware there are 2 small flaps on the top left side of the screen (you can notice them using another iphone as a flashlight) if you don't put these 2 flaps first then you are going to have a little space between the top part of the screen and the aluminum frame, at least this happened to me and then I inspected the screen using a flashlight and then I found these 2 tiny flaps behind the screen near the top left corner.
I hope it helps!
Was it just me or did anyone else discover a ribbon cable (or something like it) on the bottom end of the phone (under the home button)? It kept me from opening the front panel more than 30 degrees or so, making the replacement impossible. Thoughts?
It looks like you might actually have an iPhone 5s, that is probably the Touch ID cable, check out the iPhone 5s Display Assembly replacement here!
Thank you, Sam!
What the heck only the top part of the lcd came off, NOT together with the shield plate. I used the stupid islack opener but only the very top layer came up. I don't see the battery or anything underneath because the shield plate is still in there. I can't even put it back closed and resuction it open because the shield plate is solidly stuck in and there is a cable at the top not settling properly. I have an open lcd top part of this phone. IDK man, PLEASE ADVISE.
Hi Gabrielle, sorry you're having trouble! This frame step was meant to show you how to avoid that issue, however, you should be able to use it to pry up the frame and shield plate. You'll need to carefully pry the frame itself up. Insert a thin prying tool between the black or white plastic display frame, and the metal phone case, to lift the frame assembly out of the phone body. If you continue to have trouble, try posting a question in our forum for faster feedback!
Hello, I've changed the earphone piece on my iPhone5 following this guide but I've skipped from step 9 directly to step 17 without problem, just shutting down first. Once opened I've tied the iPhone's body vertically to a small box with an elastic ring, the display assembly resting horizontal at some 90 degrees allows enough place to unscrew and replace the earpiece.
So easy! My biggest problem is my eyesight. LOL! Had to wear glasses and use a magnifying glass. Battery took about 20 minutes. Re-installing the cover for the screen ribbons was the toughest for me. If you cant see...have someone hold the screen while you gently wrestle the screws, while holding the plate, back in.
Worth adding to the main tutorial that the screen re-install must start from the top.
I found the suction cup to be very effective in removing the front glass. Didn't take that much force to start to see the glass separate from the frame. It's a lot easier if you have a fingernail you can insert when you start to see the glass separate from the frame so that you can let go of the suction cup ring and grab a spudger to pry down one side and then the other.
Add a rubber band in the picture as mentioned, I couldn’t figure out how it should be positioned, also put in instructions that front panel does not have to be disconnected as I agrree with some of the other comments it is difficult to reattach the plate, although it may be a lot easier to pry the battery out without messing with the vertical top. Otherwise, great instructions, thanks Ifixit,new iPhone battery is wonderful. Bil - 1/16/2018
The rubber band and soda can idea for holding the display in place at the proper position as depicted works great!
-
-
-
Retirez les deux vis suivantes qui attachent le cache métallique du connecteur de la batterie à la carte mère :
-
Une vis cruciforme #00 de 1,8 mm
-
Une vis cruciforme #00 de 1,6 mm
When reassembling, note the black jumper cable that runs next to the battery ribbon cable. Sometimes this jumper comes off its little groove and can make seating the battery ribbon cable tricky. The black jumper should travel up that little ramp and then curve to the right.
A note about screw management: ALWAYS remove screws from left to right if you are just putting them in order of removal on a magnetic trey, it helps with re-assembly. If you can, I recommend getting a magnetic white board and writing the size of the screws on it and categorizing by that, it makes it way easier and you won't ever have to worry about putting the wrong size screw in anywhere ever again.
What length are these screws?
Same for me for the 1.8mm screw.
So without ph#0000, i'm screwed, right?
Be very careful with the screws. I almost lost one of the battery ones. No replacement screws in the kit. You can buy them on the web, but that takes time.
I can’t remove these screws with the tools provided. I’m returning this. Useless.
ifixit should include replacement screws in the kit. i lost one and the plate is now held with one screw. Also the video leaves ALOT out. Plus no need to take cover off; you can replace battery easily without doing that step.
I can also confirm that the Phillips 000 that came with the kit did not work on these. I used another screwdriver from a glasses repair kit and that worked great. Seems odd they would include a tool that is unable to remove the battery connector bracket. I would have been up a creek if I didn’t have the right tool already.
The PH000 worked fine for me.
Gale Benson, April 28, 2018
The screws have, indeed, Phillips 000 heads. The problem can be that the Phillips 000 driver BIT supplied with the repair kit is of INFERIOR QUALITY! I have extensive experience with Phillips head screws, and no amount of firm pressure and proper driver seating would loosen the screws. I found a micro-tool kit I had for repairing computers, grabbed the Phillips 000 bit, and it worked PERFECTLY! The instructions are pretty good, but the QUALITY of the tools supplied is a real PROBLEM.
I used the same driver for both screws and it worked perfectly.
There must be a quality control issue with production of the PH000 bits. This is the third battery I’ve ordered, and I needed another kit because my pentalobe bit was damaged and no longer working. Anyway, the PH000 bit that came with my new kit is significantly larger than the one that came with my original kit and will under no circumstances remove the 1.6 mm screw. I pulled out the old kit, used the smaller PH000 bit and had absolutely no problem removing the screw. That would explain why some people are having zero issue with the screw and others are unable to remove it.
-
-
-
Retirez le cache métallique du connecteur de batterie de l'iPhone.
When I did this strep the battery connector (step 12) came with it. There seemed to be a bit of adhesive but it wasn't hard to separate them after the fact.
Note the long, thin forceps in the photo. These aren't included in every vendor's tool set that ships with the replacement battery and I found it a necessary tool not only for removing this particular plate, but also for positioning the screws back into their holes when you're putting the thing back together. If your replacement kit doesn't include that tool, they're only a couple of bucks and you can get them at any computer geek shop like Micro Center.
When removing the connector bracket note that there is a small square black barrier pad on the undersurface of the bracket at the lower screw location. I suspect this is to prevent the metal bracket from touching the material below it. So, ensure when reinstalling the bracket that you reinstall the pad also.
-
-
-
Utilisez un outil d'ouverture en plastique pour soulever doucement le connecteur de batterie de sa prise sur la carte mère.
Oh my God.
When prying, make sure you do it from the TOP or far TOP RIGHT corner using ONLY a spudger, and NOT like it is shown here on the picture.
There is a component next to the battery connector that is easily torn off the board if you're not careful. It's a common mistake made by somebody who have never done the repair before. This will make it so the phone looks like it's charging but only ever discharges. The component is the filter for the gas gauge line which is directly to the right of the battery connector and is extremely hard to see. They look like a tiny-tiny silver cylinders and you would need a microscope to actually be able to distinguish them.
Hope this helps.
HEED THIS WARNING!!!! Not doing so failed my entire repair. When I looked with an eye loupe, I could see one of these components by the connector had been knocked loose after I removed the connector. Pry from the top ot the connector or top right corner only.
The replacement battery out of the ifixit box: The connector may not fit immediately to the contact on the logic board. I needed to bend the stiff (metal-like?) cable quite a bit to find a shape of the cable that allows the connector to fit to the contact.
Ditto the comments by Salta. I compared the iFixit battery cable to the battery cable of the one I had removed and found that I needed to kind of crimp the cable a bit where it needs to fit between the battery and the connector. It's all quite stiff. Make sure the connector snaps into place!
Re-attaching the battery connector was tricky. Make sure you align the pins well. Otherwise you may bend them and that could be a big problem.
Why do I need to take the battery out? I replaced battery a few weeks ago and it seemed no need to disconnect the screen as well.
They seem recommending taking out connections more than necessary. Anyone let me know why leaving the battery there would make a problem for replacing the screen.
-
-
-
Retirez les vis suivantes fixant le cache de la nappe du panneau frontal à la carte mère :
-
Deux vis cruciformes de 1,2 mm
-
Une vis cruciforme de 1,6 mm
Anyone have any idea why the 1.6mm screw is not magnetic? Just wondering why this screw seems to be made of aluminum, its the first screw of its kind as far as iphones go.
The compass is right next to it.
Tom Chai -
I'd recommend if they made that clearer in the guide, luckily I put them back in right, its the one with the little bit of blue on it if i recall that isn't magnetic
Matt -
is it necessary to disconnect the front panel assembly cables fore removing the battery ?
or can you leave it on wile replacing the battery ?
I just finished this process using the battery replacement kit from ifixit and it went easily. I did NOT remove the entire screen but rather just had someone hold it at less than a 90 degree angle until I got the battery out. I found it took a while to slowly pry the battery out. Take your time and alternate between gently using the plastic tool and pulling on the plastic pull tab that says "for authorized use only" or something like that. It was MUCH easier than disconnecting the entire screen for the process. Hope this helps.
david -
Rule #1 on electronics repair methodology: to prevent damage to the electronics, power should be the first thing to be removed and the last to be restored. I'd disconnect the battery before touching anything else, a slip of the screwdriver or a loose screw could cause a fatal short circuit.
Mon téléphone a pris l'humidité et présente un fond d'écran d'aspect granuleux. Du coup l'éclairage n'est plus uniforme, nuisible pour une bonne lecture de l'écran.
J'ai démonté l'écran, une pellicule grasse et collante entre le LCD et la plaque métallique. J'ai nettoyé à l'alcool. Tout remonter avec la crainte que le téléphone ne fonctionne plus.
Le téléphone s'est rallumé, tout fonctionne normalement mais j'ai toujours ses traces sur le fond d'écran. Il faut le changer!
Mes difficultés étaient de remettre les petites vis aimantés, difficiles à remettre!
Merci à IFIXIT pour ce tutoriel très explicite.
Patrick Rosa, june 23 2014
So, of COURSE I dropped the screw that you are not supposed to lose. I was being careful, but as I did not want to lose track of it, I attempted to put it back ing the phone FIRST. Bad idea. This makes the plate kind of springy, and my screwdirver slipped, and the screw popped up, spun in the air, fell between my legs, bounced off my padded chair, and clattered around on the floor. I searched for an hour, and could not locate it. BE IT KNOWN, at least in MY CASE, the screw WAS INDEED attracted to my magnet (I keep a powerful round magnet stuck to the shaft of my drivers to provite the magnetism, far more powerful than a regular magnetic screwdriver. This being the case, I WAS able to provide a substitute fron a bag of iphone 4 screws, and my compass calibrated flawlessly upon power-up. YOUR MILEAGE MAY VARY, but I thought I'd add my experience.
Be warned, the 1.6mm screw is exceptionally easy to strip. I haven't been able to get it out yet (already tried rubber band trick and a few others) and am on the verge of giving up. The #00 screwdriver that comes with the set did not do a very good job of catching.
Were you ever able to get it out? Mine seemed stripped from the get go, rendering my attempt to troubleshoot my blank screen fruitless. Rubber band, glue, flat-head all did not work for me. Buying a soldering iron tomorrow to try that.
I did the repair without disconnecting the screen. I skipped down to step 13 and carefully held the screen while removing the battery. Adds a small element difficulty, but helps prevent all the issues others are having when reconnecting the screen.
The non-magnetized screw was very difficult to install. This is how I ultimately succeeded:
Install the two magnetized screws first. They are easy because the magnetized screws will stick to then end of the screwdriver. They will hold the cable bracket in place.
Place the third, non-magnetized, screw on the center of the cable bracket. Take a toothpick and nudge the screw toward the screw hole. The threaded part of the screw (the shaft) has enough weight that it will fall into the hole, and the head of the screw will be pointed upward. You will then be able to use the screwdriver.
Put a piece of tape on the table sticky side up. Set the screw on the tape head down. lift the tape and guide the screw in place. drive the head of your screw driver through the tape and tighten screw. lift off tape. throw away. :)
rdgentry -
The tape trick works well. Another way is to dip the screwdriver in alcohol (isopropanol, do NOT use water) and put the screw on its tip. It will be held there until the liquid is evaporated, which should be sufficient to put it in place.
Kater_S -
One of the screw is completely stuck and I cannot remove it! What can I do?
When putting it back together, I replugged in all three of the ribbon cables and powered on the phone to test before putting everything back together. All was OK except for the Home button, it had no effect when pressed. I ended up unplugging and replugging the 3 ribbon cables a few times and retrying. I then cleaned the connectors using a can of compressed air, screwed the little silver cover back on and snapped the whole phone back together, hoping everything would be fine. It was. I don't know if the problem was a dirty connector, or if you need to close the phone to make the home button work again.
I recommend wiping the plastic prying tool after lifting the screen off, it gets dirty from the gunk build up and some of that could eventually fall inside the phone.
My battery was really stuck, so much that the plastic tab broke when pulling. I followed someones advice to heat the back of the phone with a hair dryer, still wasn't super easy but I managed to get the battery out, only deforming it slightly.
The contacts for the home button are on the phone base so the screen needs to be in place for the button to work..
Step 9-12 are totally unnecessary unless you need to replace a broken screen. All you need is to keep the front panel in a vertical position once the front is open. The battery can be removed without taken out the 3 connectors which by the way the screws are very very tiny and difficult to put back.
I completely agree. These are unnecessary steps. Might be a little easier to pry the battery out with the display completely off, but not enough to make it worthwhile IMHO.
Is the 1.2mm a #000 or #0000? I have a small set and can't get one of these out. The instructions say a 1.2mm, the tools list shows #000, but my set says #000 = 1.5mm.
1.2 mm refers to the length of the screw (from head to end), the screw head size is compatible with a Phillips #000 driver. So as long as you have a #000 you should be set! Good luck =)
frustrated...screws to battery holder is stripped, now what?
Maybe a small amount of loctite. I noticed the P2 screws holding the display down had a small amount on my iPhone 5.
Como se ha comentado más arriba, no es necesario desmontar la pantalla, yo he sustituido la batería aplicando calor con el iOpener y siguiendo atentamente la guía. Resultado óptimo.
Yes, right! I, too, do not see the need to remove the LCD display at all; except, when one is replacing a broken display. The battery is ready for replacement once you had removed its bracket.
I found that it wasn't at all necessary to remove the front glass. I did need to use a hair dryer to soften the glue holding the battery, but I simply laid the phone down on the face glass and blew the hot dryer on the back for a couple of minutes at almost point blank range. Then I simply held the phone open with one hand, making sure the front glass never went back more than about 80 degrees (no need to stretch it all the way to 90 degrees), and used my other hand to work the spudger around the battery, making sure not to touch any delicate electronics in the area. The top right corner gave away first and then I worked it down from there and the battery came out pretty easily. The trick is to use the hair dryer for a few minutes beyond the phone being too hot to hold in your hand! (you might need to use a towel to pick it up when you pry the battery out.)
The battery of my 2012 iPhone 5 was working well but started to inflate pushing the front panel assembly out from the case. Replacing is faster and easier than on iPhone 5s. No need to remove the front panel completely, just holdig it at near 90º is enough but needed to warm the case to soften the battery glue. Thanks to iFixit for this guides and you guys for your comments.
As other people already indicated, steps 13 to 16 are not needed and risky. I asked another person to hold the front panel at 70 degrees while changing the battery.
I rushed in and did steps 13 to 16 without reading the warning. There were some unexpected events that happen. The short version of this story is my screen comes up with funny looking grey squares but phone is still usable. I don’t care as my main phone is an iPhone SE and I bought the battery as a learning exercise. Plus iOS 11 doesn’t install on an iPhone 5 so it’s days are numbered as a productivity tool.
Long version. Dissemble was easy. I made sure I had used the phone so the battery was warmed up . First problem with reassembly is in step 13 the bottom most 1.2mm wasn’t biting and screwing in. So it looked like the top of the hole got threaded. Also a screw fell out of what I think is the loud speaker. That was unexpected. This iPhone 5 isn’t my original, it was a replacement phone that came in a white phone that the Apple Store gave me when my original phone from 2012 had 2 recalls on it. So I strongly suspect this is a factory refurbished phone and not 100% mint off the line.
I found I didn’t need to remove the front panel at all so I skipped this step 13 through step 16. These steps seem to add potential problems.
-
-
-
Soulevez le support de nappe de l'écran vers la batterie pour le décrocher, et retirez-le de l'iPhone.
My iPhone 5 (1428) model don't has this bracket and replacing the earpiece don't fix my problem (don't hear anyone).
You might check that front camera flex cable.there can be a damage also where war speaker connects
Remember to put this plate back such that it's sitting evenly. The side towards the battery some times tends to stick up a bit, this in turn will put pressure on the backplate of the screen. After putting everything back together, you see a small yellow smear just to the left of the battery % indicator, you have not put that plate on correctly. Open up the phone, remove that retention plate and put it back such that it sits properly!
Opened my iPhone 5 etc. When reassembling, I notice the screen doesn't stay clipped into the back tray and is raised a couple of mils.
There is also a new brighter spot on the screen. Any ideas anyone?
I really wonder about the wisdom, and risk, of removing this upper plate in step 14 - unless I missed it, those three cables are NOT connected to the battery in anyway - and the chances for stuffing up said cables re-assembly are moderate to high! I can see that one would have to be careful taking that bracket and disconnecting those three cables ( I certainly was), but it looks to me like there's a case for just undoing the battery bracket & screws and carefully - very carefully - with great patience and some good spudgers, esp the black ones we use in desktop iMacs, - flat one end; pointy the other - plus the usual blue plastic ones and even a guitar pick - prying the battery out from its hideyhole! Much less stress regarding the upper bracket and the three cables while only a bit more stress over releasing the battery from its sticky grip! Anywho, I might have to stand corrected - but next time I'll go for this abreviated method. :)
please do not do this part....after you remove the bracket over the battery don't mess with the 3 cables at the top or remove its bracket. Just carefully remove the battery and insert the new one. the idea of using the rubber band helped a lot with the entire procedure and i did it in one very easily. thank you ifixit and most importantly the comments. Make sure to read all the comments before doing each step even when you r reassembling.
I confirm the previous post! It’s the third times I change the battery and I just realize this time that it’s completely useless to remove the front panel. You just have to be careful if it’s your first battery change because the original one is strongly sticked on the board. Don’t be brutal! Proceed slowly.
I think that lots of problem may occur when you reassemble the front panel cables. So just don’t disconnect them !
Ifixit is great. The comments are usefull too.
I also made the mistake of trying to remove the cable bracket. Once again I had to resort to another screwdriver since the included 000 in the battery kit did not work on these. But once I got the three screws removed I noticed the bracket’s top corner (near the top of the unit) was stuck even when I properly pulled the bracket back to unhook the lip from the logic board. I tried pulling it free every which way but nothing seemed to work so that’s when I checked the comments here and realized I shouldn’t have even bothered trying to remove it.
-
-
-
Vérifiez que la batterie est déconnectée avant de déconnecter ou reconnecter les nappes de cette étape.
-
Utilisez un outil d'ouverture en plastique pour déconnecter les trois nappes de l'écran :
-
Nappe de caméra frontale et de capteur
-
Nappe de l'écran LCD
-
Nappe du numériseur
The part itfixit sent only has two cables: the digitizer and LCD are combined into a single cable. (And the guide is great! Thanks!)
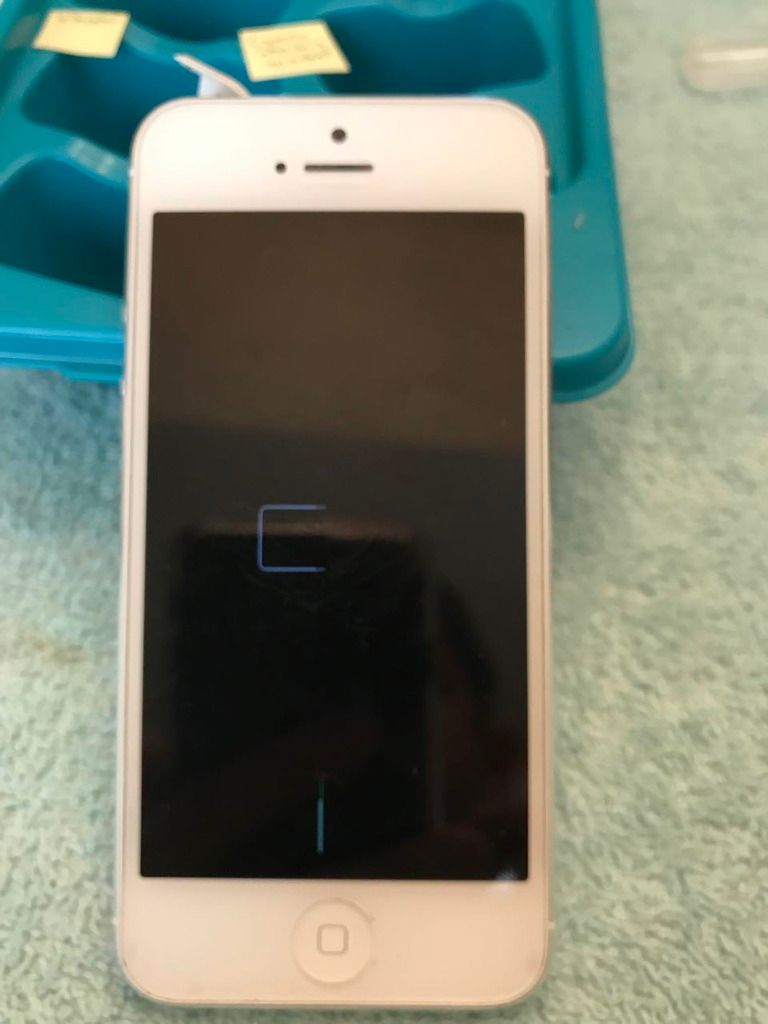
After replacing the screen I was presented with a no image screen (but backlight was ok), so I refited the shartered one, same issue, no image, but backlight. thinking I might damage the pcb, I just did a power cycle (disconnecting the battery) and now it's fine.
so... always powercycle :)
Be very careful here, at this point the phone power is live! a slip of the connectors or a loose screw could let the magic smoke out of the chips (chips won't work without their magic smoke, you know :-)
I'd disconnect the battery before messing with the connectors.
This is a troublesome step, since the LCD connector is particularly difficult to reconnect, and know that you've gotten it on. And thanks to the note claiming that if it's disconnected, if you might just get a black screen, you're left with having to disassemble the entire unit again, without knowing if it's powered off (since you presumably tried to power on). That's also nerve-wracking. I had this problem and disassembled and reassembled the entire phone, only to have the problem again. On the second try, I plugged the phone into power, and after a little bit, got the dead battery screen showing. So the problem was that the battery was discharged, not that I'd biffed the LCD connector.
A tip for knowing when your device is powered:
Activate VoiceOver before you start. this can give you audio clues with the volume control.I did not do it on purpose, but it saved me, because I got the black screen.
I also had to re-insert the display cable for like 3 to 4 times until it worked for me.(Note: Check if the display port cover is hinged on the battery side, otherwise there will be room for the connectors to come loose.)
The hint to disconnect the battery was very useful for my successful repair. After rebooting the phone everything was working just fine. Thanks!
BE CAREFUL HERE.
Take a good look at that camera loosely sitting there. It is possible that it will be slightly offset when shutting the assembly back into place. This causes it to not properly focus on closeups. If you don't move it around you will probably be okay.
Also, look at the display assembly, it has three small locking tabs that can bend easily if not pushed in at the right angle into the iPhone frame. Be careful not to be too forceful. Good luck.
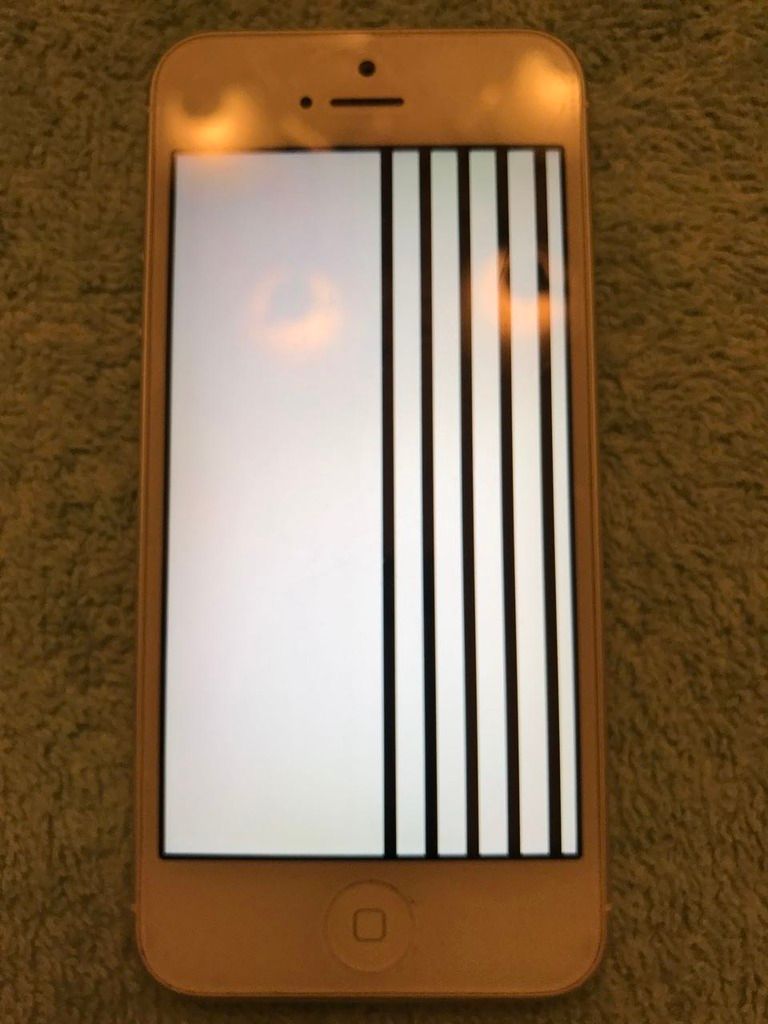
I am having issues removing the white lines on my screen. I made sure to connect the digitiizer connector was seated all the way and I also power cycled my phone several times. Anyone else having this issue?
If your lcd is properly fine then it can be a LCD Ic issue on pcb
When I was reassembling this the front facing camera cable was a bit longer than the previous one. I had to kink the ribbon cable a bit to get the connection to line up. Everything seems to be working but I wanted to note that the part might be slightly off spec.
I am very satisfied with the replacement display assembly (including FaceTime camera and Home button) iFixit sent. It arrived a day early, fit perfectly, and has fixed the color banding, cracked screen, and scratched edges very well. In addition, the home button now has a much crisper "click" to it, more like the new MacBook's keys vs those of an older MacBook Pro.
This step is not needed to remove the battery and complicates the process by having to reconnect the sensors.
if my lcd metal plate is scratched can i replace it to remove the lines or do i need a new lcd
When I started the phone again, there was a grid pattern and touch was not working consistently. It turns out there were two separate problems. (1) We had over-handled the cables and a quick swab of alcohol helped remove the oil from the connections. (2) The first connection is really tricky to get right and comes undone easily during the final reassembly.
I had this problem too (not the oil though). When I first restarted the phone, I had white crosses over the display, and the digitiser didn't work. The only way to shut down the phone was to hold the home key & power key for 8 seconds until the display went black. Reseating the LCD & Digitiser connectors, and power cycling by reconnecting the battery fixed the problem. Hope this info helps others.
In the image you can see the camera has lifted out a bit. Mine did this too, because the old screen had levered it out. To push the camera back into position you need to insert a fine tool behind a small metal spring contact because it catches on the camera's casing otherwise. This little spring is to the left of the metal case, between the camera and ribbon.
So I keep getting the "white lines on the LCD" bit with no resolution. I've tried reconnecting the connector like 6 times and power cycling and I get the exact same thing every time? Is it possible that the replacement screen has an issue?
Watch the soft pad between the rear camera enclosing and the top side of the frame, especially when reassembling. After replacing the battery, my camera pictures gradually showed lots of dust spots. I opened the device again and discovered that the pad had been displaced. However, I am not fully sure if that is the reason for the spots.
On reinstall, I can't get the connectors to line up and the replacement screen has 3 connectors where as my busted screen had only 2. The cables on the replacement screen are too short? Is that even possible?
I’d say removing the screen is BS. I realized that I didn’t have to remove my screen cable as I was able to flip the screen vertically while I take the battery out. Removing the screen cables causes more problems- you may end up with white squares on the top of the screen which seem to expand over time. Also it is very easy to bend little metal legs on the socket when prying the connector.
totally agree, no need to remove the screen. It means you will have to do everything with only one hand (the other one is holding the screen), but you skip so many steps that overall it’s well worth it.
It is very important to make sure the cables are fully seated. When I finish assembling the phone I too had a vertical white stripe on the display. I disassembled the phone and reconnected the cables very carefully, and also made sure the shield was properly seated. When I turned the phone back on I found a very faint white line, but after doing a power cycle it disappeared to my great relief. Also, I would definitely recommend removing the display because it’s so hard to get the battery out you don’t need the extra risk of damaging the display.
After replacing a friend’s iPhone 5’s rear camera and reassembling their phone the screen displays verticle black lines on the right side now like this: http://i1091.photobucket.com/albums/i393...
Anyone else have this problem? I didn’t think about cleaning the display connectors with alcohol at the time.
Also, when the battery was too low and before the display produced vertical lines the display showed half of a low battery symbol:
http://i1091.photobucket.com/albums/i393...
Like the right side of the display was blank.
On reinstalling the front panel assembly, I had a difficult time lining up the digitizer cable. After struggling with it for a while, I noticed that the plastic shoulders of the small mounting bracket at the ends of the pins had become rounded over. After cleaning these up with a razor blade, everything slid together perfectly. Thanks so much for these guides and all the helpful comments!
I have done all these operations 6 times to get back a good displaying. The last was the last: nothing on the screen now. It is now black, no sound, no vibration, BUT the iPhone show up in iTunes O.O
iTunes asked me to update the iOS to 10.3.3 but it’s already done. I clicked OK but nothing more. Still black and quiet.
The new battery is 100% charged.
What is my problem, please help :-(
I found the part who was deffective: the connector of the screen has broken due to too much movements. :-( Screen is perfect and clean but dead.
-
-
-
Retirez le panneau frontal complet du boîtier arrière.
My display was not turning on and my home button was not working (I verified this by trying to activate siri which didn't work). When I replaced the display assembly everything works except for the home button. Since this assembly comes with the button and the ribbon cable, I'm not sure what else can be wrong. I checked the contacts on the phone and I see the little copper 'pins' sticking out. I can't tell if they are making contact since the display has to be closed, but it appears they are lined up correctly. Does anyone have any suggestions or ways to test the contact pins? Could the home button on my replacement be defective? I've already emailed support, but just curious if anyone has any suggestions I could try while waiting to hear back from them. Thanks! By the way, SUPER grateful the rest of the display works. I can now back up my phone and can probably deal with a broken home button if I need to. Woohoo!
I'm having issues where the screen jumps around when you get a finger near it. I'm reading it might be grounding but no idea where any tape could be applied. Replaced the screen twice thinking it was a bad part. Now, I just don't know.
My front camera does not work. I took apart and ensured the connection several, several , several times.... no front camera... anyone else have this issue?
Try replacing the camera and flex assembly.
Greg M -
-


Pour remonter votre appareil, suivez ces instructions dans l'ordre inverse.
Pour remonter votre appareil, suivez ces instructions dans l'ordre inverse.
Annulation : je n'ai pas terminé ce tutoriel.
888 autres ont terminé cette réparation.
Merci à ces traducteurs :
97%


Ces traducteurs nous aident réparer le monde ! Vous voulez contribuer ?
Commencez à traduire ›

38 commentaires
My brother in-law had water damage to his screen and the carrier was going to charge him and arm and a leg for a new phone so I ordered the complete display assembly from right here on iFixit that came with all the necessary tools. Took me a little over 5 minutes between repairing and chit chat to finish. It was a really easy repair and my brother in-law was never happier to have his phone back at a fraction of the cost the carrier was quoting.
Thanks for your guide for replace new touch screen
i had save one tiny screw from inside assembally :) :) :)
My display didn't shut down when i have a call and i put the phone near my ear! I plug my broken display and it work well but not the new one...please someone help! btw thanks for the guide and for the fast delivery
I know you posted this awhile ago, but if anyone else is wondering, how to fix the issue where the display won't turn off while on a phone call, You MUST transfer over the small plastic retaining brackets from the old display, and put them in the correct position! By correct position, I mean the two small transparent points need to line up with the receptors on your iPhone's front panel assembly (Camera, light sensor, mic).
This one is for Max:
Max, can you explain better what you mean by plastic retaining brackets? I'm about to swap my screen out and I wanna be able to do this
U need to scratch the paint in ur display where the proximity sensors are covered by it. After that use a black marker.
Nothing is working on my iphone and hate putting myself down but reality is im absolute pathetic dumbo when it comes to the xomplexity of technology and i lterally break down in tears multiple times every day because i dont understand it anyhow my questions include how can i independently fix: reminders not working? notes not working? safar not working? voice recorder not working? and basiclly everything not working? and I can't even delete anything to free up more space?! When it was allowing me to delete thigns which I did delete a lot it still didn;t atually free up any sapce?! Please help this kind soul dear technological geniuses of IFixIt as this is not only additional brdem to my many lfe stresses but its very time wastign and i cant afford to and dont want to just go and buy another iphone as i like this one very much it just needs to get working !!!
Im a busy carer and student and other informal roles daily too. Im going through a very difficult time in every way and i would appreciate wuick answer!
Hey Rachel.
I almost broke down too when I read your comment...
What I would do in your situation, is:
First, backup what you want to keep with iTunes or CopyTrans, google will help you find many tutorials on YouTube or elsewhere.
Secondly, do a reset to factory settings. Open the settings app, go to General, scroll all the way down, press Reset and then select the option that says "Erase all content and Settings". Then after your iPhone turns on again, connect to the Internet and open Settings->General->Software Update and update if there is one.
Thirdly, restore your backup, but I suggest to restore only photos, videos, messages, contacts and not apps & settings because the problem could arise
from some app.
I hope I helped, have a nice day!
akos vfr -
Further to previous advice, use apps like dropbox or Google Photos to backup your photos and then erase them from the phone, save space that way, clear out SMS messages and photos... You still have access to all your photos using the cloud services like Google or Dropbox...
Apps that won't update, delete them and then try re-install..
Keep phone memory free of junk, do updates... use iCloud, do backups Avoid too much music and or videos.. use cloud services to stream instead of keeping lots of music etc on phone...
Find a nerdy "friend" to help you and help keep the phone from getting "stuffed up" Takes things on methodically...... don't panic, be happy! :-)
I did everything correct and... IT'S PERFECT! thanks Ifixit for the parts and the guide I'm so satisfied that I have repaired the broken screen by my own! REPAIR AND DIY!!!
Everything's great ...except that the left side of my screen won't snap down. Not sure what I did wrong, but if I use more force, I'm afraid I'll re-break the screen (or something else). I probably need a new battery --it looked a bit swollen and even the old screen didn't sit exactly flush on the left side, so I'm wondering if it might be a bit swollen and that could be causing some of my issue. Ideas?
Hey Shelbi,
If your battery is looking a little swollen, I would highly advise that you get a new one! The rechargeable batteries found in phones can be a little dangerous and deformation is usually an indicator that something isn't quite right. I bet that it will be fine, but definitely look into replacing the battery just in case. Comment remplacer la batterie de votre iPhone 5 I actually did this battery swap yesterday and it took me only minutes!
If the battery seems to be ay-okay, then maybe remove the display and look along the left side of the phone to see if there is something that seems out of place. Also look at the display assembly itself, does anything look bent or deformed? Are the brackets straight? And if the battery IS deformed, it can definitely prevent the display assembly from sitting flush.
Good luck! I have faith you will make your phone good as new.
Scott
Update: Just got my replacement battery in (no new tools needed, just used the one from my display replacement kit), and all is fine. The old battery looks like it had expanded and partially collapsed (eek!). Strange thing was, it was holding a charge just fine --about 24 hours, and I charge it before I go to bed at night. I did have a cheaper off-brand lightning cable that I am no longer using --I suspect that may have caused my issue in the first place. My advice: I suggest if you have an older phone or suspect any kind of battery issues, go ahead and just order a new battery at the same time as the replacement display. You'll save yourself some time and maybe some shipping charges. It's easier to pry out the old battery if you have the display off anyway, so you may as well do them both while your phone is open.
tl;dr: with a battery replacement, the display fits flush on the phone now, no gaps. Thanks!
Shelbi -
Guide was super easy to follow. screen on my daughters iPhone was shattered and the packing tape solution at the beginning of the repair guide made it super easy! thanks for the advice ifixit community!!
Esta ha sido mi primera reparación de un iPhone. La guía es excelente pero he encontrado un problema inesperado: el cristal se rompió por una caída y el golpe deformó imperceptiblemente una esquina de la carcasa del teléfono; al ir a montar la pantalla nueva no encajaba bien y tuve dificultad para enderezar la parte deformada sin dejar marcas de las herramientas en el aluminio de la carcasa que es muy rígida. Por lo demás el resultado es altamente satisfactorio. Muchas gracias.
Thanks for this great guide! I have an iPhone that has the display section coming up from the rest. You say to put some adhesive in to hold the display down. What kind of adhesive do you recommend?
Hi Guys,
I have here a general question. When you replace LCD display of any iphone do you really first need to disconnect battery? Because if the battery was disconnected, when you switch on the phone it appears to have network searching problem, time and date problem etc?
Thanks in advance.
Taabar
Great guide! Had an iPhone 5 screen crack on me, a while ago. For Christmas, I went out and bought an Ifixit repair kit and full assembly replacement. This guide helped me get through it, with relative ease. There were definitely some sticking points such as cable re-seating. Unfortunately, I was wasn't expecting the transfers of the home button and cable, so I had to look up another guide to complete the full transfer. The whole project took me way longer than I'd like to admit, but it was my first time, and know it will be super quick the next time! Thanks!
Cool, just replaced the screen assembly because the screen stopped registering touches. Works perfectly now. Great parts, great manuals. Once again a repaired device.
Just as a note for help if anyone else encounters it: in many new display assemblies, the display cables can be very rigid, which makes putting on the metal cover to the display cables a little bit tricky. Make sure you fully clip in each of the cables in it's correct spot, and don't be afraid to put a little bit of pressure on the metal covering as you screw it down. In addition, magnetic screwdrivers are helpful, but don't rely on them too heavily, as the tiny screws seem to randomly fall off magnetic screwdrivers at some points. Otherwise, this was an extremely helpful guide, and I was able to complete the task within an hour.
Replaced my iphone 5 screen the new one lights up but the touchscreen does not respond to finger pressure. Any ideas . Thanks.
Everything in order but strangely the on/off button seems unresponsive… everything else works, including the home button. Idea ?
My son dropped his iPhone 5 while getting out of his bunk bed (top bunk) the screen when to a bunch of lines running up and down the screen. When I tried to do a soft reset (home and lock buttons) it turned off and won’t come back on. Will changing lcd/screen fix this?
Great guide. Two things of note however:
1. When prying the glass up without the iSclack, it was impossible to get leverage with the tools (sparge, plastic opening tool). It took a considerable amount of brute force and, when it opened, it bypassed the clips entirely. That being said, there was no damage and the face clicked back in place without a problem after replacement.
2. There is no clear instructions on removing the battery after the last cables were removed. It took quite a bit of extremely careful prying to separate it from the adhesive and hoping that was the right thing to do. I wasn’t entirely sure that was the right thing (or if I was accidentally breaking something).
Adding one more step to show how the battery should be removed would be great.
All in all, however, this is a great guide and I’m glad I chose to replace the battery on my 5 instead of consigning it to the junk heap.
Hi Maarten, are you sure you were viewing the battery guide? Steps 17-20 should explain exactly how to remove the battery. I’m glad to hear that you were successful regardless! Great job =)
After changing a friend’s iPhone 5 rear camera and reassembling their iPhone, upon power up the display shows white and black bars down the right side of the screen like this:
http://i1091.photobucket.com/albums/i393...
Before the iPhone 5’s battery was recharged the screen displayed only the left side of the "low battery” symbol, like the right side of the screen didn’t work:
http://s1091.photobucket.com/user/warmfu...
Anyone have any idea what the cause is?
I’ve detached the display, cleaned the connectors with electrical contact cleaner, and reattached the display, but it still only shows vertical lines:
http://i1091.photobucket.com/albums/i393...
Anyone else experience this and/or have a solution?
step by step instructions for battery replacement were clear and perfect! Thanks for this!
I already have replaced several displays with iFixit and it worked great! Thanks for that!
This time, the screen is black, the iPhone seems dead. :-(
What could be the problem?
I could not shut down the phone before opening due to display problems (didn’t react).
hello, can you help me? My iPhone 5 is a live machine and is detected on the PC, but does not appear on the screen. the case of my iphone fell in the water, and I let it go, the next day the LCD started to line up and the touch jammed. then I bought a new LCD, after the machine was installed, the screen did not appear. beg for a solution
My phone was taken to repaire but they took this metal part what is the possiblility that i could get error in phone as the display was slightly up and down the number seems two in one
Very happy with the outcome of replacing the display plus replacing the battery as well. It did take time doing the repair as I had forgotten which screws went where. But now I have a fully functioning phone.
thankyou
can i replace a white display for a black display on my iphone 5
Absolutely! The color won’t affect your phone at all, just be sure you have the correct display for your phone! iPhone 5 displays are not compatible with the 5c or 5s =)
the screen backplate disconnect got torn of and now i can’t get in.
My iPhone 5 if the screen is lowered down the screen is scrambled, sometimes white lines, and there is a green color on the screen, when I lift it, the screen returns to normal, what is this damage?
This guide ends before they get to the home button. It needs to be transferred from the old display. Here's the guide for that: Remplacement du bouton home de l'iPhone 5
Having completed this repair using the rear camera part from Ifixit I have to comment that the camera is noticeably lower quality. Its not huge - You don't notice it looking at the photos scaled down to fit but viewing one for one there is significant detail lost. My staff member has an Iphone 5 bough at exactly the same time as mine so I was able to take a photo side by side on his and mine after my repair and when you view 1 for 1 pixel in product boxes on mine the text was just a colored blur where on his although you couldn't read the text it was more obviously text. Overall though its still better than having a camera that wouldn't focus at all and being that Apple seem to refuse to supply genuine spare parts (Which there has to be a low against??? - Imagine if a car manufacturer did that) its still good buying one from someone who gives good support. At the end of the day its a phone camera not an SLR and its still better than the older Iphone 4 camera.
matt - Réponse
The majority of product manufacturers are not required to provide parts, and apple will fix items under the various warranties it offers. Car manufacturers on the other hand are required to make parts available by law. It is part of the regulation of their industry. They get a lot of protection for their business model, but have some obligations too. It's why the EV1 was pulled, they didn't want to have to make the parts, and why there are so many Delorian parts.
William Leeper -
This is a great guide. However, I'm having a hard time popping the screen back into place. Everything works but I'm afraid of putting too much pressure least I crack it again. Any advice?
amciotola - Réponse
To avoid broken screens during reassembling:
Put the hooks of the screen in the right place in the housing, then close it loose, don't press it. Turn your phone upside down with the screen on a very flat surface (e.g. table). Now press the housing on the screen -> no more risk for braking the screen because of inhomogeneous force applied on the glass!
mondbewohner -
I hope folks read this comment before proceeding to attempt a Sleep/Wake button repair on the iPhone 5! Apple has an iPhone 5 Sleep/Wake button replacement program, free, for iPhone 5 devices manufactured through March 2013. See program details at https://www.apple.com/support/iphone5-sl.... Don't do this yourself if you don't need to. It's a difficult repair.
Mark Luscher - Réponse
I was willing to add the following important remark on top of this guide but, strangely, it has been refused! Here it is:
---
*Check if your Iphone 5 is eligible to the Apple special program for a free battery replacement (devices sold between September 2012 and January 2013, within a limited serial number range).
* If not, watch the video and use this guide [video|https://www.youtube.com/watch?v=6ogE8USs...]
---
And thus, as my Iphone 5 was eligible, I went to the Apple store of Le Louvre in Paris and the battery has been changed for free instead of 65 euros. Thanks to Mark!
revher -
Hi every one i drop my iphone5s 16gb
I replace 10!new screen but cant back to live i see on the "logic board" where u conect the screen i se damage HOW CANT FIX THAT WHITOUT LOST MA DATA ??? Thaks for anny hellp!!!!!
aliroberto01 - Réponse
Steps 12-15 seem to be not necessary for battery replacement. They are not required to remove and replace the battery and they at least DOUBLE the amount of work. Most of the time spent on this process involved working with those tiny screws and maneuvering them in place and screwing them down. Steps 12-15 are three of the five screws that you work with inside.
Also, there should be a note at the beginning of Step 2 that if you bought the iFixit kit that you should go directly to Step 6.
Bob Hatcher - Réponse
please wear safety helmet too, integral helmet and cover mouth with an N95 facemask underneath, just in case the battery punctures, explodes, you knock your head back to the wall and slam it back forward hitting the screw in your eye and and inhaling toxic fumes! can never be too careful ;-)
ibisiki - Réponse