Aller au contenu principal
Pour réparer ensemble - Je crée un compte

Samsung Galaxy S22 Screen Replacement

Ce dont vous avez besoin

  1. Samsung Galaxy S22 Screen Replacement, Heat the bottom edge: étape 1, image 1 de 1
    • Let your phone's battery to drain below 25% before starting this repair. A charged lithium-ion battery may catch fire if damaged.

    • Heat an iOpener and apply it to the bottom edge of the back cover for two minutes.

    • A hair dryer, heat gun, or hot plate may also be used, but be careful not to overheat the phone—the display and internal battery are susceptible to heat damage.

    Demander à FixBot
  2. Samsung Galaxy S22 Screen Replacement, Adhesive information: étape 2, image 1 de 2 Samsung Galaxy S22 Screen Replacement, Adhesive information: étape 2, image 2 de 2
    • While you wait for the adhesive to soften, note the following:

    • There's adhesive securing the back cover around the perimeter of the frame.

    • The adhesive is strongest in the bottom right and top left corners.

    Demander à FixBot
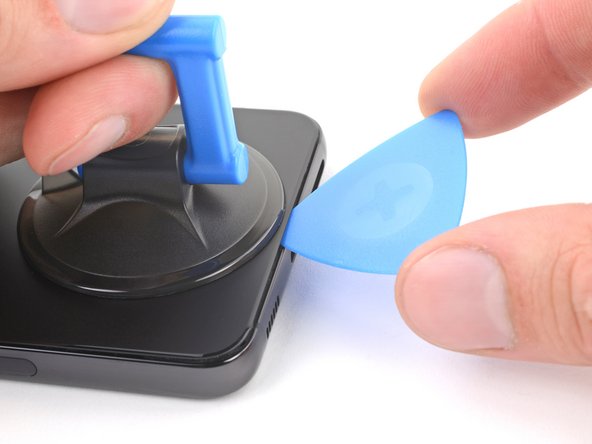
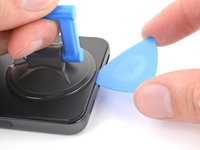
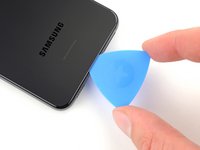
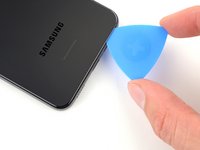
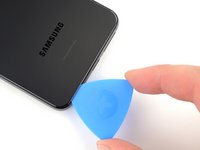
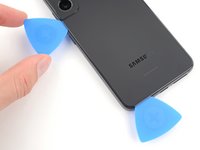
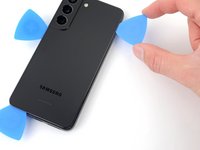
  3. Samsung Galaxy S22 Screen Replacement, Insert an opening pick: étape 3, image 1 de 3 Samsung Galaxy S22 Screen Replacement, Insert an opening pick: étape 3, image 2 de 3 Samsung Galaxy S22 Screen Replacement, Insert an opening pick: étape 3, image 3 de 3
    • Apply a suction handle to the back cover, as close to the bottom edge as possible.

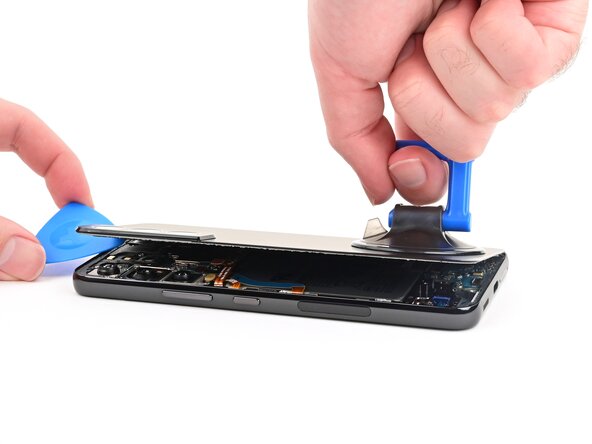
    • Pull up on the suction handle with strong, steady force to create a gap between the cover and the frame.

    • If you have trouble creating a gap, apply more heat to further soften the adhesive. Follow the iOpener instructions to avoid overheating.

    • Insert an opening pick into the gap.

    Demander à FixBot
  4. Samsung Galaxy S22 Screen Replacement, Slice the bottom adhesive: étape 4, image 1 de 3 Samsung Galaxy S22 Screen Replacement, Slice the bottom adhesive: étape 4, image 2 de 3 Samsung Galaxy S22 Screen Replacement, Slice the bottom adhesive: étape 4, image 3 de 3
    • Slide the pick back and forth along the bottom edge to slice through the adhesive.

    • Leave the pick inserted in the bottom left corner to prevent the adhesive from resealing.

    Demander à FixBot
  5. Samsung Galaxy S22 Screen Replacement, Heat the left edge: étape 5, image 1 de 1
    • Apply a heated iOpener to the left edge of the back cover for two minutes.

    Demander à FixBot
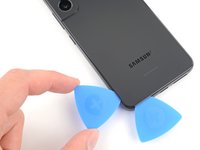
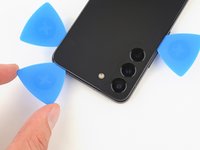
  6. Samsung Galaxy S22 Screen Replacement, Slice the left adhesive: étape 6, image 1 de 3 Samsung Galaxy S22 Screen Replacement, Slice the left adhesive: étape 6, image 2 de 3 Samsung Galaxy S22 Screen Replacement, Slice the left adhesive: étape 6, image 3 de 3
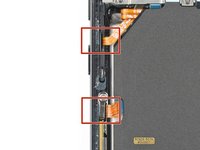
    • Insert a second opening pick at the bottom left corner.

    • Slide the pick to the bottom of the camera bezel to slice the left adhesive.

    • Only insert the pick up to 5 mm, as you may damage the antenna flex cable or the power button cable.

    • Leave the pick in to prevent the adhesive from resealing.

    Demander à FixBot
  7. Samsung Galaxy S22 Screen Replacement, Heat the right edge: étape 7, image 1 de 1
    • Heat an iOpener and apply it to the right edge of the back cover for two minutes.

    Demander à FixBot
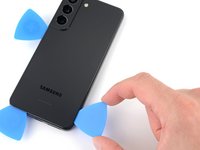
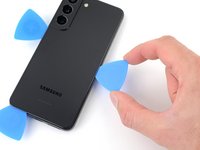
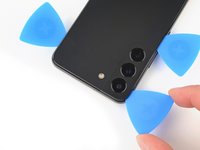
  8. Samsung Galaxy S22 Screen Replacement, Slice the right adhesive: étape 8, image 1 de 3 Samsung Galaxy S22 Screen Replacement, Slice the right adhesive: étape 8, image 2 de 3 Samsung Galaxy S22 Screen Replacement, Slice the right adhesive: étape 8, image 3 de 3
    • Insert a third opening pick at the bottom right corner.

    • If the adhesive has resealed, insert the pick closer to the bottom edge.

    • Slide the pick to the top right corner to slice the adhesive.

    • Leave the pick in the top right corner to prevent the adhesive from resealing.

    Demander à FixBot
  9. Samsung Galaxy S22 Screen Replacement, Heat the top edge: étape 9, image 1 de 1
    • Heat an iOpener and apply it to the top edge of the back cover for two minutes.

    Demander à FixBot
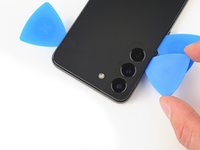
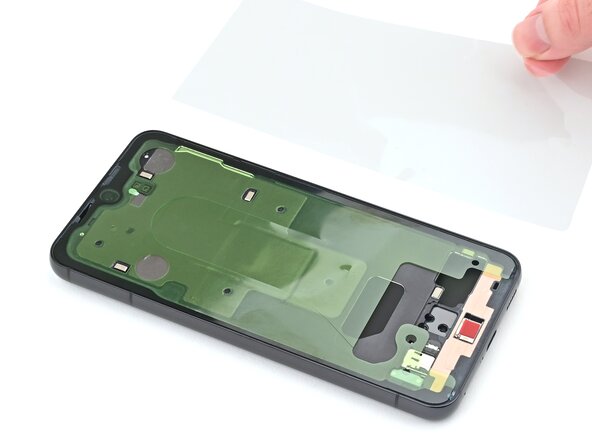
  10. Samsung Galaxy S22 Screen Replacement, Slice the remaining adhesive: étape 10, image 1 de 3 Samsung Galaxy S22 Screen Replacement, Slice the remaining adhesive: étape 10, image 2 de 3 Samsung Galaxy S22 Screen Replacement, Slice the remaining adhesive: étape 10, image 3 de 3
    • Insert an opening pick in the gap at the top right edge.

    • Slide the pick across the top edge and around the top left corner to slice the remaining adhesive.

    • Only insert the pick up to 4 mm, as you may damage the rear cameras or flash.

    Demander à FixBot
  11. Samsung Galaxy S22 Screen Replacement, Remove the back cover: étape 11, image 1 de 3 Samsung Galaxy S22 Screen Replacement, Remove the back cover: étape 11, image 2 de 3 Samsung Galaxy S22 Screen Replacement, Remove the back cover: étape 11, image 3 de 3
    Outil utilisé dans cette étape :
    Tweezers
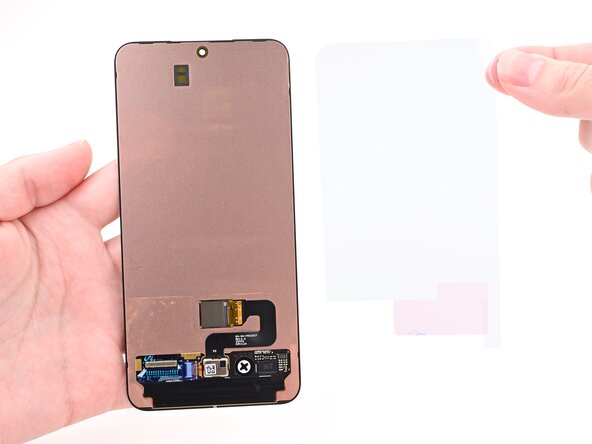
    $4.99
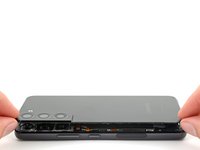
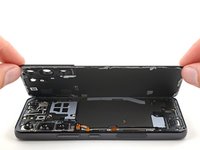
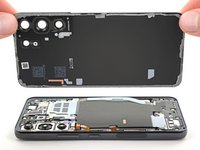
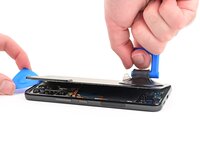
    • Grab and remove the back cover.

    • If your cover is still sticking to the frame, slide an opening pick around the perimeter until the cover completely separates.

    • During reassembly:

    • This is a good point to power on your phone and test all functions before sealing it up. Be sure to power your phone back down completely before you continue working.

    • Remove any adhesive chunks with a pair of tweezers or your fingers. Apply heat if you're having trouble separating the adhesive.

    • To apply new adhesive, follow this guide.

    Demander à FixBot
  12. Samsung Galaxy S22 Screen Replacement, Disconnect the wireless charging coil: étape 12, image 1 de 2 Samsung Galaxy S22 Screen Replacement, Disconnect the wireless charging coil: étape 12, image 2 de 2
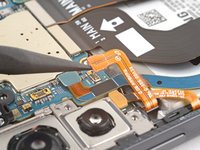
    • Use the pointed end of a spudger to pry up and disconnect the wireless charging coil from the motherboard.

    • To re-attach press connectors, carefully align and press down on one side until it clicks into place, then repeat on the other side. Don't press down on the middle. If the connector is misaligned, the pins can bend and cause permanent damage.

    Demander à FixBot
  13. Samsung Galaxy S22 Screen Replacement, Unfasten the wireless charging coil: étape 13, image 1 de 1
    • Use your Phillips screwdriver to remove the six 3.5 mm-long screws securing the wireless charging coil.

    Demander à FixBot
  14. Samsung Galaxy S22 Screen Replacement, Unfasten the loudspeaker: étape 14, image 1 de 1
    • Use your Phillips screwdriver to remove the seven 3.5 mm screws securing the loudspeaker.

    Demander à FixBot
  15. Samsung Galaxy S22 Screen Replacement, Unclip the loudspeaker: étape 15, image 1 de 3 Samsung Galaxy S22 Screen Replacement, Unclip the loudspeaker: étape 15, image 2 de 3 Samsung Galaxy S22 Screen Replacement, Unclip the loudspeaker: étape 15, image 3 de 3
    • Insert the pointed end of your spudger between the upper left corner of the loudspeaker and the frame.

    • Pry up to unclip the loudspeaker from the frame.

    • During reassembly, press around the perimeter of the loudspeaker to engage the clips.

    Demander à FixBot
  16. Samsung Galaxy S22 Screen Replacement, Remove the charging coil and loudspeaker assembly: étape 16, image 1 de 3 Samsung Galaxy S22 Screen Replacement, Remove the charging coil and loudspeaker assembly: étape 16, image 2 de 3 Samsung Galaxy S22 Screen Replacement, Remove the charging coil and loudspeaker assembly: étape 16, image 3 de 3
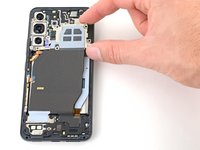
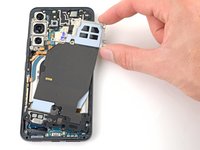
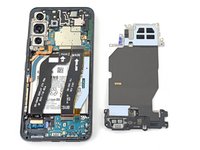
    • Grab and remove the wireless charging coil and loudspeaker from the frame.

    • Do not separate the charging coil from the loudspeaker.

    Demander à FixBot
  17. Samsung Galaxy S22 Screen Replacement, Disconnect the battery: étape 17, image 1 de 2 Samsung Galaxy S22 Screen Replacement, Disconnect the battery: étape 17, image 2 de 2
    • Use the pointed end of your spudger to pry up and disconnect the battery press connector.

    Demander à FixBot
  18. Samsung Galaxy S22 Screen Replacement, Disconnect the screen cable: étape 18, image 1 de 2 Samsung Galaxy S22 Screen Replacement, Disconnect the screen cable: étape 18, image 2 de 2
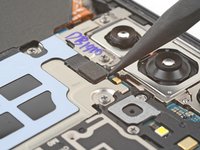
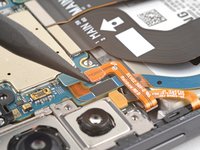
    • Insert the point of a spudger under the screen cable press connector at the bottom left corner of the phone and pry up to disconnect it.

    Demander à FixBot
  19. Samsung Galaxy S22 Screen Replacement: étape 19, image 1 de 2 Samsung Galaxy S22 Screen Replacement: étape 19, image 2 de 2
    • Repeat this process for the other end of the cable located on the motherboard.

    Demander à FixBot
  20. Samsung Galaxy S22 Screen Replacement, Remove the screen cable: étape 20, image 1 de 2 Samsung Galaxy S22 Screen Replacement, Remove the screen cable: étape 20, image 2 de 2
    • Remove the screen cable from the phone.

    Demander à FixBot
  21. Samsung Galaxy S22 Screen Replacement, Replace the back cover: étape 21, image 1 de 3 Samsung Galaxy S22 Screen Replacement, Replace the back cover: étape 21, image 2 de 3 Samsung Galaxy S22 Screen Replacement, Replace the back cover: étape 21, image 3 de 3
    • Align the back cover with the frame and press down evenly with your fingers to lightly adhere it to the phone.

    • Don't apply new adhesive at this step, as you'll need to remove the back cover again to finish reassembly. The old adhesive will be enough to keep the back cover in place while you replace the screen.

    • If you've already removed the adhesive, hold it in place while flipping your phone over, being careful not to drop or bend the back cover.

    • Flip the phone over so the screen is facing up.

    Demander à FixBot
  22. Samsung Galaxy S22 Screen Replacement, Prepare the screen: étape 22, image 1 de 1
    • Don't apply packing tape to the metal frame of the phone. The tape may peel the paint off the frame.

    • If the screen is badly cracked, lay overlapping strips of packing tape over the glass to protect yourself and make disassembly easier.

    • Make sure there's a single strip (not overlapping) of tape across the bottom edge, big enough for a suction handle to fit on.

    Demander à FixBot
  23. Samsung Galaxy S22 Screen Replacement, Tool and safety information: étape 23, image 1 de 3 Samsung Galaxy S22 Screen Replacement, Tool and safety information: étape 23, image 2 de 3 Samsung Galaxy S22 Screen Replacement, Tool and safety information: étape 23, image 3 de 3
    Outil utilisé dans cette étape :
    iFlex Opening Tool
    $11.99
    • The gap between the front glass and frame is very small. You'll need a thin, rigid tool like an iFlex to create an initial gap.

    • Take the following safety precautions while removing the front glass during the next steps:

    • Don't grip the iFlex or similar metal tools by the edges—they're very sharp.

    • The front glass may shatter and spread shards of glass around your workspace. Consider wearing gloves and safety glasses to protect yourself.

    Demander à FixBot
  24. Samsung Galaxy S22 Screen Replacement, Heat the screen: étape 24, image 1 de 1
    • Use a hair dryer or heat gun to heat the bottom edge of the screen until it's slightly too hot to touch.

    • If you're using a heat gun, be careful not to overheat the phone—the internal battery is susceptible to heat damage. Set the heat gun temperature to low, if possible.

    Demander à FixBot
  25. Samsung Galaxy S22 Screen Replacement, Apply a suction handle: étape 25, image 1 de 2 Samsung Galaxy S22 Screen Replacement, Apply a suction handle: étape 25, image 2 de 2
    • Apply a suction handle to the center of the screen's bottom edge, as close to the edge as possible.

    Demander à FixBot
  26. Samsung Galaxy S22 Screen Replacement, Insert an iFlex: étape 26, image 1 de 3 Samsung Galaxy S22 Screen Replacement, Insert an iFlex: étape 26, image 2 de 3 Samsung Galaxy S22 Screen Replacement, Insert an iFlex: étape 26, image 3 de 3
    • Be careful not to scratch the frame of the phone with the iFlex in this step.

    • Lift the suction handle with strong, steady force.

    • Insert an iFlex in the gap between the bottom edge of the screen and the frame.

    Demander à FixBot
  27. Samsung Galaxy S22 Screen Replacement, Insert an opening pick: étape 27, image 1 de 3 Samsung Galaxy S22 Screen Replacement, Insert an opening pick: étape 27, image 2 de 3 Samsung Galaxy S22 Screen Replacement, Insert an opening pick: étape 27, image 3 de 3
    • Replace the iFlex with an opening pick.

    • Slide the opening pick around the top left corner of the phone, separating the glass from the display itself.

    Demander à FixBot
  28. Samsung Galaxy S22 Screen Replacement, Remove the suction handle: étape 28, image 1 de 2 Samsung Galaxy S22 Screen Replacement, Remove the suction handle: étape 28, image 2 de 2
    • Remove the suction handle.

    Demander à FixBot
  29. Samsung Galaxy S22 Screen Replacement, Separate the bottom edge adhesive: étape 29, image 1 de 3 Samsung Galaxy S22 Screen Replacement, Separate the bottom edge adhesive: étape 29, image 2 de 3 Samsung Galaxy S22 Screen Replacement, Separate the bottom edge adhesive: étape 29, image 3 de 3
    • Slide the opening pick back and forth across the bottom edge of the phone to separate the adhesive securing the screen to the frame.

    • Leave the opening pick in the bottom‑left corner of the phone to keep the adhesive separated.

    Demander à FixBot
  30. Samsung Galaxy S22 Screen Replacement, Heat the left edge: étape 30, image 1 de 1
    • Heat the left edge of the screen until it's slightly too hot to touch.

    Demander à FixBot
  31. Samsung Galaxy S22 Screen Replacement, Separate the left edge adhesive: étape 31, image 1 de 3 Samsung Galaxy S22 Screen Replacement, Separate the left edge adhesive: étape 31, image 2 de 3 Samsung Galaxy S22 Screen Replacement, Separate the left edge adhesive: étape 31, image 3 de 3
    • Don't insert the pick deeper than 3.5 mm along the left edge to avoid damaging the graphite sheet under the screen.

    • Slide the opening pick around the bottom‑left corner and up the left edge of the screen.

    Demander à FixBot
  32. Samsung Galaxy S22 Screen Replacement, Heat the top edge: étape 32, image 1 de 1
    • Heat the top edge of the screen until it's slightly too hot to touch.

    Demander à FixBot
  33. Samsung Galaxy S22 Screen Replacement, Separate the top edge adhesive: étape 33, image 1 de 3 Samsung Galaxy S22 Screen Replacement, Separate the top edge adhesive: étape 33, image 2 de 3 Samsung Galaxy S22 Screen Replacement, Separate the top edge adhesive: étape 33, image 3 de 3
    • Be careful when sliding the pick across the top edge of the phone—the camera can be damaged by the pick.

    • Slide the opening pick around the top‑left corner and across the top edge of the screen to separate the adhesive.

    Demander à FixBot
  34. Samsung Galaxy S22 Screen Replacement, Heat the right edge: étape 34, image 1 de 1
    • Heat the right edge of the screen until it's slightly too hot to touch.

    Demander à FixBot
  35. Samsung Galaxy S22 Screen Replacement, Separate the right edge adhesive: étape 35, image 1 de 2 Samsung Galaxy S22 Screen Replacement, Separate the right edge adhesive: étape 35, image 2 de 2
    • Don't insert the pick deeper than 3.5 mm along the right edge to avoid damaging the graphite sheet.

    • Slide the opening pick down the right edge of the screen to separate the adhesive.

    Demander à FixBot
  36. Samsung Galaxy S22 Screen Replacement, Lift the screen: étape 36, image 1 de 3 Samsung Galaxy S22 Screen Replacement, Lift the screen: étape 36, image 2 de 3 Samsung Galaxy S22 Screen Replacement, Lift the screen: étape 36, image 3 de 3
    • The screen should be free at this point. If the screen is still adhered anywhere, use heat and an opening pick to separate the adhesive.

    • Use the opening pick to lift the screen until you can grab it with your fingers.

    Demander à FixBot
  37. Samsung Galaxy S22 Screen Replacement, Remove the screen: étape 37, image 1 de 2 Samsung Galaxy S22 Screen Replacement, Remove the screen: étape 37, image 2 de 2
    • Lift the screen off the frame and remove it.

    Demander à FixBot
  38. Samsung Galaxy S22 Screen Replacement, Clean the frame: étape 38, image 1 de 2 Samsung Galaxy S22 Screen Replacement, Clean the frame: étape 38, image 2 de 2
    • Before installing adhesive, all the old adhesive must be completely removed from the frame.

    • Take your time during the next few steps. A clean frame allows replacement adhesive to lay totally flat, ensuring a better seal for your new screen.

    • The graphite sheet attached to the frame is very fragile. Be careful not to damage it when cleaning the frame.

    Demander à FixBot
  39. Samsung Galaxy S22 Screen Replacement, Lift the adhesive: étape 39, image 1 de 2 Samsung Galaxy S22 Screen Replacement, Lift the adhesive: étape 39, image 2 de 2
    • Use the flat end of a spudger to lift a piece of adhesive residue off the frame, just enough to grab it with a pair of blunt tweezers.

    Demander à FixBot
  40. Samsung Galaxy S22 Screen Replacement, Remove the adhesive residue: étape 40, image 1 de 3 Samsung Galaxy S22 Screen Replacement, Remove the adhesive residue: étape 40, image 2 de 3 Samsung Galaxy S22 Screen Replacement, Remove the adhesive residue: étape 40, image 3 de 3
    • Use blunt tweezers or your fingers to grab a strip of adhesive residue and slowly peel it up off the frame.

    • Wrap the adhesive around the tweezers with a roll‑and‑pull motion for better grip.

    • Repeat this process to remove all strips of adhesive residue left on the frame.

    Demander à FixBot
  41. Samsung Galaxy S22 Screen Replacement: étape 41, image 1 de 3 Samsung Galaxy S22 Screen Replacement: étape 41, image 2 de 3 Samsung Galaxy S22 Screen Replacement: étape 41, image 3 de 3
    • Use blunt tweezers or your fingers to peel off all three clear adhesive film pieces on the frame.

    Demander à FixBot
  42. Samsung Galaxy S22 Screen Replacement: étape 42, image 1 de 2 Samsung Galaxy S22 Screen Replacement: étape 42, image 2 de 2
    Outil utilisé dans cette étape :
    iFixit Adhesive Remover
    $19.99
    • Apply a few drops of high-concentration (>90%) isopropyl alcohol or adhesive remover to a cotton swab or lint‑free cloth.

    • Clean the areas of the frame where you removed the old adhesive.

    Demander à FixBot
  43. Samsung Galaxy S22 Screen Replacement: étape 43, image 1 de 1
    • Repeat this process until the frame is completely clean.

    Demander à FixBot
  44. Samsung Galaxy S22 Screen Replacement, Adhesive information: étape 44, image 1 de 1
    • Check if your replacement screen comes with adhesive pre‑installed around its perimeter. If it does, skip down to this step.

    • The Galaxy S22 has two strips of adhesive securing the screen to the phone:

    • One large piece that conforms to the top and two long edges of the frame.

    • One small strip that goes along the bottom edge of the frame.

    • Be careful not to crease or stretch the adhesive during installation. It won't seal properly if damaged.

    Demander à FixBot
  45. Samsung Galaxy S22 Screen Replacement, Align the large adhesive: étape 45, image 1 de 3 Samsung Galaxy S22 Screen Replacement, Align the large adhesive: étape 45, image 2 de 3 Samsung Galaxy S22 Screen Replacement, Align the large adhesive: étape 45, image 3 de 3
    • Hold the large adhesive above the frame to find its orientation. Use cutouts in the liner and the contours of the adhesive to help visualize how it will lay in the frame.

    • Keep the adhesive in this orientation in the next few steps.

    Demander à FixBot
  46. Samsung Galaxy S22 Screen Replacement, Remove the large adhesive liner: étape 46, image 1 de 3 Samsung Galaxy S22 Screen Replacement, Remove the large adhesive liner: étape 46, image 2 de 3 Samsung Galaxy S22 Screen Replacement, Remove the large adhesive liner: étape 46, image 3 de 3
    • Be careful while installing the adhesive—once it sticks, it can't be removed and reused.

    • Peel up the top half of the larger, clear liner to expose the adhesive. Fold the liner over so only the top half of the adhesive is exposed.

    Demander à FixBot
  47. Samsung Galaxy S22 Screen Replacement, Install the large adhesive: étape 47, image 1 de 3 Samsung Galaxy S22 Screen Replacement, Install the large adhesive: étape 47, image 2 de 3 Samsung Galaxy S22 Screen Replacement, Install the large adhesive: étape 47, image 3 de 3
    • Take your time aligning the adhesive with the frame—it's very sticky and can't be moved after you apply it.

    • With the larger, clear liner folded towards the bottom of the phone, lay the exposed top edge of the adhesive into the shaped depression at the top of the frame.

    • Slowly lay the rest of the adhesive onto the frame, pressing it into place and peeling away the larger, clear liner as you go.

    Demander à FixBot
  48. Samsung Galaxy S22 Screen Replacement: étape 48, image 1 de 2 Samsung Galaxy S22 Screen Replacement: étape 48, image 2 de 2
    • Press your fingers along the large adhesive to help it bond to the frame.

    Demander à FixBot
  49. Samsung Galaxy S22 Screen Replacement, Prepare the small adhesive: étape 49, image 1 de 3 Samsung Galaxy S22 Screen Replacement, Prepare the small adhesive: étape 49, image 2 de 3 Samsung Galaxy S22 Screen Replacement, Prepare the small adhesive: étape 49, image 3 de 3
    • Peel the clear liner off the top of the small adhesive to expose the green liner. Keep the green liner in place for now.

    Demander à FixBot
  50. Samsung Galaxy S22 Screen Replacement, Align the small adhesive: étape 50, image 1 de 2 Samsung Galaxy S22 Screen Replacement, Align the small adhesive: étape 50, image 2 de 2
    • Align the small adhesive with the bottom edge of the frame. The curvature of the adhesive should match the curvature of the frame.

    • Remove the clear plastic liner from the bottom of the small adhesive. The adhesive is now exposed.

    Demander à FixBot
  51. Samsung Galaxy S22 Screen Replacement, Install the small adhesive: étape 51, image 1 de 3 Samsung Galaxy S22 Screen Replacement, Install the small adhesive: étape 51, image 2 de 3 Samsung Galaxy S22 Screen Replacement, Install the small adhesive: étape 51, image 3 de 3
    • Carefully lower the small adhesive into the frame and stick it into place.

    Demander à FixBot
  52. Samsung Galaxy S22 Screen Replacement: étape 52, image 1 de 2 Samsung Galaxy S22 Screen Replacement: étape 52, image 2 de 2
    • Press your finger along the small adhesive to help it bond to the frame.

    Demander à FixBot
  53. Samsung Galaxy S22 Screen Replacement, Prepare the replacement screen: étape 53, image 1 de 3 Samsung Galaxy S22 Screen Replacement, Prepare the replacement screen: étape 53, image 2 de 3 Samsung Galaxy S22 Screen Replacement, Prepare the replacement screen: étape 53, image 3 de 3
    • Your replacement screen may have protective liners on the underside that must be removed before installation. Usually, you can identify the liners by their pull tabs.

    • The exposed back of the screen is very fragile—even a small scratch can cause damage. Be very careful not to damage the screen during the remaining steps.

    • Use your fingers or tweezers to remove all plastic liners from the back of the replacement screen.

    Demander à FixBot
  54. Samsung Galaxy S22 Screen Replacement, Remove the final liners: étape 54, image 1 de 2 Samsung Galaxy S22 Screen Replacement, Remove the final liners: étape 54, image 2 de 2
    • Slowly peel up and remove the green liner on the small adhesive, peeling by its protruding tabs.

    • If the adhesive starts to peel up with the liner, check that you’ve pushed all of it into place.

    Demander à FixBot
  55. Samsung Galaxy S22 Screen Replacement: étape 55, image 1 de 3 Samsung Galaxy S22 Screen Replacement: étape 55, image 2 de 3 Samsung Galaxy S22 Screen Replacement: étape 55, image 3 de 3
    • Repeat this process to remove the green liner from the large adhesive.

    Demander à FixBot
  56. Samsung Galaxy S22 Screen Replacement, Install the new screen: étape 56, image 1 de 3 Samsung Galaxy S22 Screen Replacement, Install the new screen: étape 56, image 2 de 3 Samsung Galaxy S22 Screen Replacement, Install the new screen: étape 56, image 3 de 3
    • Align the replacement screen with the frame and set it into place.

    Demander à FixBot
  57. Samsung Galaxy S22 Screen Replacement, Remove the back cover: étape 57, image 1 de 3 Samsung Galaxy S22 Screen Replacement, Remove the back cover: étape 57, image 2 de 3 Samsung Galaxy S22 Screen Replacement, Remove the back cover: étape 57, image 3 de 3
    • Flip the phone over.

    • Work slowly when removing the back cover—the adhesive isn't as strong as before. If you feel resistance when lifting, apply heat instead of using more force.

    • Use a suction handle to gently lift the back cover from its bottom edge. If it won't lift easily, use an iOpener, hair dryer, or heat gun to heat it until it's hot to the touch.

    • Use an opening pick to gently separate the adhesive securing the back cover.

    • Lift and remove the back cover.

    Demander à FixBot
  58. Samsung Galaxy S22 Screen Replacement, Install the screen cable: étape 58, image 1 de 2 Samsung Galaxy S22 Screen Replacement, Install the screen cable: étape 58, image 2 de 2
    • Set the screen cable into place so it's aligned with its sockets on the motherboard and screen (in the bottom left corner of the phone).

    Demander à FixBot
  59. Samsung Galaxy S22 Screen Replacement, Connect the screen cable: étape 59, image 1 de 3 Samsung Galaxy S22 Screen Replacement, Connect the screen cable: étape 59, image 2 de 3 Samsung Galaxy S22 Screen Replacement, Connect the screen cable: étape 59, image 3 de 3
    • To reconnect press connectors like this one, align the connector carefully over its socket and press down—first on one of the short sides, then the other—until it clicks into place. Don't try to force the connector into place. If you're having trouble, reposition it and try again.

    • Use the flat end of a spudger or your finger to connect the screen press connectors to their respective sockets on the screen and motherboard.

    Demander à FixBot
  60. Samsung Galaxy S22 Screen Replacement, Connect the battery: étape 60, image 1 de 2 Samsung Galaxy S22 Screen Replacement, Connect the battery: étape 60, image 2 de 2
    • Use the flat end of a spudger or your finger to connect the battery press connector onto its socket on the motherboard.

    Demander à FixBot
  61. Samsung Galaxy S22 Screen Replacement, Install the charging coil and loudspeaker assembly: étape 61, image 1 de 3 Samsung Galaxy S22 Screen Replacement, Install the charging coil and loudspeaker assembly: étape 61, image 2 de 3 Samsung Galaxy S22 Screen Replacement, Install the charging coil and loudspeaker assembly: étape 61, image 3 de 3
    • Insert the loudspeaker at a downward angle into the frame and press it into place.

    Demander à FixBot
  62. Samsung Galaxy S22 Screen Replacement, Fasten the loudspeaker: étape 62, image 1 de 1
    • Use your Phillips screwdriver to install the seven 3.5 mm‑long screws securing the loudspeaker.

    Demander à FixBot
  63. Samsung Galaxy S22 Screen Replacement, Fasten the wireless charging coil: étape 63, image 1 de 1
    • Use your Phillips screwdriver to install the six 3.5 mm‑long screws securing the wireless charging coil.

    Demander à FixBot
  64. Samsung Galaxy S22 Screen Replacement, Connect the wireless charging coil: étape 64, image 1 de 2 Samsung Galaxy S22 Screen Replacement, Connect the wireless charging coil: étape 64, image 2 de 2
    • Use the flat end of a spudger or your finger to connect the wireless charging coil press connector to its socket on the motherboard.

    Demander à FixBot
  65. Samsung Galaxy S22 Screen Replacement, Heat the camera bezel: étape 65, image 1 de 1
    Demander à FixBot
  66. Samsung Galaxy S22 Screen Replacement, Separate the metal camera cover: étape 66, image 1 de 3 Samsung Galaxy S22 Screen Replacement, Separate the metal camera cover: étape 66, image 2 de 3 Samsung Galaxy S22 Screen Replacement, Separate the metal camera cover: étape 66, image 3 de 3
    • Be careful not to bend or deform the metal camera cover during removal. If it's damaged, try to bend it back into shape or replace it to ensure a proper seal.

    • Insert an opening pick beneath the metal camera cover at its bottom edge.

    • The metal cover is strongly adhered. If you can't insert a pick, apply more heat to soften the adhesive.

    • Slide the pick around the cover's bottom‑left corner to separate it from the adhesive.

    Demander à FixBot
  67. Samsung Galaxy S22 Screen Replacement: étape 67, image 1 de 3 Samsung Galaxy S22 Screen Replacement: étape 67, image 2 de 3 Samsung Galaxy S22 Screen Replacement: étape 67, image 3 de 3
    • Re‑heat the metal camera cover.

    • Slide the opening pick around the entire perimeter of the metal camera cover to separate it from the adhesive.

    Demander à FixBot
  68. Samsung Galaxy S22 Screen Replacement, Remove the metal camera cover: étape 68, image 1 de 2 Samsung Galaxy S22 Screen Replacement, Remove the metal camera cover: étape 68, image 2 de 2
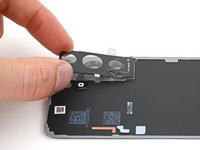
    • Peel the metal cover off the back cover and remove it.

    Demander à FixBot
  69. Samsung Galaxy S22 Screen Replacement, Remove the perimeter adhesive: étape 69, image 1 de 3 Samsung Galaxy S22 Screen Replacement, Remove the perimeter adhesive: étape 69, image 2 de 3 Samsung Galaxy S22 Screen Replacement, Remove the perimeter adhesive: étape 69, image 3 de 3
    • Use blunt nose tweezers or your fingers to lift the thin adhesive strip off the perimeter of the back cover.

    • If it doesn't lift easily, apply heat to the perimeter.

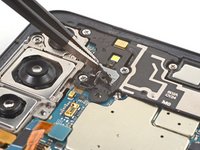
    • Heat the adhesive on the camera bezel.

    Demander à FixBot
  70. Samsung Galaxy S22 Screen Replacement, Remove the camera adhesive: étape 70, image 1 de 3 Samsung Galaxy S22 Screen Replacement, Remove the camera adhesive: étape 70, image 2 de 3 Samsung Galaxy S22 Screen Replacement, Remove the camera adhesive: étape 70, image 3 de 3
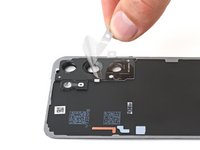
    • During removal, the camera bezel will likely detach from the back glass.

    • Use your fingers to pull up the remaining adhesive from the camera bezel with slow, steady force.

    • This section of adhesive can be difficult to remove. Be careful not to bend or crack the back glass.

    Demander à FixBot
  71. Samsung Galaxy S22 Screen Replacement, Remove the microphone adhesive: étape 71, image 1 de 2 Samsung Galaxy S22 Screen Replacement, Remove the microphone adhesive: étape 71, image 2 de 2
    Demander à FixBot
  72. Samsung Galaxy S22 Screen Replacement, Clean the remaining adhesive residue: étape 72, image 1 de 3 Samsung Galaxy S22 Screen Replacement, Clean the remaining adhesive residue: étape 72, image 2 de 3 Samsung Galaxy S22 Screen Replacement, Clean the remaining adhesive residue: étape 72, image 3 de 3
    Outil utilisé dans cette étape :
    iFixit Adhesive Remover
    $19.99
    • If the camera bezel is still attached to the back glass, it should separate while removing the adhesive residue. It's easier to clean them individually than together.

    • Apply a few drops of isopropyl alcohol or adhesive remover to the flat end of a spudger.

    • Use the spudger to scrape off any large chunks of adhesive residue from the camera bezel. Apply more solvent to the spudger to help dissolve the adhesive.

    • You only need to remove large adhesive chunks—the smaller pieces will be wiped off later.

    Demander à FixBot
  73. Samsung Galaxy S22 Screen Replacement: étape 73, image 1 de 3 Samsung Galaxy S22 Screen Replacement: étape 73, image 2 de 3 Samsung Galaxy S22 Screen Replacement: étape 73, image 3 de 3
    • Repeat this process to scrape off any large chunks of adhesive residue from the perimeter of the back glass.

    Demander à FixBot
  74. Samsung Galaxy S22 Screen Replacement: étape 74, image 1 de 3 Samsung Galaxy S22 Screen Replacement: étape 74, image 2 de 3 Samsung Galaxy S22 Screen Replacement: étape 74, image 3 de 3
    Outil utilisé dans cette étape :
    iFixit Adhesive Remover
    $19.99
    • Apply several drops of isopropyl alcohol or adhesive remover to a microfiber or lint free cloth.

    • Alternatively, use our adhesive cleanup kit.

    • Clean the camera bezel and back glass until they're free of adhesive residue.

    Demander à FixBot
  75. Samsung Galaxy S22 Screen Replacement, Clean the frame: étape 75, image 1 de 3 Samsung Galaxy S22 Screen Replacement, Clean the frame: étape 75, image 2 de 3 Samsung Galaxy S22 Screen Replacement, Clean the frame: étape 75, image 3 de 3
    • Repeat the cleaning process to remove any adhesive residue from the frame of the phone.

    Demander à FixBot
  76. Samsung Galaxy S22 Screen Replacement, Reinstall the camera bezel: étape 76, image 1 de 3 Samsung Galaxy S22 Screen Replacement, Reinstall the camera bezel: étape 76, image 2 de 3 Samsung Galaxy S22 Screen Replacement, Reinstall the camera bezel: étape 76, image 3 de 3
    • Lay the back glass and camera bezel on a flat surface.

    • Align the camera bezel with the back glass, making sure the arrow is pointing toward the top of the cover.

    Demander à FixBot
  77. Samsung Galaxy S22 Screen Replacement, Apply the new adhesive: étape 77, image 1 de 3 Samsung Galaxy S22 Screen Replacement, Apply the new adhesive: étape 77, image 2 de 3 Samsung Galaxy S22 Screen Replacement, Apply the new adhesive: étape 77, image 3 de 3
    • Be very careful during this step! The back cover adhesive is very sticky and can't be repositioned once it sticks. Misaligned adhesive can lead to an improper seal.

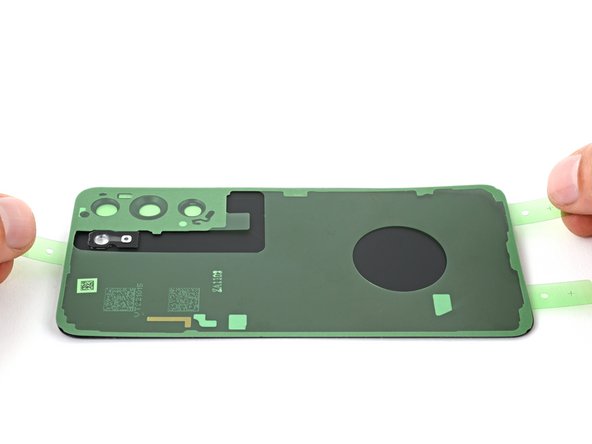
    • Remove the clear plastic liner from the new back cover adhesive.

    • Grab the new adhesive by its pull tabs and align it over the back cover and camera bezel.

    • Place the adhesive on the back cover.

    • Use features such as the camera cutouts and perimeter notches to help align the adhesive.

    Demander à FixBot
  78. Samsung Galaxy S22 Screen Replacement, Remove the liners: étape 78, image 1 de 3 Samsung Galaxy S22 Screen Replacement, Remove the liners: étape 78, image 2 de 3 Samsung Galaxy S22 Screen Replacement, Remove the liners: étape 78, image 3 de 3
    • Press firmly along the perimeter of the adhesive to adhere it.

    • Remove the main adhesive liner from the back cover using the pull tabs on the top and bottom edges.

    • If present, remove the secondary adhesive liner from the camera bezel using the pull tab on the bottom of the bezel.

    Demander à FixBot
  79. Samsung Galaxy S22 Screen Replacement, Prepare the metal cover: étape 79, image 1 de 1
    • If you're replacing the metal camera cover, remove the main liner from the new cover using the black pull tabs.

    • If you're reusing the cover, ensure the cover is clean and wasn't deformed during removal. If it was, try bending it back into shape. If there's adhesive residue, apply solvent to a cloth and wipe it off.

    • If you clean the cover, be careful not to damage the gray foam or white vent.

    Demander à FixBot
  80. Samsung Galaxy S22 Screen Replacement, Install the metal camera cover: étape 80, image 1 de 3 Samsung Galaxy S22 Screen Replacement, Install the metal camera cover: étape 80, image 2 de 3 Samsung Galaxy S22 Screen Replacement, Install the metal camera cover: étape 80, image 3 de 3
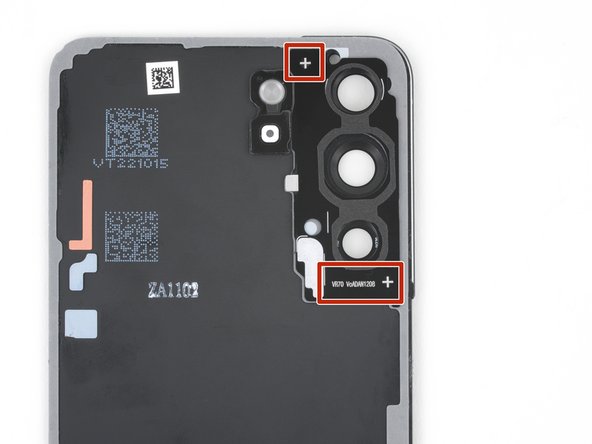
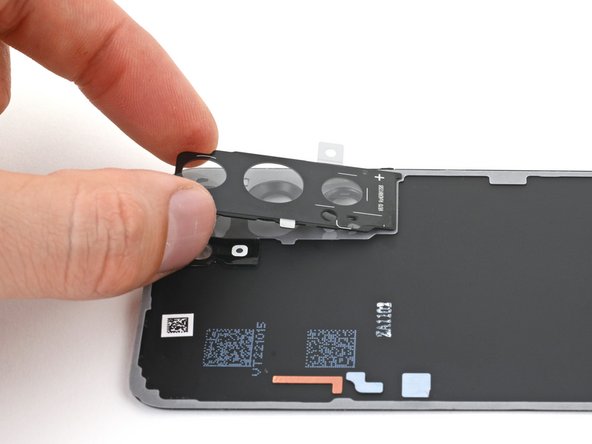
    • Orient the new metal camera cover so the white text is along the bottom of the camera bezel and the crosses are in the upper left and lower right corners.

    • Place the cover onto the camera bezel and apply pressure to adhere it.

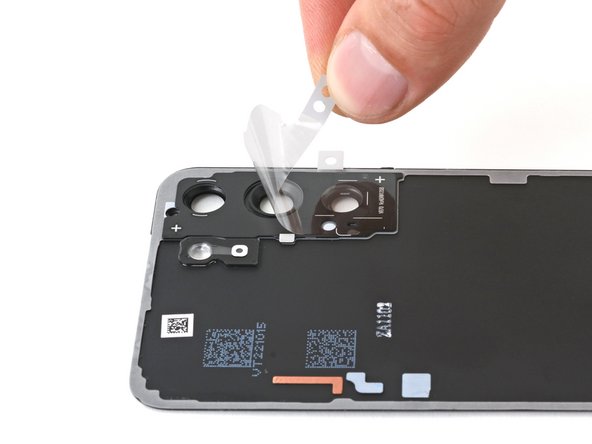
    • If you're installing a new cover, remove the secondary liner using the white pull tabs.

    Demander à FixBot
  81. Samsung Galaxy S22 Screen Replacement, Replace the microphone adhesive: étape 81, image 1 de 3 Samsung Galaxy S22 Screen Replacement, Replace the microphone adhesive: étape 81, image 2 de 3 Samsung Galaxy S22 Screen Replacement, Replace the microphone adhesive: étape 81, image 3 de 3
    Outil utilisé dans cette étape :
    Tesa 61395 Tape
    $2.95
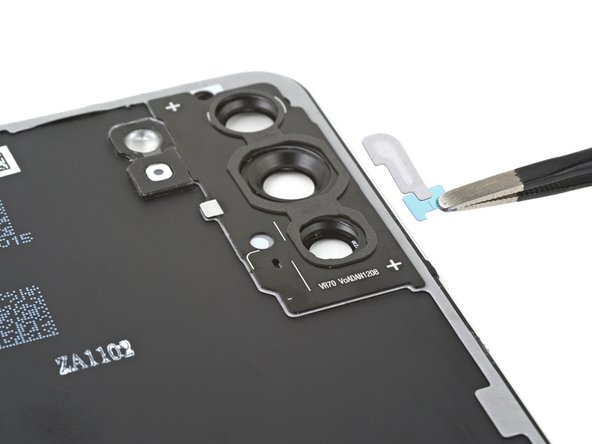
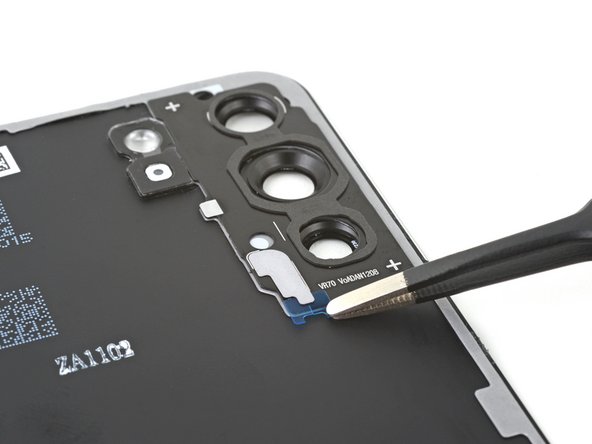
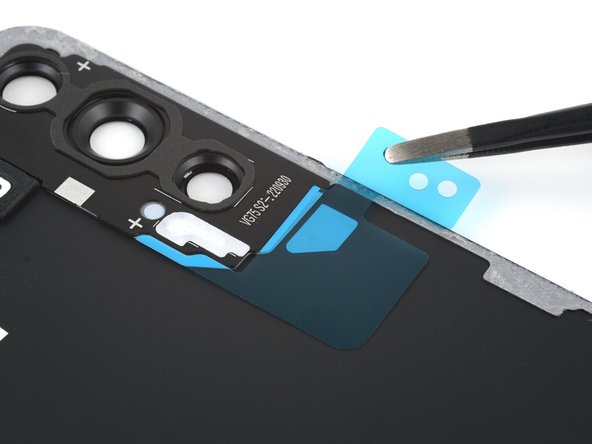
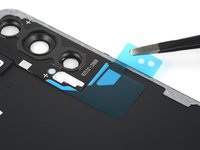
    • On the motherboard cover, remove the old adhesive from the microphone hole under the flash unit.

    • If you have replacement microphone adhesive:

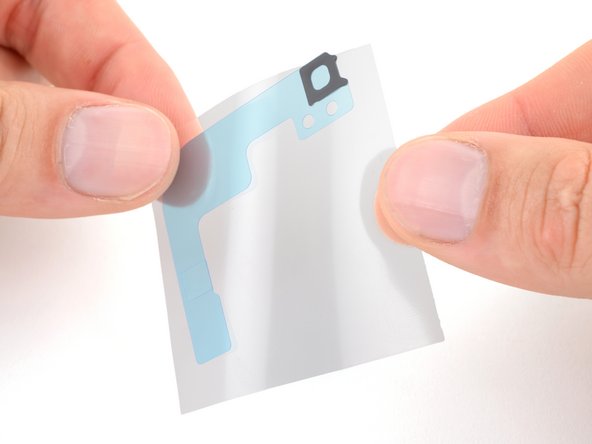
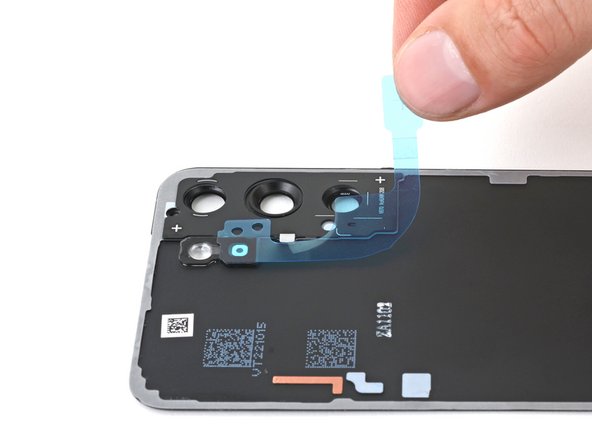
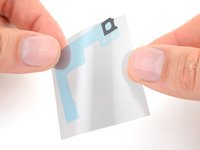
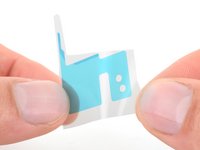
    • Remove the clear liner from the large L‑shaped adhesive piece.

    • Place the square piece of adhesive over the back cover's microphone cutout under the flash unit, with the blue liner tab facing right.

    • Remove the blue liner.

    • If you don't have replacement microphone adhesive, use 1 mm strips of thin, double-sided tape instead. Apply the strips around the perimeter of the white microphone sticker on the back cover.

    Demander à FixBot
  82. Samsung Galaxy S22 Screen Replacement, Apply the camera foam adhesive: étape 82, image 1 de 3 Samsung Galaxy S22 Screen Replacement, Apply the camera foam adhesive: étape 82, image 2 de 3 Samsung Galaxy S22 Screen Replacement, Apply the camera foam adhesive: étape 82, image 3 de 3
    • If you're reusing the old metal camera cover, skip the next two steps.

    • If the replacement metal camera cover comes with foam preinstalled, skip this step.

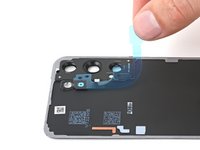
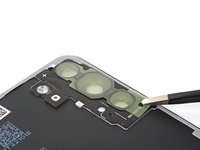
    • Remove the clear liner from the camera foam adhesive.

    • Orient the adhesive over the camera cutouts with the circular section toward the top.

    • Place the adhesive onto the metal cover, making sure to use the markings around the camera cutouts to align it.

    • Remove the green liner from the adhesive.

    Demander à FixBot
  83. Samsung Galaxy S22 Screen Replacement, Apply the air vent adhesive: étape 83, image 1 de 3 Samsung Galaxy S22 Screen Replacement, Apply the air vent adhesive: étape 83, image 2 de 3 Samsung Galaxy S22 Screen Replacement, Apply the air vent adhesive: étape 83, image 3 de 3
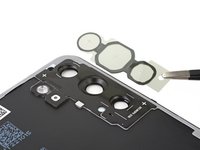
    • If the replacement metal camera cover comes with the air vent preinstalled, skip this step.

    • Remove the clear liner from the air vent adhesive.

    • Place the adhesive onto the metal cover with the fuzzy side facing upward and the blue tab toward the bottom of the cover.

    • Use the markings on the cover to align the adhesive.

    • Remove the blue tab from under the adhesive.

    Demander à FixBot
  84. Samsung Galaxy S22 Screen Replacement, Apply the metal camera cover corner adhesive: étape 84, image 1 de 2 Samsung Galaxy S22 Screen Replacement, Apply the metal camera cover corner adhesive: étape 84, image 2 de 2
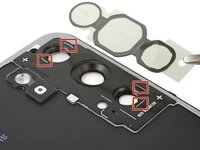
    • If you have a Galaxy S22+, there may be an additional piece of adhesive for the metal cover. If there isn't, skip this step.

    • The replacement adhesive we sell has this built in.

    • Remove the clear liner from the large two-piece adhesive sheet.

    • Align the adhesive over the notches in the bottom left of the metal cover.

    • Place the adhesive and apply pressure to adhere it.

    • Remove the blue liner.

    Demander à FixBot
  85. Samsung Galaxy S22 Screen Replacement, Install the back cover: étape 85, image 1 de 3 Samsung Galaxy S22 Screen Replacement, Install the back cover: étape 85, image 2 de 3 Samsung Galaxy S22 Screen Replacement, Install the back cover: étape 85, image 3 de 3
    • Align the back cover with the frame and set it into place.

    • Press on the back cover to help the adhesive bond.

    Demander à FixBot
  86. Samsung Galaxy S22 Screen Replacement, Heat the back cover: étape 86, image 1 de 2 Samsung Galaxy S22 Screen Replacement, Heat the back cover: étape 86, image 2 de 2
    • To help the adhesive bond, apply heat to all four edges of the back cover using an iOpener, hair dryer, or heat gun until it's hot to the touch.

    Demander à FixBot
  87. Samsung Galaxy S22 Screen Replacement, Prepare the phone: étape 87, image 1 de 2 Samsung Galaxy S22 Screen Replacement, Prepare the phone: étape 87, image 2 de 2
    • In order for the adhesive to bond correctly, you'll need to apply even pressure around the perimeter of the phone. You can compensate for the camera bump by laying the phone face-down and placing coins around its perimeter.

    • Alternatively, you can use screen vise clamps around the perimeter of your device to set the new adhesive.

    • Place the phone screen-side-down on a soft, flat surface.

    • Apply blue painter's tape to the edges to protect its finish.

    • Stronger tape may peel off the paint from the frame of the phone. If you don't have blue painter's tape, use a paper towel or thin cloth instead.

    Demander à FixBot
  88. Samsung Galaxy S22 Screen Replacement, Press the adhesive: étape 88, image 1 de 2 Samsung Galaxy S22 Screen Replacement, Press the adhesive: étape 88, image 2 de 2
    • Place evenly spaced layers of coins or similarly thick objects on the tape along the edges of the back cover.

    • Stack them to a consistent height taller than the camera bump.

    Demander à FixBot
  89. Samsung Galaxy S22 Screen Replacement: étape 89, image 1 de 1
    • Stack multiple books or other heavy objects on the coins.

    • The coins may leave an impression on the bottom object, so don't use anything valuable.

    • Leave the objects in place for at least thirty minutes. The lighter the objects, the longer they should be left. Ideally, leave them stacked overnight.

    Demander à FixBot
Conclusion

Take your e-waste to an R2 or e-Stewards certified recycler.

Repair didn’t go as planned? Check out our Answers community for troubleshooting help.

Nick Schultz

Membre depuis le 03/24/24

53 705 Réputation

305 tutoriels rédigés

0 commentaires de tutoriel

Ajouter un commentaire

Nombre de vues :

Dernières 24 heures : 22

7 derniers jours : 103

30 derniers jours : 518

Total : 1,016