Introduction
This repair guide was authored by the iFixit staff and hasn’t been endorsed by Google. Learn more about our repair guides here.
Use this guide to remove or replace the charging assembly on your Google Pixel 4 XL. The charging assembly contains the USB-C port, as well as some antenna connectors, and is layered underneath the loudspeaker and battery.
This process requires removing the loudspeaker, which will compromise the loudspeaker’s ingress gasket.
Caution: Google warns that disassembly of the front laser assembly could result in hazardous exposure to invisible infrared laser emissions. Read their safety warnings here.
Warning: Do not reuse the battery if it has been deformed or damaged, as doing so is a potential safety hazard. Replace it with a new battery.
Ce dont vous avez besoin
-
-
Insert a SIM eject tool, bit, or a straightened paper clip into the small hole on the SIM card tray on the left edge of the phone.
-
Press firmly to eject the tray.
-
Remove the SIM card tray.
-
-
-
Prepare an iOpener and apply it to the bottom edge of the back panel for one minute.
-
-
-
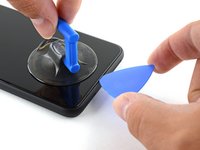
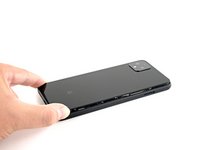
Apply a suction cup to the heated edge of the back panel by pressing down on it to create suction, as close to the edge as possible.
-
-
-
Pull up on the suction cup with strong, steady force to create a gap between the back panel and the frame.
-
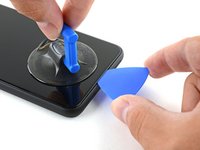
Insert the point of an opening pick into the gap.
-
-
-
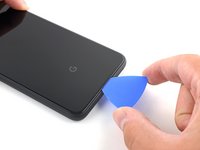
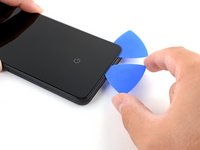
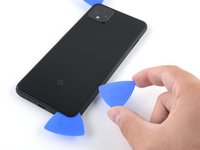
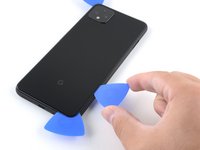
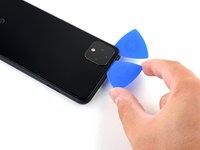
Slide the opening pick across the bottom towards the left corner to slice the adhesive.
-
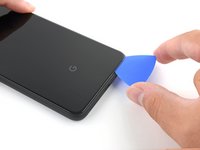
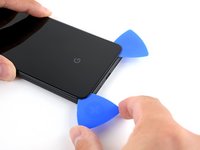
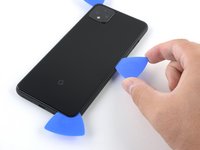
With the pick still inserted, slide it from the bottom left corner over to the bottom right corner to completely slice the bottom side adhesive.
-
Leave the pick inserted in the bottom right corner to prevent the adhesive from re-sealing.
-
-
-
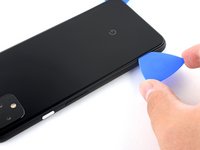
Prepare an iOpener and apply it on the left edge of the phone for one minute.
-
-
-
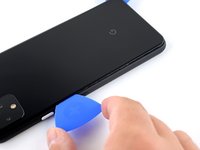
Prepare an iOpener and apply it on the right edge of the phone for one minute.
-
-
-
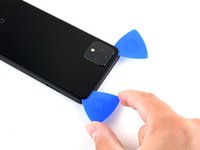
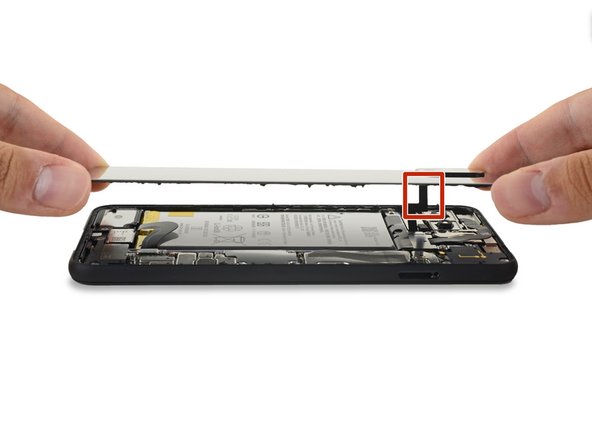
Slide the third opening pick around the top right corner and across the top side of the phone, slicing the final strip of adhesive.
-
-
-
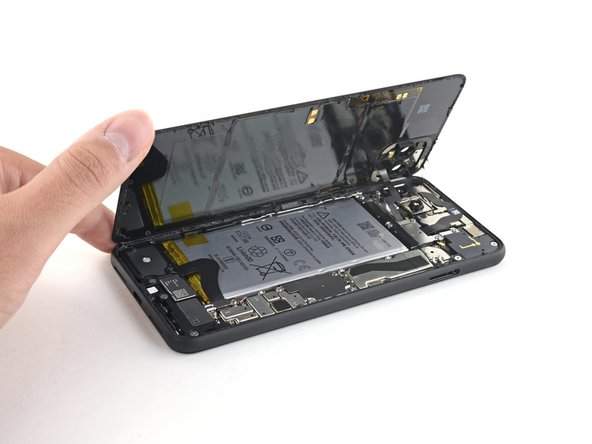
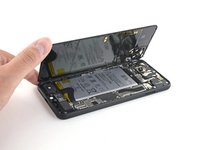
Once you have sliced around the perimeter of the phone, carefully lift the right edge of the back cover, opening it like a book.
-
Do not try to pull the panel all the way off yet, as it is still connected to the phone.
-
-
-
Outil utilisé dans cette étape :Magnetic Project Mat$19.95
-
Remove the four T3 Torx screws securing the battery connector shield:
-
One 1.8 mm screw
-
One 4.1 mm screw
-
One 4.4 mm shouldered screw
-
One 4.0 mm shouldered screw
-
-
-
Use a T3 Torx driver to remove the two 4.1 mm screws securing the back panel connector cover.
-
-
Outil utilisé dans cette étape :Tweezers$4.99
-
Use blunt tweezers to lift up the battery adhesive pull tabs so you can more easily grip them with your fingers.
-
-
-
Pull on the black pull tab at a shallow angle with steady force. When the adhesive grows long, roll it around a spudger and continue pulling.
-
Continue firmly pulling up on the adhesive strip with constant force, spinning the spudger every so often to keep the exposed section of the pull tab as short as possible.
-
Continue this process for each of the three pull tabs, until all are either out or have snapped in half.
-
-
-
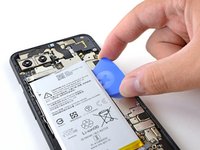
If the battery tabs snapped during removal, insert an opening pick on the upper right edge of the battery, slicing the adhesive underneath.
-
-
Outil utilisé dans cette étape :Tesa 61395 Tape$5.99
-
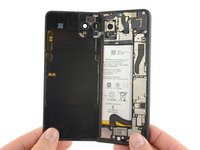
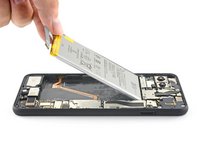
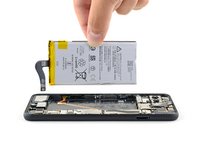
Lift the battery up, away from the phone to remove it.
-
Remove any remaining adhesive from the battery well.
-
If you're using stretch release adhesive, apply them onto the battery. Otherwise, apply some double-sided tape, or pre-cut adhesive strips in the phone's battery well, being careful not to cover the charge port flex cable. Peel away any tape liners to expose the adhesive.
-
Temporarily re-connect the battery's connector to the motherboard socket. This ensures that the battery is properly positioned.
-
Lay the battery in place and press firmly.
-
Disconnect the battery connector from its motherboard socket and resume re-assembly.
-
-
-
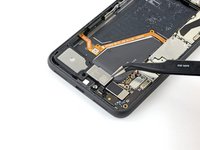
Remove the three T3 Torx screws securing the loudspeaker:
-
One 4.1 mm screw
-
One 2.7 mm screw
-
One 4.4 mm shouldered screw
-
-
Outil utilisé dans cette étape :Tesa 61395 Tape$5.99
-
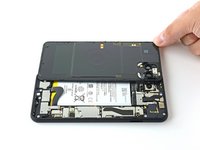
Use a pair of tweezers to remove the loudspeaker.
-
If it is in good condition, you can re-use the gasket. Make sure that the gasket does not cover the exit hole.
-
If the gasket is pulled out of place, remove it and replace the adhesive with a pre-cut strip or Tesa tape.
-
-
-
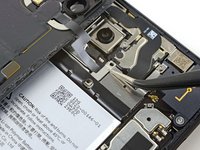
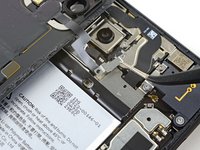
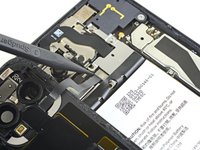
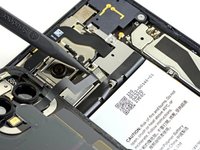
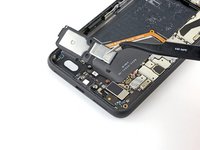
Use a T3 Torx driver to remove the four 3.5 mm screws securing the display connector cover.
-
-
-
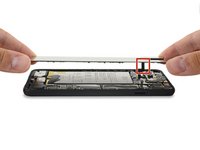
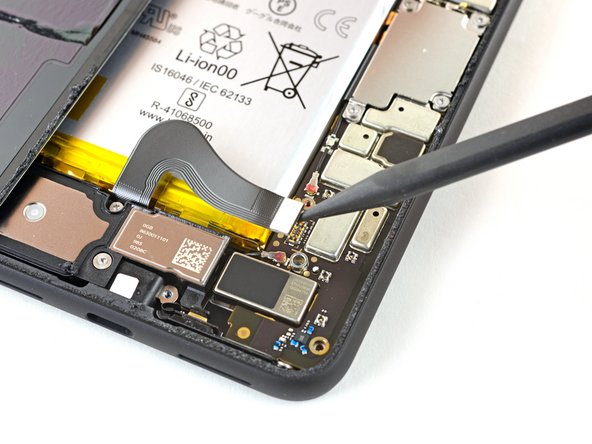
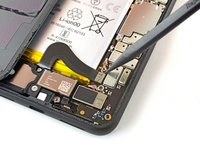
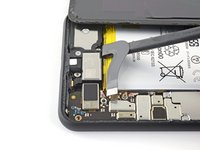
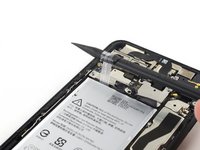
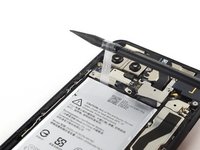
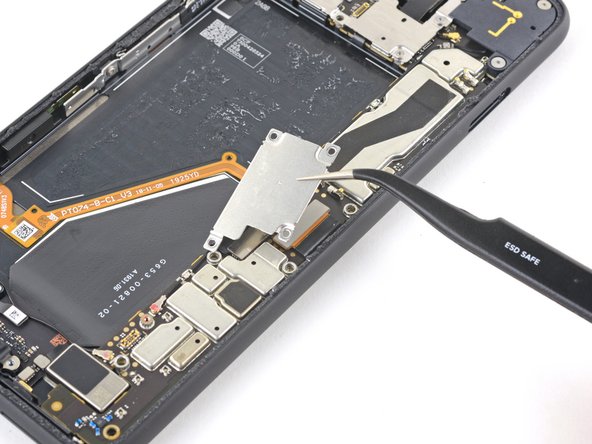
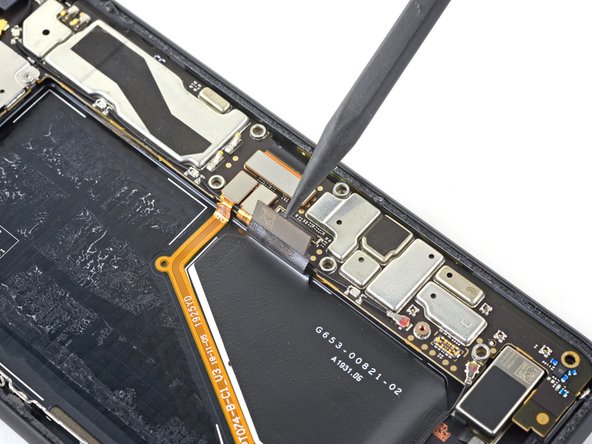
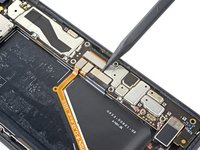
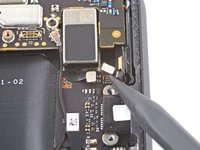
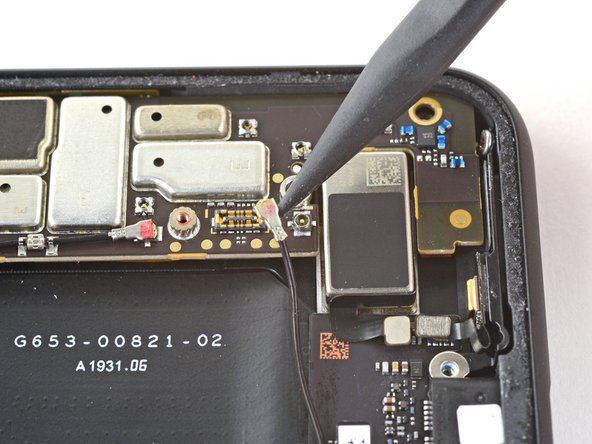
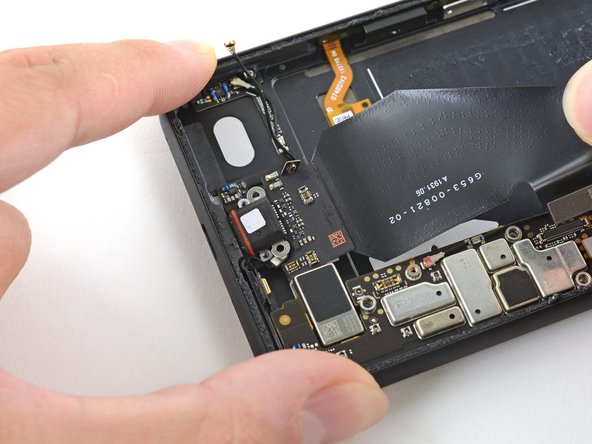
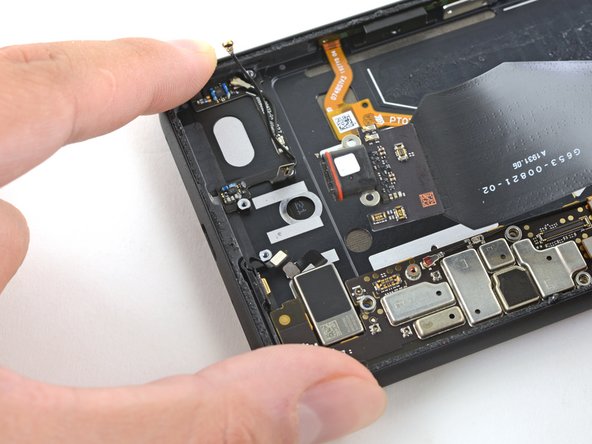
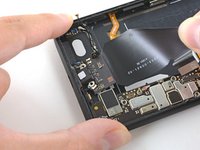
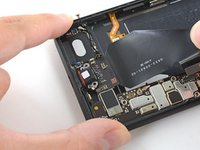
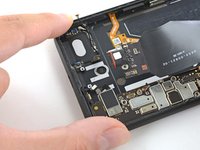
Disconnect the antenna press connector from the charging assembly.
-
-
-
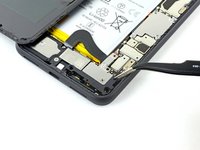
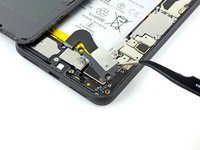
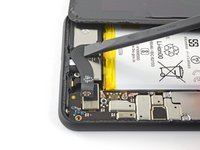
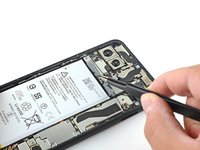
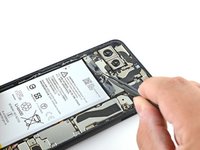
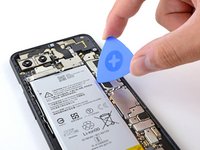
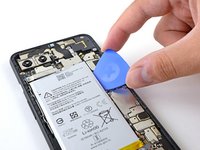
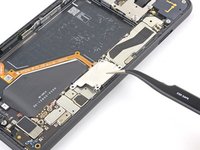
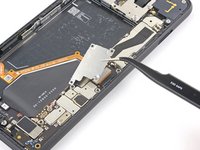
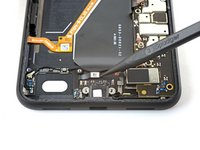
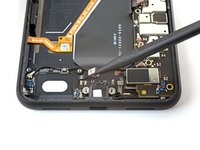
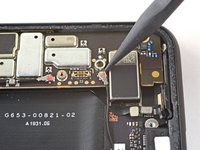
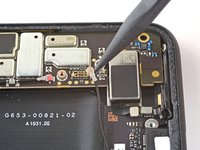
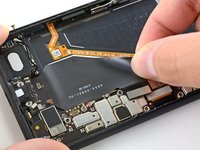
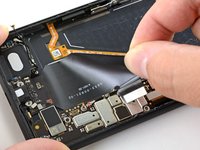
Peel back the ribbon cable that's secured to the phone's frame. It's secured with some light adhesive.
-


Compare your new replacement part to the original part—you may need to transfer remaining components or remove adhesive backings from the new part before installing.
To reassemble your device, follow the above steps in reverse order.
Take your e-waste to an R2 or e-Stewards certified recycler.
Repair didn’t go as planned? Try some basic troubleshooting, or ask our Answers community for help.
Annulation : je n'ai pas terminé ce tutoriel.
10 autres ont terminé cette réparation.


Un commentaire
hello dear my google pixel 4xl is not working due to charging IC defect so how can i get charging IC in Pakistan??