Introduction
The motherboard is the central hub of all of the internal components in a device. All other components in a device send signals to the motherboard, and the motherboard is usually one of the last components to fail in a device (barring unforeseen circumstances). The following symptoms can be signs of a failing motherboard:
- Blue screen of death (BSoD)
- Laptop is running very slow
- Laptop isn’t booting up properly
- Laptop keeps freezing
- Other components aren’t being recognized
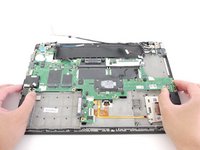
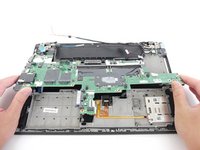
If your Lenovo ThinkPad T450 is exhibiting any of the above symptoms, it may be time to replace the motherboard in your device. Follow these instructions to replace the motherboard in your laptop.
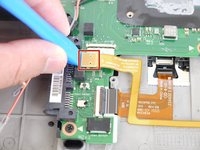
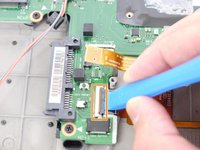
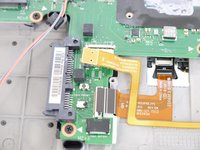
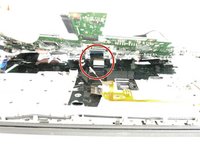
Please make sure to disconnect the ZIF connector from the motherboard prior to fully removing it from the device. You can find more information in the third image of step 27.
Ce dont vous avez besoin
-
-
Using your hands, slide the two locking tabs away from each other to release the battery.
-
Slide the battery up and out of the device.
-
-
-
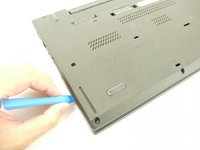
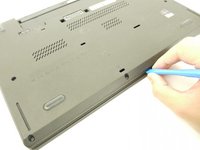
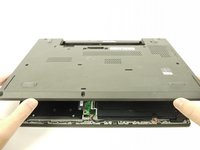
Using the JIS #00 screwdriver, unscrew seven screws from the back cover.
-
Use the JIS #00 screwdriver to remove the single 2.8 mm screw from the back cover.
-
-
-
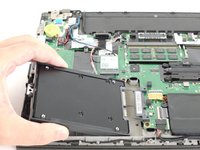
Using the JIS #00 screwdriver, remove the single 2.8 mm screw securing the SSD to the device.
-
-
-
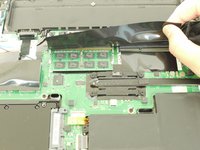
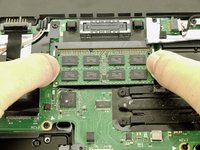
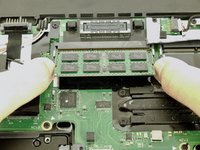
Lift up the black piece of tape and remove it to uncover the RAM sticks underneath.
-
-
-
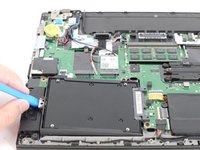
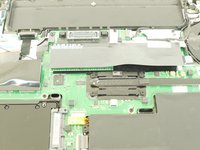
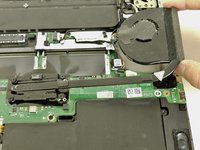
Using the JIS #00 screwdriver, unscrew the four screws securing the fan and heatsink assembly to the motherboard.
-
-
-
-
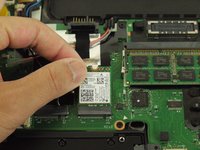
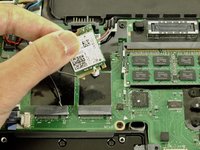
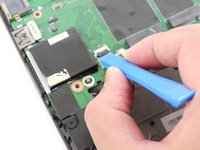
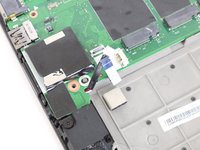
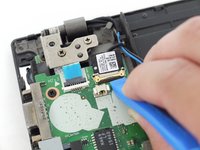
Lift and remove the black piece of plastic to expose the Wi-Fi card.
-
-
-
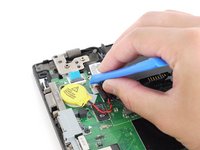
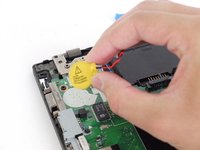
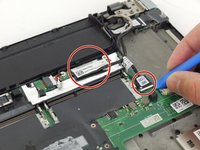
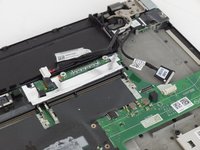
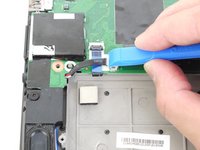
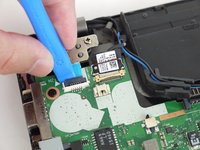
Use the plastic opening tool to remove the black piece of tape holding the cables together.
-
-
-
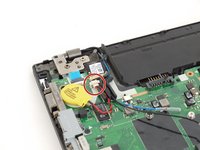
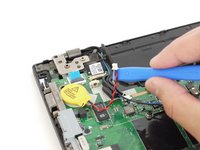
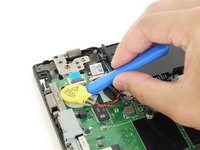
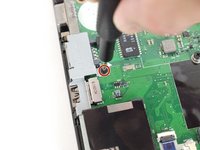
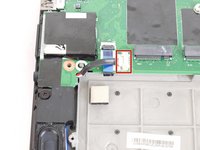
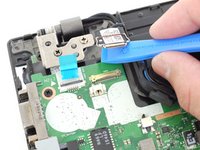
Using the plastic opening tool, disconnect the CMOS battery from the motherboard.
-
-
-
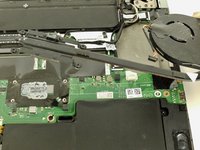
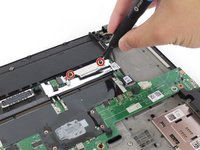
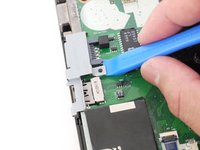
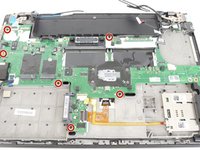
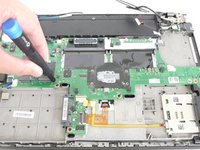
Use the JIS #00 screwdriver to remove two 2.8 mm screws securing the display cable bracket to the motherboard.
-
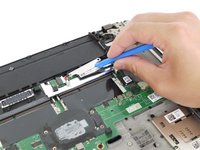
Remove the display cable bracket from the device.
-


To reassemble your device, follow these instructions in reverse order.
Take your e-waste to an R2 or e-Stewards certified recycler.
To reassemble your device, follow these instructions in reverse order.
Take your e-waste to an R2 or e-Stewards certified recycler.
Annulation : je n'ai pas terminé ce tutoriel.
3 autres ont terminé cette réparation.

