Introduction
Suivez ce tutoriel pour remplacer le ventilateur à l'intérieur de votre console de jeux Nintendo Switch.
La Switch utilise des vis JIS, mais vous pouvez utiliser un tournevis cruciforme en cas de besoin. Faites très attention à ne pas abîmer les vis. Les embouts cruciformes d'iFixit sont conçus pour être compatibles avec les vis de type JIS.
Remarque : lorsque vous retirez la plaque de protection, vous devrez remplacer la pâte thermique entre la plaque et le dissipateur thermique. Comme la pâte thermique normale n’est pas conçue pour combler de grands espaces, la pâte thermique visqueuse K5 Pro est la plus proche pour le remplacement.
Remarque : ce tuto et la pièce que nous vendons sont compatibles avec le modèle Nintendo Switch original sorti en 2017, ainsi qu’avec le nouveau modèle sorti en 2019 (numéros de modèle respectifs HAC-001 et HAC -001(-01)).
Ce dont vous avez besoin
-
-
Appuyez sur le petit bouton rond à l'arrière de la JoyCon et maintenez-le enfoncé.
-
Pendant que vous maintenez le bouton enfoncé, faites glisser la Joy-Con vers le haut.
-
-
-
Continuez à faire glisser la Joy-Con vers le haut, jusqu'à ce qu'elle soit complètement retirée de la console.
-
-
Outil utilisé dans cette étape :Magnetic Project Mat$19.95
-
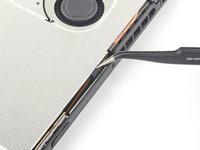
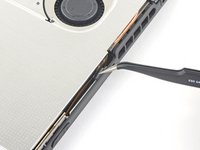
Utilisez un tournevis Y00 pour dévisser les quatre vis de 6,3 mm qui fixent la coque arrière.
-
-
-
Utilisez un tournevis JIS #000, ou un tournevis cruciforme iFixit officiel PH 000, pour retirer les vis suivantes qui fixent la coque arrière :
-
Une vis de 2,5 mm sur le bord supérieur de l'appareil
-
Deux vis de 2,5 mm sur le bord inférieur de l'appareil
-
-
-
Utilisez un tournevis JIS 000 ou un tournevis iFixit PH 000 pour retirer la vis de 3,1 mm qui fixe le lecteur de carte micro SD.
-
-
-
-
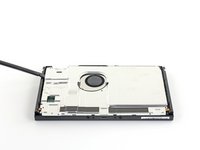
Utilisez un tournevis JIS 000 ou un tournevis iFixit PH 000 pour retirer les six vis de 3 mm qui fixent la plaque de protection.
-
-
-
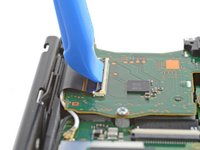
Insérez une spatule (spudger) sous la plaque de protection, le long du bord de l'appareil.
-
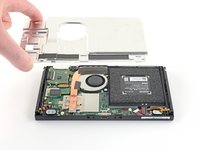
Soulevez la plaque de protection et ôtez-la de la console.
-
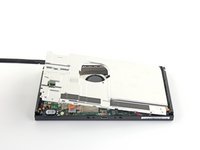
Vous pouvez réutiliser la pâte thermique rose si vous êtes prudent. Gardez la pâte propre et assurez-vous qu'elle fasse un bon contact entre le dissipateur thermique et la plaque durant le remontage.
-
Si vous devez la remplacer durant le remontage, consultez notre tutoriel de pâte thermique pour retirer l'ancienne couche de pâte thermique et la remplacer avec une pâte appropriée, comme la K5 Pro.
-
-
-
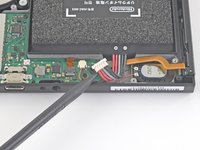
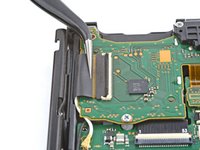
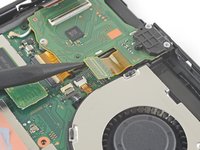
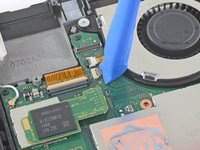
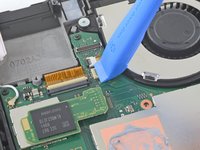
Utilisez la pointe d'une spatule pour soulever le connecteur de la batterie vers le haut et le sortir de sa prise sur la carte mère.
-
-
-
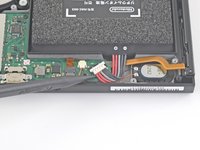
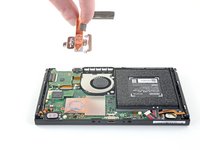
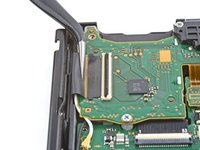
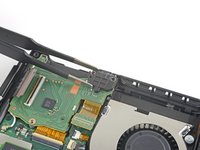
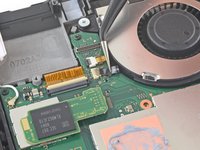
Utilisez un tournevis JIS 000 ou un tournevis iFixit PH 000 pour retirer les 3 vis de 3 mm qui fixent le dissipateur thermique à la carte mère.
-
-
-
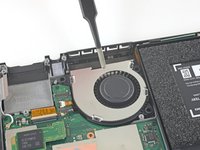
Utiliser le bout plat d'une spatule ou vos doigts pour retirer délicatement la mousse qui adhère légèrement au ventilateur.
-
Insérez la pointe d’une spatule sous la partie de la mousse qui n’est pas collée contre quoi que ce soit.
-
Appuyez sur le dessus de la mousse avec votre doigt pour la maintenir en place.
-
Roulez la pointe de la spatule sous la mousse jusqu’à l’autre extrémité de la mousse, pour la décoller. Appuyez sur le dessus de la mousse avec votre doigt pour la maintenir en place.
-
-
-
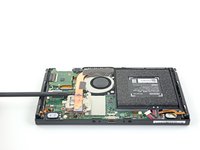
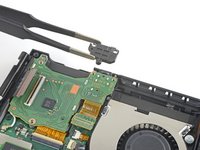
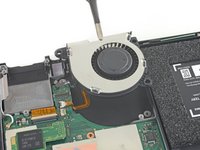
Utilisez un outil en plastique ou vos doigts pour soulever le dissipateur thermique et le séparer de la carte mère.
-
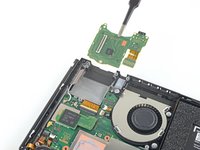
Appliquez une nouvelle couche de pâte thermique sur toutes les surfaces où il y en avait auparavant. Cela inclut la zone entre le caloduc et la plaque en aluminium, qui fait partie du système de refroidissement de la Switch.
-
-
-
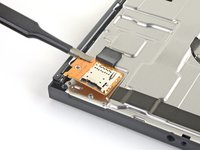
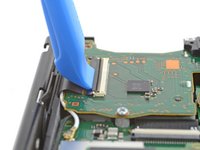
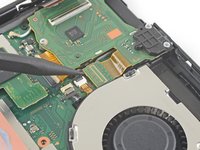
Utilisez un outil en plastique ou votre ongle pour déverrouiller le connecteur ZIF de la nappe de la vitre tactile.
-
-
-
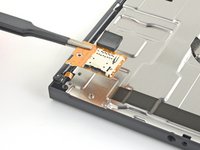
Utilisez un outil en plastique, une spatule (spudger) ou votre ongle pour déverrouiller la prise du connecteur ZIF de la nappe du ventilateur.
-


Pour réassembler votre appareil, veuillez suivre ces instructions dans le sens inverse.
Déposez vos déchets électroniques dans un centre de recyclage certifié.
La réparation ne s’est pas déroulée comme prévu ? Consultez nos conseils basiques de diagnostic ou la section Nintendo Switch de notre Forum pour obtenir de l’aide.
Annulation : je n'ai pas terminé ce tutoriel.
230 autres ont terminé cette réparation.
Merci à ces traducteurs :
100%


Ces traducteurs nous aident réparer le monde ! Vous voulez contribuer ?
Commencez à traduire ›

52 commentaires
If your joycons are not charging, it could be the fans fault as they seem to share a 1.8v and or 5v rail, I had both joycons refusing to charge, and the fan was not working, so by replacing the fan, it had them charging properly again.
oh? i was wondering why my joycons died and never turned on. i though the hot switch short circuited them. the same thing happened to mine. The fan died as well as my joycons. very useful mate. thanks for the info!
I changed the fan and it still don’t charge my Joycon. What should I do?
baron154 -
I’ve recently found a video that shows what can be wrong with Switch with the same issue, but working fan https://www.youtube.com/watch?v=WuQC3ipu... . In the comments people confirmed several times that it helps.
Andrey -
If I'm just replacing the fan, do I need to clean off/reapply any thermal paste?