Introduction
Use this guide to replace the battery in your TicWatch E3.
For your safety, discharge the battery below 25% before disassembling your watch. This reduces the risk of fire if the battery is accidentally damaged during the repair. If your battery is swollen, take appropriate precautions.
You’ll need replacement adhesive when reassembling the device. Your device will function normally, but will lose its IP (Ingress Protection) rating.
Ce dont vous avez besoin
-
-
Before starting repairs, take your watch off the charger and power it down.
-
Remove the watch band.
-
-
-
Apply a heated iOpener to the rear side of the watch for 5 minutes to loosen the adhesive underneath.
-
-
-
Insert an opening pick into the recess between the watch frame and the top edge of the back cover.
-
Push the opening pick to create a gap between the back cover and the watch frame.
-
-
-
Twist the opening pick to widen the gap between the back cover assembly and the watch frame.
-
Pry upward to loosen the back cover assembly.
-
-
-
Carefully lift up the bottom edge of the back cover assembly to make sure it isn't adhered to the watch frame anymore.
-
-
-
-
Grab the back cover assembly and carefully bring it into an upright position next to the watch housing.
-
-
-
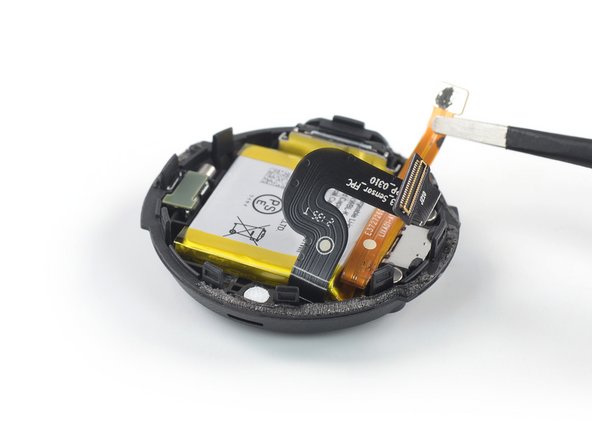
Use a spudger to disconnect the battery cable by prying the connector straight up from its socket.
-
-
-
Use a spudger to disconnect the sensor cable by prying the connector straight up from its socket.
-
-
-
Apply a heated iOpener to the back cover for 2 minutes to loosen the adhesive underneath the battery.
-
-
-
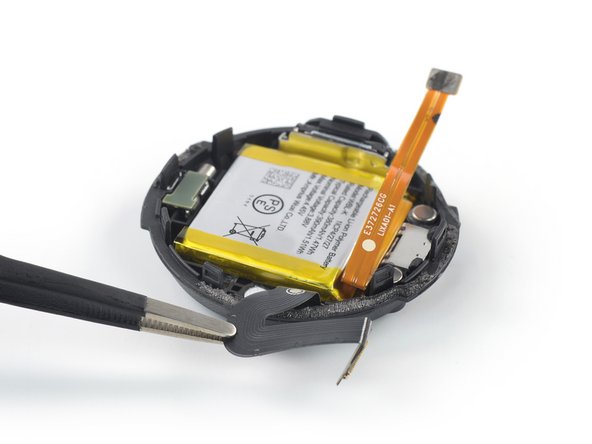
Reposition the battery and sensor assembly cables by folding the battery cable to the left and then the sensor cable to the right side of the back cover assembly.
-
-
-
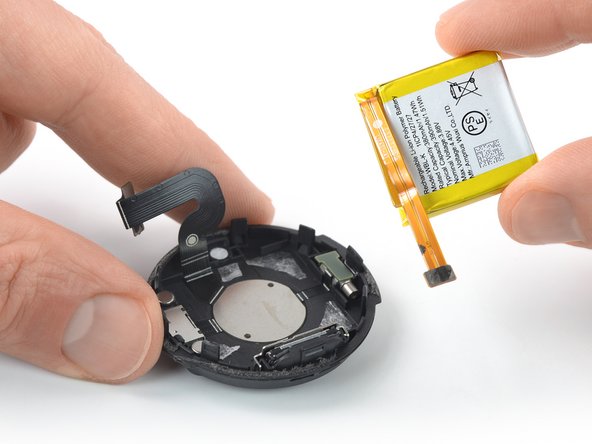
Insert the flat end of a spudger underneath the bottom edge of the battery.
-
Pry upwards to loosen the battery.
-


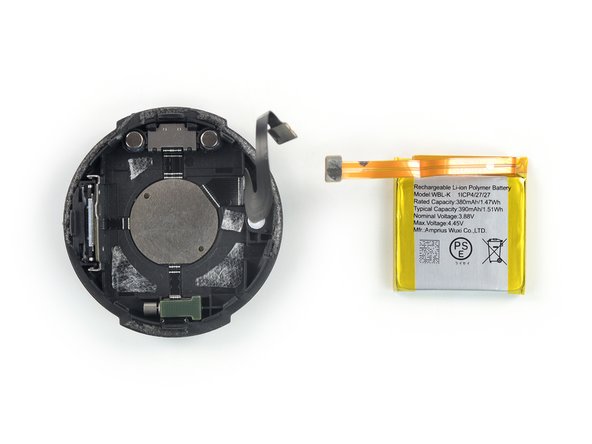
Compare your new replacement part to the original part—you may need to transfer remaining components or remove adhesive backings from the new part before you install it.
To reassemble your device, follow these instructions in reverse order.
During reassembly, apply new adhesive where it's necessary after cleaning the relevant areas with isopropyl alcohol (>90%).
For optimal performance, calibrate your newly installed battery after completing this guide.
Take your e-waste to an R2 or e-Stewards certified recycler.
Repair didn’t go as planned? Try some basic troubleshooting, or ask our TicWatch E3 answers community for help.
Annulation : je n'ai pas terminé ce tutoriel.
3 autres ont terminé cette réparation.


Un commentaire
Dear Dominik thanks a lot for your useful help. Can you please tell me where I can buy a new battery for the ticwatch E3, internet doesn’t seem to help much. Thanks in advance.