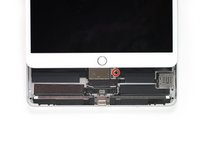
Introduction
Follow this guide to remove or replace the battery in an iPad Air 3. You’ll need to remove the logic board in order to replace the battery—both are held in place by strong adhesive.
This guide shows step-by-step instructions for the Wi-Fi only model. The cellular model requires disconnecting the upper cellular antennas, which are not covered in this guide.
For your safety, discharge your battery below 25% before disassembling your device. This reduces the risk of a dangerous thermal event if the battery is accidentally damaged during the repair. If your battery is swollen, take appropriate precautions.
Some photos in this guide are from a different model and may contain slight visual discrepancies, but they won't affect the guide procedure.
Ce dont vous avez besoin
-
-
You may need to reapply heat repeatedly throughout this process to prevent the adhesive from cooling and hardening.
-
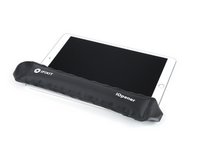
Prepare an iOpener and place it on the bottom edge of the iPad's screen for about two minutes.
-
-
Outil utilisé dans cette étape :Clampy - Anti-Clamp$24.95
-
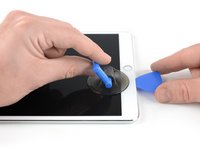
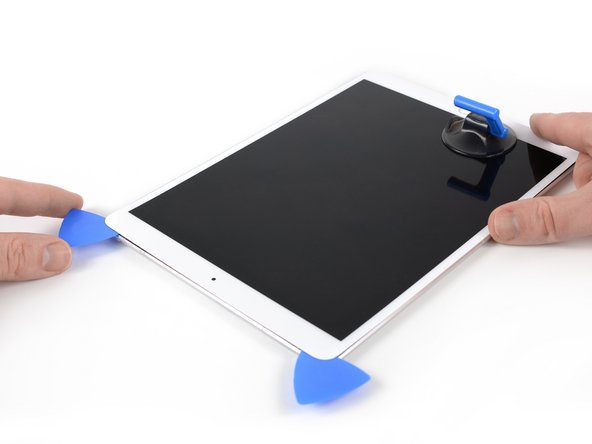
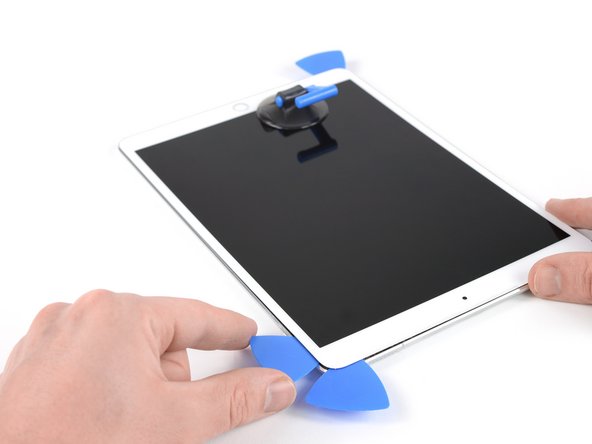
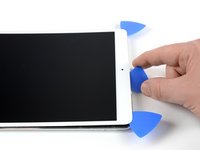
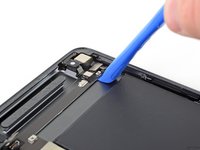
Place a suction cup next to the iPad's home button and press down to create a seal.
-
Firmly pull up on the suction cup to create a small gap between the front panel and the rear case.
-
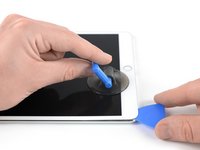
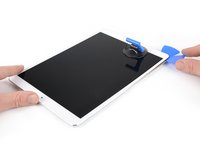
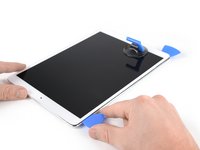
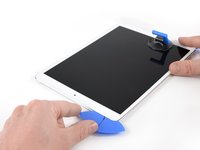
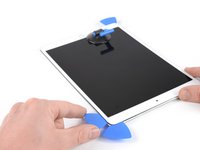
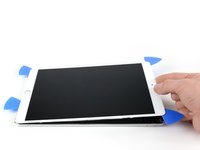
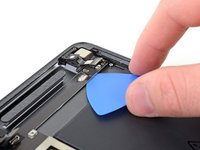
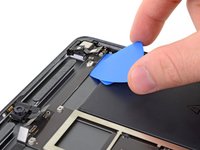
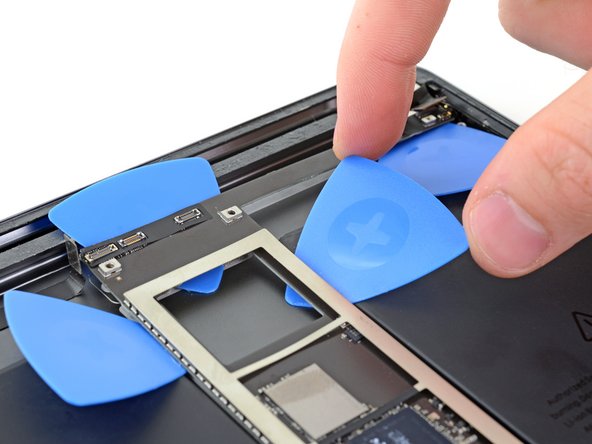
Once you've opened a sufficient gap, insert an opening pick into the gap.
-
-
-
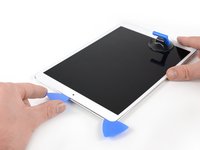
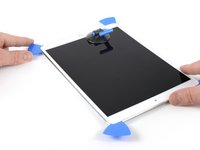
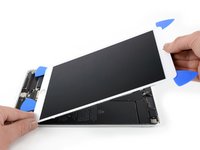
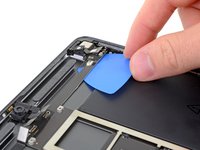
Slice through the adhesive under the screen by sliding the pick along the edge of the display, towards the bottom left corner.
-
Leave the pick in place temporarily to prevent the adhesive from re-sealing.
-
-
-
Apply heat to the left edge of the iPad for about two minutes, or until it's slightly too hot to touch comfortably.
-
If necessary, re-heat your iOpener for a few seconds or until it's a bit too hot to touch. Be careful not to overheat the iOpener, or it may burst.
-
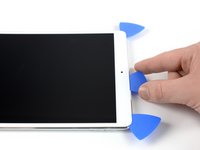
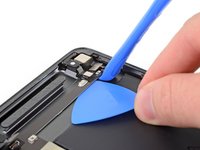
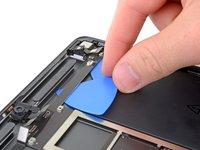
Insert a second opening pick at the bottom left corner of the iPad.
-
Slide the second opening pick along the left side of the display to separate the adhesive underneath.
-
Leave the opening pick inserted near the top left corner of the iPad to prevent the adhesive from re-sealing.
-
-
-
Apply heat to the final, right edge of the iPad for about two minutes, or until it's slightly too hot to touch comfortably.
-
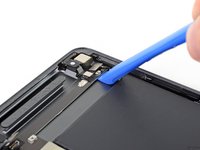
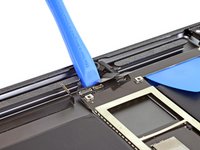
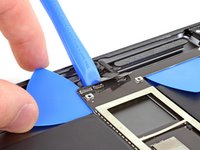
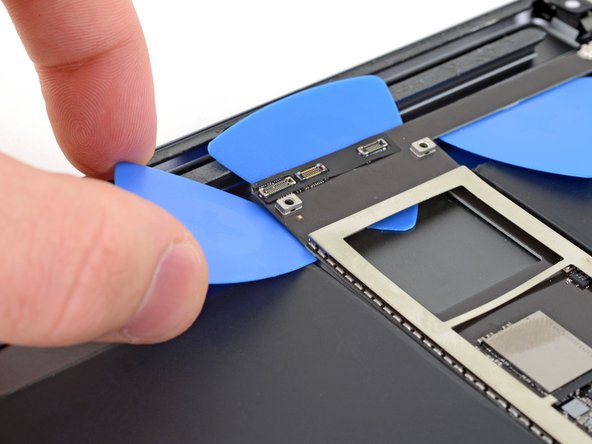
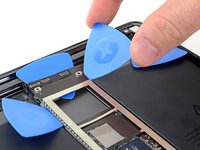
Insert a fourth opening pick at the top right corner of the iPad.
-
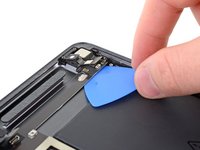
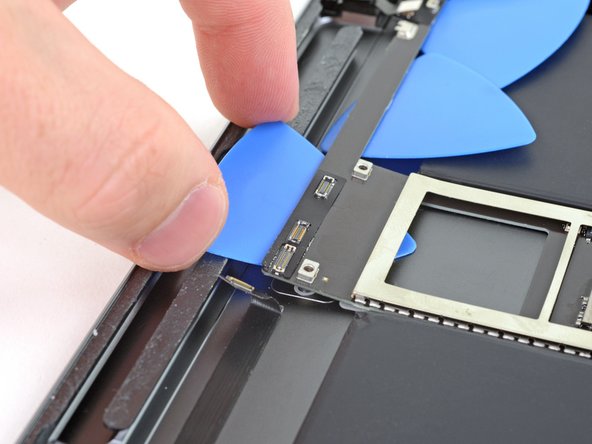
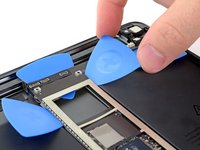
Slide the opening pick down to the bottom right corner to cut the adhesive.
-
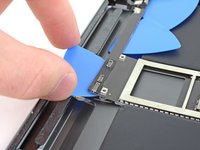
Slide the opening pick around the bottom right corner—pausing to apply more heat if needed—and cut the remaining adhesive on the bottom edge, but stop before you reach the home button.
-
-
-
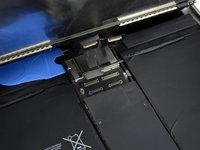
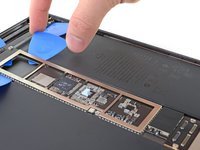
To disconnect the battery, slide one prong of a battery blocker or the tip of an opening pick under the battery power connector to ensure the power circuit is interrupted.
-
Leave the battery blocker in place as you work.
-
-
-
Use a Phillips screwdriver to remove the five screws securing the upper component bracket:
-
Three 1.4 mm-long screws
-
Two 2.4 mm-long screws
-
-
-
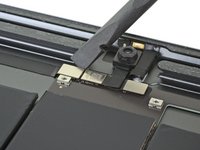
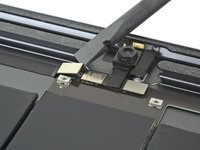
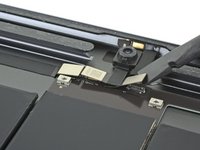
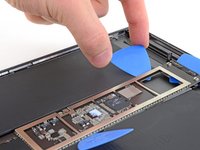
Use a spudger to push the upper component bracket towards the upper edge and off of the clips located near the rear camera.
-
-
Outil utilisé dans cette étape :Tweezers$4.99
-
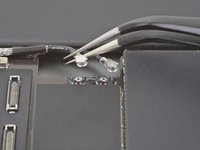
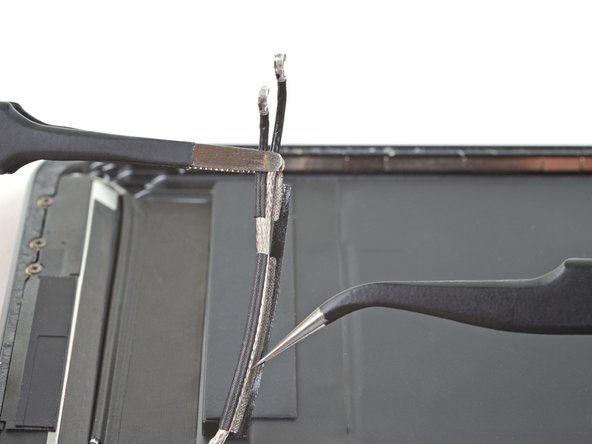
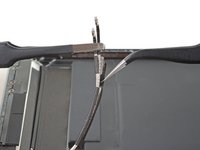
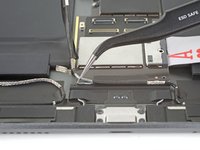
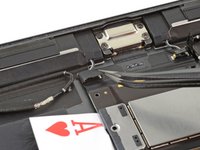
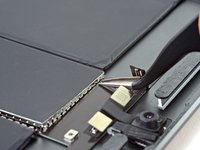
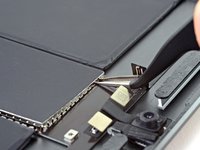
Use a pair of tweezers to disconnect a logic board antenna cable by lifting up on the cable as close to the connector as possible.
-
Repeat for the other logic board antenna cable.
-
-
-
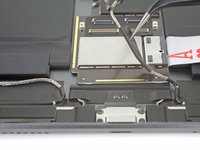
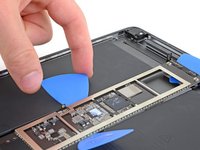
Use a pair of tweezers to lift the antenna cables away from the logic board.
-
-
-
Outil utilisé dans cette étape :Tweezers$4.99
-
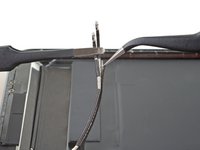
Use a pair of tweezers to peel the right antenna cable away from the logic board.
-
Fold both the left and right antenna cables out of the way.
-
-
-
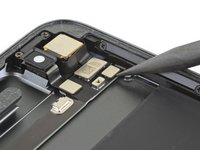
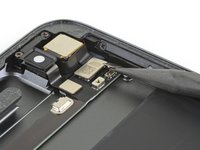
Use a pair of tweezers to peel up the tape covering the right speaker connector.
-
Repeat for the left speaker connector.
-
-
-
Use a pair of tweezers to remove the tape from the back of both speaker connectors.
-
-
-
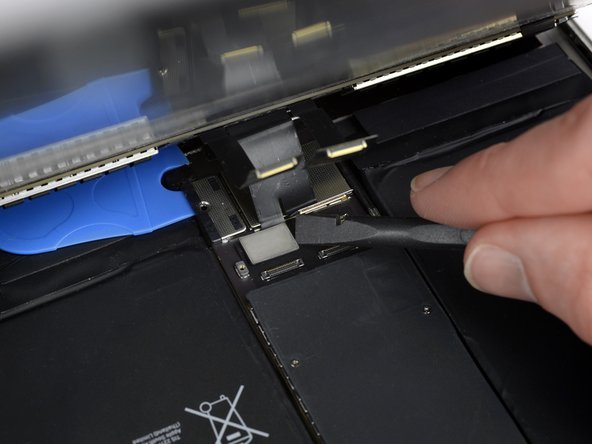
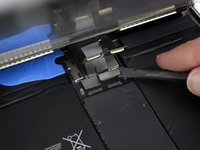
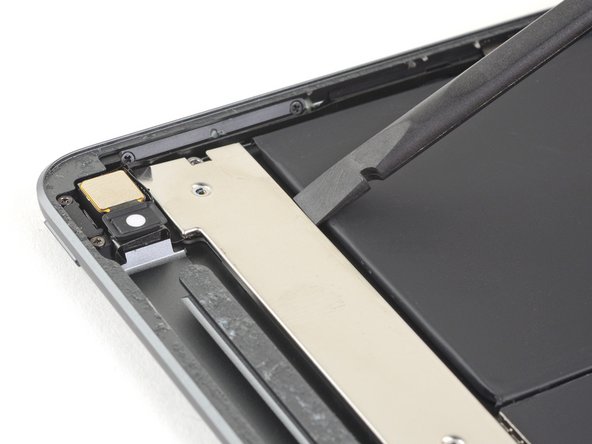
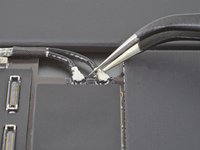
Use the flat end of a spudger to disconnect the headphone jack cable by lifting straight up on the press connector.
-
Repeat to disconnect the front camera and microphone assembly cables.
-
-
-
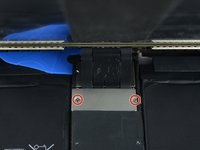
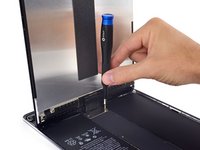
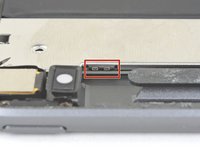
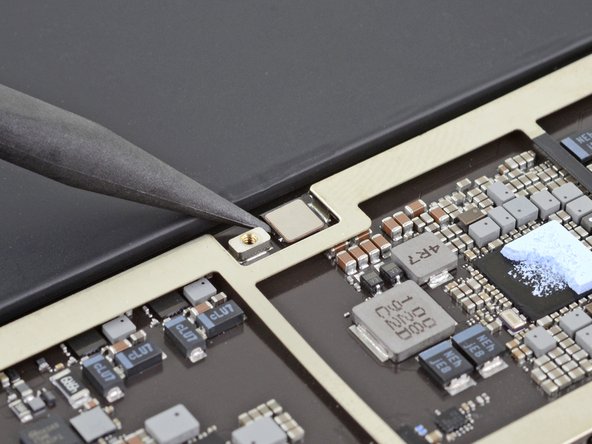
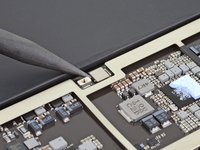
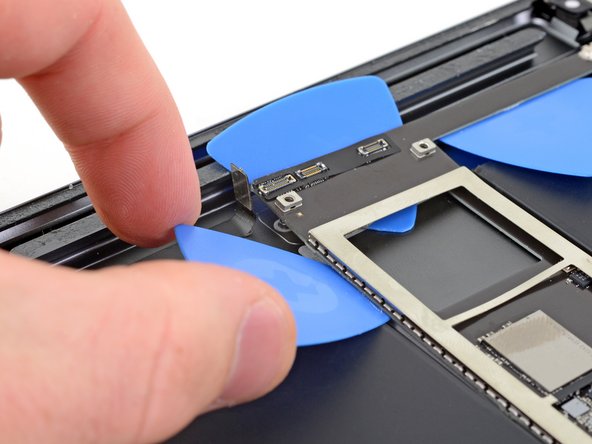
Use a Phillips screwdriver to remove the 1.3 mm-long screw securing the logic board shield.
-
-
-
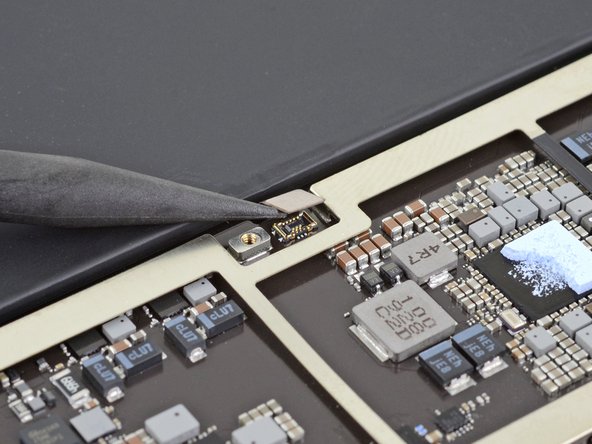
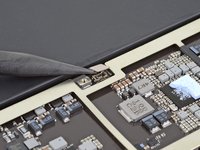
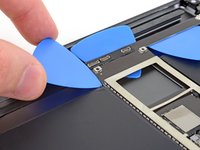
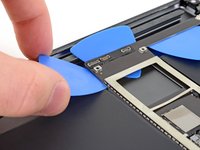
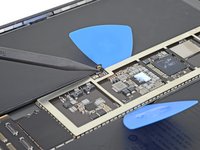
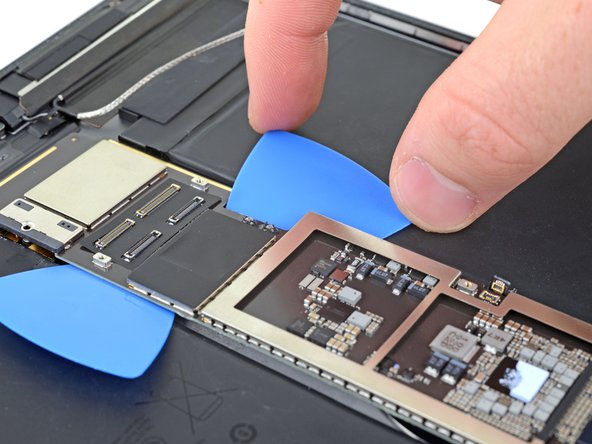
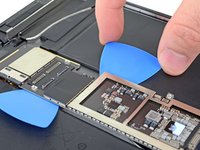
Insert the tips of a pair of tweezers into the gaps under the the logic board shield on the upper right corner.
-
Pry up slightly to loosen the logic board shield.
-
-
-
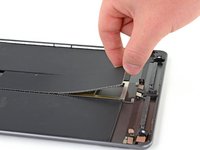
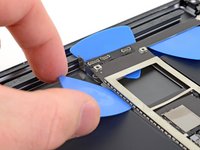
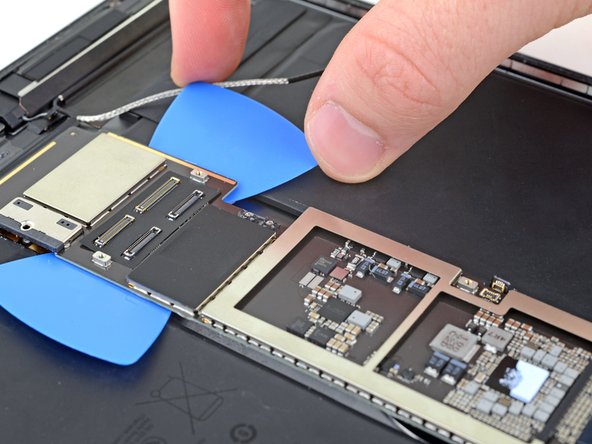
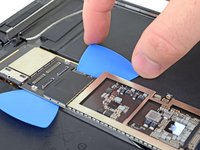
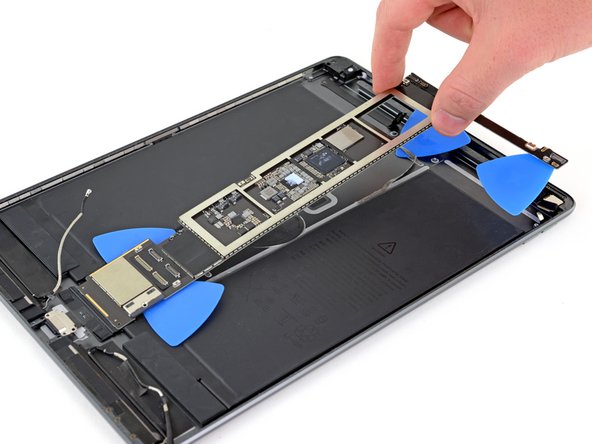
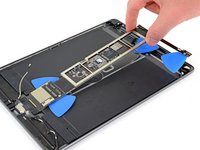
Grip the logic board shield with your fingers.
-
Slowly lift the shield up and remove it.
-
-
-
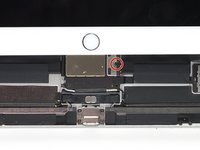
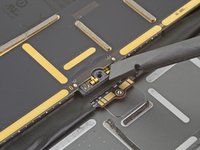
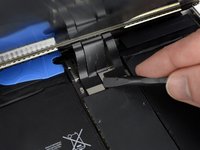
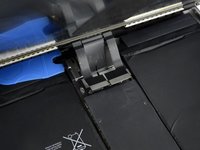
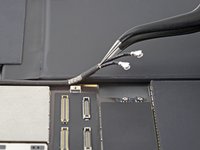
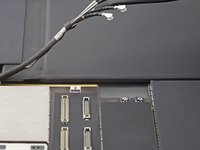
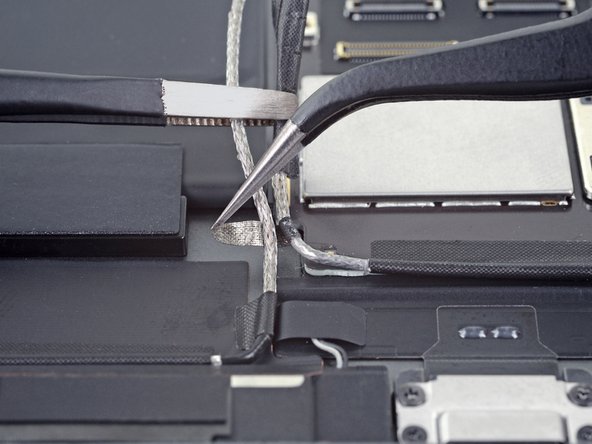
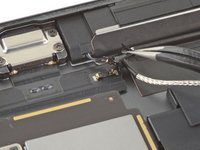
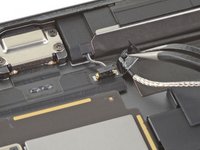
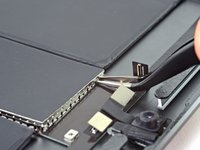
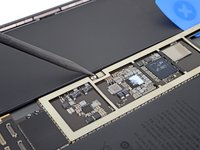
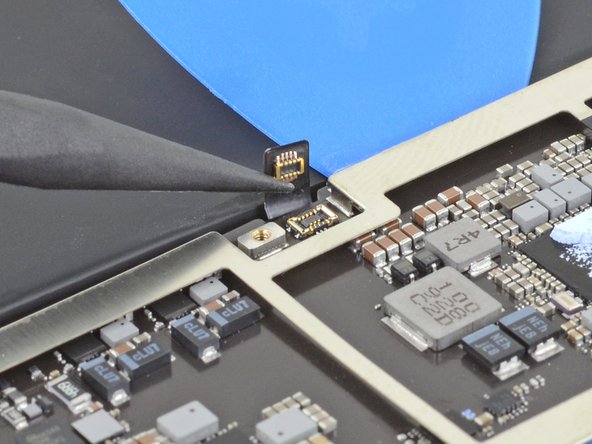
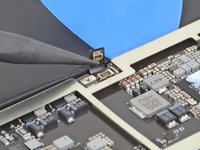
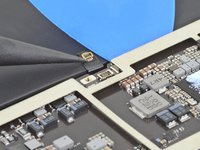
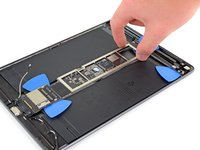
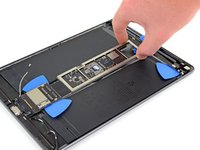
Use the pointed end of a spudger to disconnect the Smart Connector cable by lifting straight up on the press connector.
-
-
-
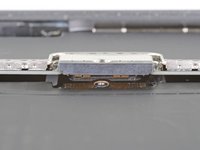
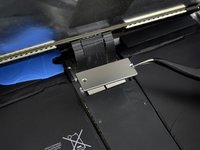
Use a Phillips screwdriver to remove the four screws securing the charging port to the rear case:
-
Two 2.4 mm-long screws
-
Two 1.7 mm-long screws
-
-
-
Apply a heated iOpener to the top edge of the rear case for a minute.
-
-
-
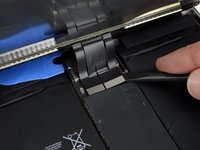
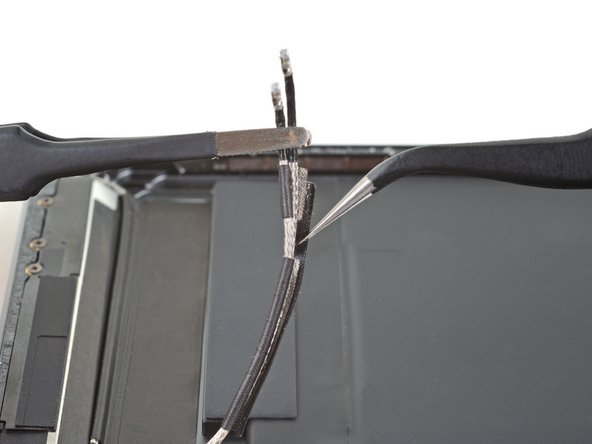
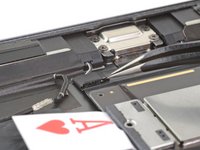
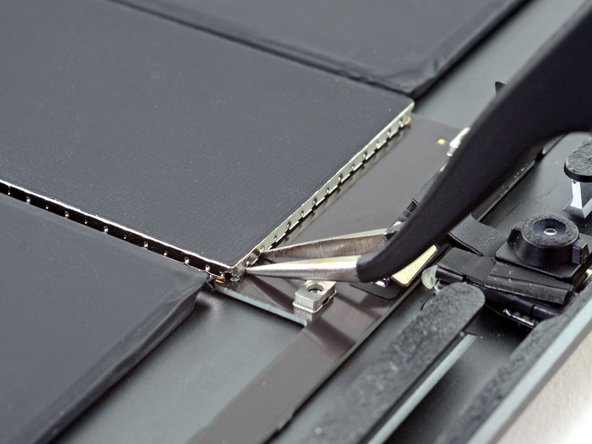
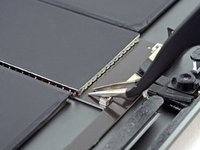
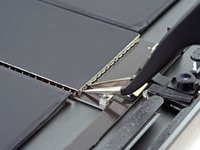
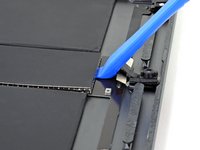
Insert an opening tool underneath the logic board arm near the rear camera.
-
Pry up the arm until you can slide in an opening pick underneath it.
-
-
-
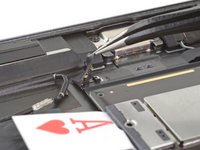
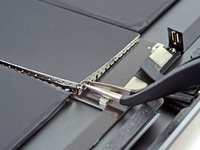
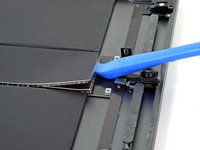
Push the opening pick underneath the logic board to slice the adhesive.
-
-
-
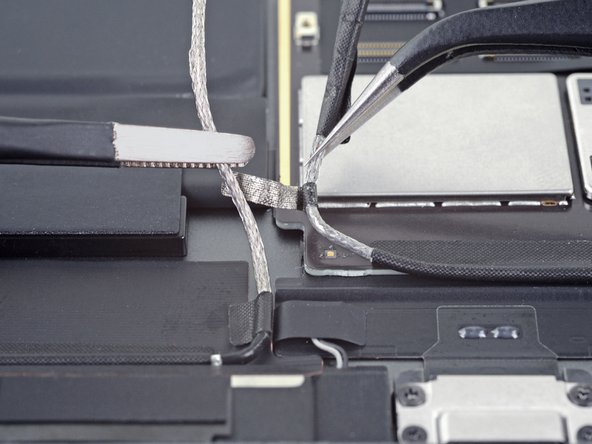
Use a spudger to move the Smart Connector cable behind the opening pick.
-
-
-
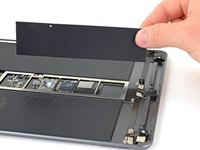
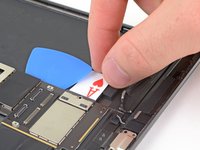
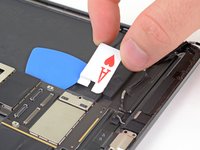
Cut a strip of painter's tape or masking tape to the width of the iPad.
-
Press the bottom edge of the tape strip onto the rear case below the upper components.
-
Press the top edge of the tape strip over the upper components.
-
-
Outil utilisé dans cette étape :Tweezers$4.99
-
Use a pair of tweezers to remove the two pieces of tape securing the battery to the lower buffer blocks.
-
-
-
Wear eye protection when handling and applying the adhesive remover.
-
Do not wear contact lenses without eye protection.
-
Protective gloves are included in your kit. If you are concerned about possible skin irritation, put your gloves on now.
-
-
-
Pull off the black rubber stopper from your bottle of adhesive remover.
-
Use scissors to cut off the sealed tip of the applicator.
-
-
-
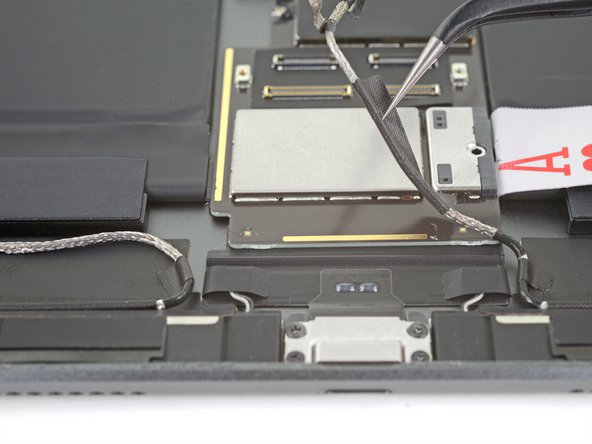
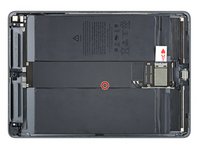
The red boxes show the locations of the adhesive strips that secure the battery to the rear case.
-
The orange box shows the location of the Smart Connector cable that runs underneath the left battery cell. Be careful not to damage this cable when you pry up the battery.
-
-
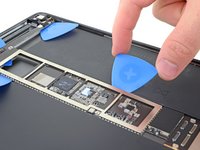
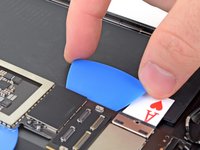
Outil utilisé dans cette étape :Plastic Cards$2.99
-
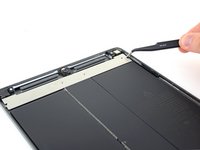
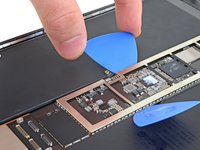
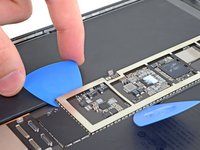
Insert a plastic card under the top of the left battery cell.
-
Slide the plastic card as far as you can under the battery to cut the adhesive.
-
Leave the plastic card inserted.
-
-
Outil utilisé dans cette étape :Tesa 61395 Tape$12.99
-
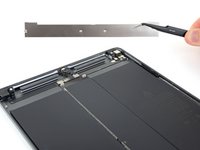
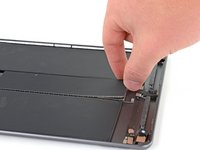
Remove the battery.
-
Use high concentration (>90%) isopropyl alcohol and a lint-free cloth to remove all traces of adhesive residue from the rear case.
-


To reassemble your device, follow these instructions in reverse order.
For optimal performance, calibrate your newly installed battery after completing this guide.
Take your e-waste to an R2 or e-Stewards certified recycler.
Repair didn’t go as planned? Try some basic troubleshooting, or ask our iPad Air 3 Answers community for help.
Annulation : je n'ai pas terminé ce tutoriel.
8 autres ont terminé cette réparation.
