Aller au contenu principal
Acer Spin 5 N17W2 Screen Assembly Replacement

Acer Spin 5 N17W2 Screen Assembly Replacement

YUJIE WANG

YUJIE WANG et 5 autres contributeurs

Dernière mise à jour le May 23, 2023

20 - 25 minutes
Modérée
A besoin de meilleures images
Nécessite plus d'images

This technical guide provides a step-by-step process for replacing the screen assembly of an Acer Spin 5 N17W2 laptop. The Acer Spin 5 N17W2 is a popular convertible laptop that features a touchscreen display, making it a great device for both productivity and entertainment. However, if the screen becomes damaged or stops working, it can be a frustrating issue to deal with. With this guide, you'll be able to replace the screen yourself, saving you time and money compared to taking it to a repair shop. The guide includes detailed instructions, helpful tips, and recommended tools to ensure a successful screen replacement.

Ce dont vous avez besoin

Outils

  1. Acer Spin 5 N17W2 Screen Assembly Replacement, Screen Assembly: étape 1, image 1 de 2 Acer Spin 5 N17W2 Screen Assembly Replacement, Screen Assembly: étape 1, image 2 de 2
    • Use the Phillips #1 screwdriver to remove the six 6mm screws.

    • Use Phillips #1 screwdriver to remove six 5mm screws.

  2. Acer Spin 5 N17W2 Screen Assembly Replacement: étape 2, image 1 de 1
    • Use an opening tool to pry the back cover open.

  3. Acer Spin 5 N17W2 Screen Assembly Replacement: étape 3, image 1 de 1
    • Use the Phillips #1 screwdriver to remove the three 5mm screws.

    • Use the Phillips #1 screwdriver to remove the three 5mm screws on another side of hinge.

  4. Acer Spin 5 N17W2 Screen Assembly Replacement: étape 4, image 1 de 1
    • Disconnect chips from the two end side of hinge.

  5. Acer Spin 5 N17W2 Screen Assembly Replacement: étape 5, image 1 de 1
    • Use the plastic opening tool to pry the hinge up.

  6. Acer Spin 5 N17W2 Screen Assembly Replacement: étape 6, image 1 de 1
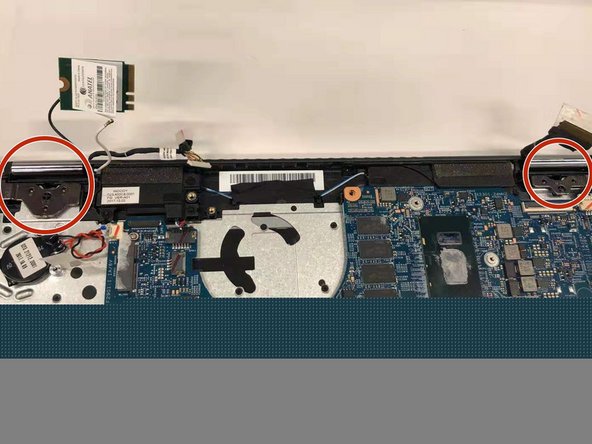
    • Remove the wireless LAN chip from the motherboard.

  7. Acer Spin 5 N17W2 Screen Assembly Replacement: étape 7, image 1 de 1
    • Detach the sensors on each side of the hinge from the motherboard.

  8. Acer Spin 5 N17W2 Screen Assembly Replacement: étape 8, image 1 de 1
    • Detach the screen assembly from the device.

Conclusion

To reassemble your device, follow these instructions in reverse order.

3 autres ont terminé cette réparation.

0 commentaires

Ajouter un commentaire

Nombre de vues :

Dernières 24 heures : 1

7 derniers jours : 5

30 derniers jours : 29

Total : 2,779