
Beats Pill XL Motherboard Replacement
Introduction
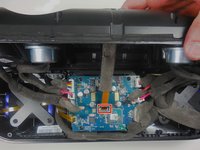
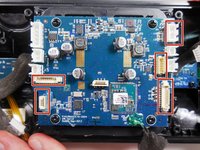
Passez à l'étape 1In this guide, you will remove the cables and screws from the motherboard. You will also take the Bluetooth antenna out of the speaker.
Ce dont vous avez besoin
Outils


-
-
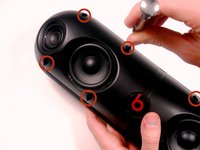
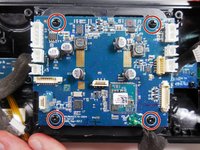
Using a plastic opening tool, pry the casing from the rest of the device.
-
Pry all the way around the edge and then pull apart.
-
-
-
-
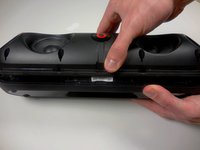
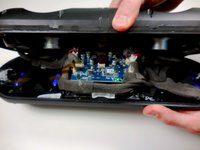
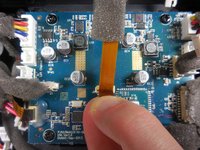
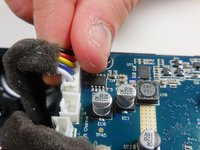
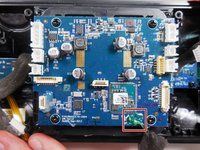
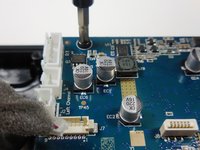
After completing the guide for removing the case, remove the cables connecting the speakers.
-
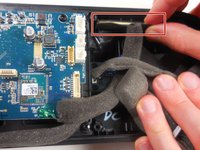
Simply pull up on them without pulling on the wires themselves.
-


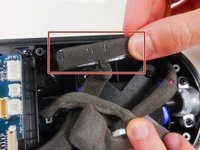


To reassemble your device, follow these instructions in reverse order.
To reassemble your device, follow these instructions in reverse order.
Annulation : je n'ai pas terminé ce tutoriel.
14 autres ont terminé cette réparation.
Équipe

Colorado Springs, Team 9-2, Panko Spring 2015 Membre de l'équipe Colorado Springs, Team 9-2, Panko Spring 2015
UCCS-PANKO-S15S9G2
3 membres
7 tutoriels rédigés
7 commentaires
Disculpe la molestia quisiera saber el número de parte de los transistores Q2,Q3
I have a question regarding the contents of circuit.
which type of IC is used in the circuit which is hided by a marker. And if you have that ic than how can i contact you.
I need the Beats Pill XL Motherboard.. where i can buy
where u can buy motherboard
Bonjour impeccable bien expliqué
Ou puis-je trouvé cette carte
Merci beaucoup