Aller au contenu principal
Brother CS6000i Needle Plate Replacement

Brother CS6000i Needle Plate Replacement

Ava Martinez

Ava Martinez et 2 autres contributeurs

Dernière mise à jour le December 31, 2024

15 - 20 minutes
Modérée

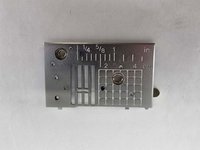
This guide will teach you how to replace the metal needle plate on the Brother CS6000i. You will need a Phillips #2 screwdriver as well as a 4mm flathead screwdriver. It will take about 15-20 minutes.

Ce dont vous avez besoin

iFixit touche une commission lorsque vous achetez par l'intermédiaire de ces liens.
  1. Brother CS6000i Needle Plate Replacement, Body: étape 1, image 1 de 2 Brother CS6000i Needle Plate Replacement, Body: étape 1, image 2 de 2
    • Remove the five 20 mm Phillips #2 screws on the back of the device.

    • Remove the single 28 mm Phillips #2 screw on the back of the device.

    • Remove the single 23 mm Phillips #2 screw on the back of the device.

  2. Brother CS6000i Needle Plate Replacement: étape 2, image 1 de 2 Brother CS6000i Needle Plate Replacement: étape 2, image 2 de 2
    • Pull the white cover off.

  3. Brother CS6000i Needle Plate Replacement: étape 3, image 1 de 2 Brother CS6000i Needle Plate Replacement: étape 3, image 2 de 2
    • Remove the final screw, a 11 mm Phillips #2.

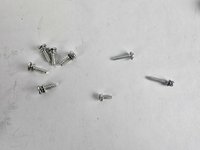
    • After removing all eight screws, you will have five 2 mm screws, one 28 mm screw, one 23 mm screw, and one 11 mm screw, all of which are Phillips #2.

  4. Brother CS6000i Needle Plate Replacement: étape 4, image 1 de 3 Brother CS6000i Needle Plate Replacement: étape 4, image 2 de 3 Brother CS6000i Needle Plate Replacement: étape 4, image 3 de 3
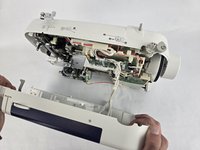
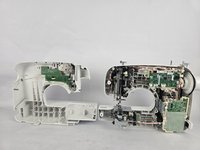
    • Slightly pull apart the two halves of the machine, taking care not to strain the attached cables.

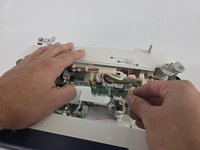
    • Unhook the white wires that are connected to the motherboard.

    • Fully separate the two halves.

  5. Brother CS6000i Needle Plate Replacement, Needle Plate: étape 5, image 1 de 2 Brother CS6000i Needle Plate Replacement, Needle Plate: étape 5, image 2 de 2
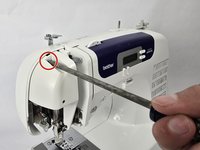
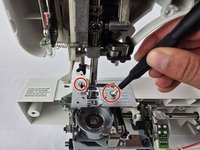
    • Remove the two screws securing the needle plate with a 4mm flathead screwdriver.

Conclusion

To reassemble your device, follow these instructions in reverse order.

Ava Martinez

Membre depuis le 10/31/24

433 Réputation

4 tutoriels rédigés

Équipe

Cuesta, Team 20-1, Krynen Fall 2024 Membre de l'équipe Cuesta, Team 20-1, Krynen Fall 2024

CUESTA-KRYNEN-F24S20G1

5 membres

8 tutoriels rédigés

0 commentaires de tutoriel

Ajouter un commentaire

Nombre de vues :

Dernières 24 heures : 1

7 derniers jours : 3

30 derniers jours : 10

Total : 82