Aller au contenu principal
Canon PowerShot A200 Camera Lens Replacement

Canon PowerShot A200 Camera Lens Replacement

William Starr

William Starr et 16 autres contributeurs

Dernière mise à jour le May 7, 2024

40 minutes - 1 heure
Modérée
Étapes manquantes
Étudiant en action

If your Canon PowerShot A200 camera’s lens is damaged or not properly functioning, use this guide to replace the lens.

A camera’s lens is required in order to successfully take a photo. A camera lens may become damaged over time through heavy wear and tear, or if the camera is dropped and the lens becomes scratched or shattered. If your camera’s lens no longer functions to its fullest potential, consider replacing the lens for ideal photography.

Before using this guide, locate the camera lens, which can be found on the front side of the overall case. This guide is intended for users familiar with the Canon PowerShot camera or users who have prior experience fixing cameras.

It is important to be gentle when removing any piece of the camera from the body. To ensure all pieces do not become damaged or lost, place all small parts in a safe space while working on the camera.

Ce dont vous avez besoin

Outils

Afficher plus…

  1. Canon PowerShot A200 Camera Lens Replacement, Canon PowerShot A200: étape 1, image 1 de 1
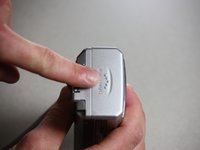
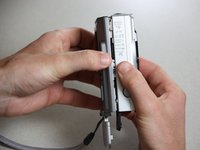
    • Use a Phillips #00 screwdriver to remove the two screws located at the bottom of the camera.

  2. Canon PowerShot A200 Camera Lens Replacement: étape 2, image 1 de 2 Canon PowerShot A200 Camera Lens Replacement: étape 2, image 2 de 2
    • Locate the screw and the rubber covering on the left side of the camera. Slide the rubber covering to expose a second screw.

    • Remove the two screws with the Phillips #00 screwdriver.

  3. Canon PowerShot A200 Camera Lens Replacement: étape 3, image 1 de 2 Canon PowerShot A200 Camera Lens Replacement: étape 3, image 2 de 2
    • Open the battery compartment on the right side of the camera by pushing slightly in the direction of the arrow.

    • Be sure to remove the memory card.

    • Remove the two screws by the memory card slot using the Phillips #00 screwdriver.

  4. Canon PowerShot A200 Camera Lens Replacement: étape 4, image 1 de 2 Canon PowerShot A200 Camera Lens Replacement: étape 4, image 2 de 2
    • Pull the grey tab towards the back of the camera. Lift the black cover to expose the battery slots.

    • Remove the two visible screws with the Phillips #00 screwdriver.

    • During reassembly, the holes for these screws must align properly with the interior of the camera body. Then the black battery cover must lie flat and be held in place by the grey tab.

  5. Canon PowerShot A200 Camera Lens Replacement: étape 5, image 1 de 2 Canon PowerShot A200 Camera Lens Replacement: étape 5, image 2 de 2
    • Remove the screen battery located to the left of the screen.

    • Set the screen battery aside for reassembly

  6. Canon PowerShot A200 Camera Lens Replacement: étape 6, image 1 de 2 Canon PowerShot A200 Camera Lens Replacement: étape 6, image 2 de 2
    • Gently pull the camera apart from the top.

    • Be careful. The two halves are still attached by two short ribbons at the bottom of the camera.

  7. Canon PowerShot A200 Camera Lens Replacement: étape 7, image 1 de 2 Canon PowerShot A200 Camera Lens Replacement: étape 7, image 2 de 2
    Outil utilisé dans cette étape :
    Tweezers
    $4.99
    • Locate the black tabs on either side of the white ribbon.

    • Use the metal tweezers to gently move these tabs to the outside edges of the ribbon.

    • Gently pull the white ribbon out from its connection.

  8. Canon PowerShot A200 Camera Lens Replacement: étape 8, image 1 de 3 Canon PowerShot A200 Camera Lens Replacement: étape 8, image 2 de 3 Canon PowerShot A200 Camera Lens Replacement: étape 8, image 3 de 3
    • Locate the black tabs on either side of the orange ribbon.

    • Use the metal tweezers to gently move these tabs to the outside edges of the ribbon.

    • Gently pull the orange ribbon out of its connection.

    • Your camera will now be in two separate pieces.

  9. Canon PowerShot A200 Camera Lens Replacement, Camera Lens: étape 9, image 1 de 3 Canon PowerShot A200 Camera Lens Replacement, Camera Lens: étape 9, image 2 de 3 Canon PowerShot A200 Camera Lens Replacement, Camera Lens: étape 9, image 3 de 3
    Outil utilisé dans cette étape :
    Tweezers
    $4.99
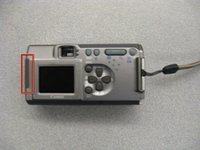
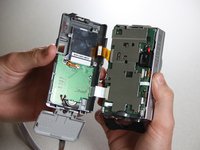
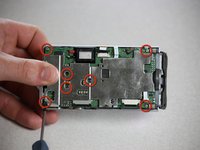
    • Use the Phillips #00 screwdriver to remove the seven screws holding the camera body to the case.

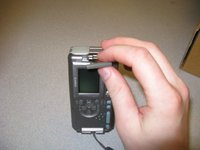
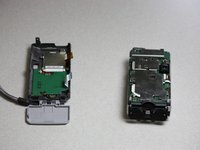
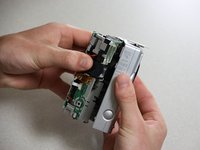
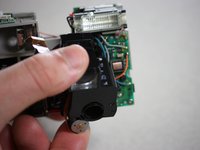
    • Pull out the camera body from the camera casing.

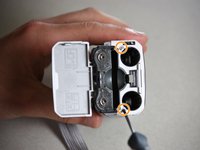
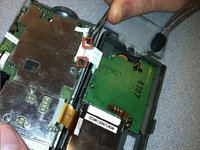
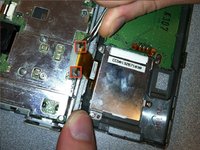
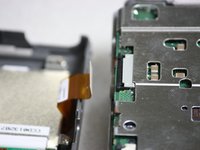
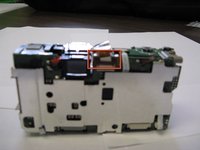
    • Use the metal tweezers to unplug the orange connector.

  10. Canon PowerShot A200 Camera Lens Replacement: étape 10, image 1 de 1
    • Use the Phillips #00 screwdriver to remove the six screws that secure the camera lens.

  11. Canon PowerShot A200 Camera Lens Replacement: étape 11, image 1 de 3 Canon PowerShot A200 Camera Lens Replacement: étape 11, image 2 de 3 Canon PowerShot A200 Camera Lens Replacement: étape 11, image 3 de 3
    • Use the metal tweezers to remove the orange ribbon from the top of the camera body.

    • Gently remove the lens from the camera body.

    • When removing the lens, be aware that small pieces may fall out.

Conclusion

To reassemble your device, follow these instructions in reverse order.

William Starr

Membre depuis le 01/06/11

111 Réputation

1 tutoriel rédigé

Équipe

Cal Poly, Team 7-37, Regan Winter 2011 Membre de l'équipe Cal Poly, Team 7-37, Regan Winter 2011

CPSU-REGAN-W11S7G37

4 membres

10 tutoriels rédigés

0 commentaires de tutoriel

Ajouter un commentaire

Nombre de vues :

Dernières 24 heures : 0

7 derniers jours : 4

30 derniers jours : 23

Total : 2,237