Canon PowerShot ELPH 300HS Back Panel Button Replacement
Introduction
Passez à l'étape 1In this guide you will learn how to replace broken buttons on the Back Panel of your Canon PowerShot ELPH 300HS. Replacing these buttons is usually a simple and inexpensive alternative to having you camera repaired at a shop or replaced.
Ce dont vous avez besoin
Outils
Afficher plus…
-
-
Turn off your camera by pressing the power button, located on the top-center of the device.
-
Locate the battery door on the bottom right area of the camera case.
-
Place your finger firmly on the black rubber pad on the battery door and slide the door to the right to open it.
-
Locate the orange battery release button beneath the battery door.
-
Slide the battery release button downward to release the battery.
-
-
-
Remove the two screws located on the left side of the camera case, using the Phillips screwdriver #00 (2.0 mm).
-
-
-
-
Remove the two screws on the bottom of the camera located near the battery door (Phillips #00 screwdriver) (4.0 mm).
-
-
-
Remove the screw located on the lower right side of the camera case (Phillips #00 screwdriver) (4.0 mm).
-
Remove the HDMI A/V out port cover located on the upper right side of the camera.
-
Remove the screw located just beneath the port cover removed in step 2. (Phillips #00 screwdriver) (2.0 mm).
-
-
-
Carefully pry the case apart at the seem, using your fingers.
-
-
-
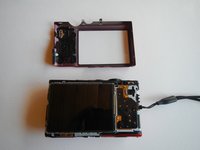
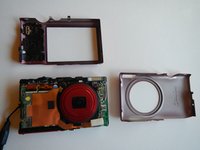
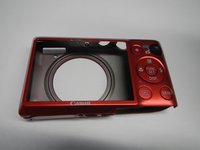
Now that you have followed the steps to remove the case, you can remove the back panel of your camera and replace it with your new panel.
-
-
-
Now that you have replaced your back panel buttons, you can reassemble the device in reverse order of the instructions in the Camera Case Replacement guide.
-
To reassemble your device, follow these instructions in reverse order.
To reassemble your device, follow these instructions in reverse order.
Annulation : je n'ai pas terminé ce tutoriel.
Une autre personne a terminé cette réparation.


