Aller au contenu principal

Canon PowerShot SX280 HS Back Button Panel Replacement

Ce dont vous avez besoin

  1. Canon PowerShot SX280 HS Back Button Panel Replacement, Back Button Panel: étape 1, image 1 de 1
    • Before taking apart your device the two most important steps are:

    • Turning the camera off

    • Removing the battery to reduce the risk of shock

  2. Canon PowerShot SX280 HS Back Button Panel Replacement: étape 2, image 1 de 1
    • Turn off the camera by holding the ON/OFF on the top of the camera.

    • Now that the camera is off the battery must be removed.

    • Firmly place your finger on the battery door and slide to the right.

    • Once the door is open, there will be a small orange button, which is the battery release. Slide this button down to release the battery.

  3. Canon PowerShot SX280 HS Back Button Panel Replacement: étape 4, image 1 de 1
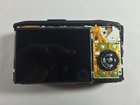
    • Once the battery is removed, you can begin to take the outer screws out. Removing these will allow you to remove the camera case. It will require a #00 phillips screwdriver.

    • Be sure to be careful when removing these screws as they are easy to lose. Be gentle as well, as they are made of weak material and can strip easily.

  4. Canon PowerShot SX280 HS Back Button Panel Replacement: étape 5, image 1 de 1
    • There are two screws in the left side of the camera, which are marked in the photo. These screws are

  5. Canon PowerShot SX280 HS Back Button Panel Replacement: étape 6, image 1 de 1
    • There are two screws to remove on the right side of the camera, which are marked in the photo. These screws are

  6. Canon PowerShot SX280 HS Back Button Panel Replacement: étape 7, image 1 de 1
    • Finally, there are two screws on the bottom that need to be removed. These screws are

  7. Canon PowerShot SX280 HS Back Button Panel Replacement: étape 8, image 1 de 2 Canon PowerShot SX280 HS Back Button Panel Replacement: étape 8, image 2 de 2
    • Now that the outer screws have been removed you can begin to remove the back case which contains the buttons.

    • Gently remove the back case, and replace it with the new one.

Conclusion

To reassemble your device, follow these instructions in reverse order.

Mason Boyd

Membre depuis le 03/23/15

228 Réputation

2 tutoriels rédigés

Équipe

UMass Dartmouth, Team 1-5, Miles Spring 2015 Membre de l'équipe UMass Dartmouth, Team 1-5, Miles Spring 2015

UMASSD-MILES-S15S1G5

3 membres

5 tutoriels rédigés

0 commentaires

Ajouter un commentaire

Nombre de vues :

Dernières 24 heures : 0

7 derniers jours : 0

30 derniers jours : 5

Total : 503