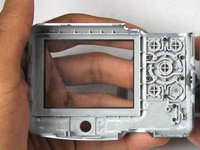
Canon Powershot A720 IS LCD Screen Replacement
Introduction
Passez à l'étape 1If your Canon Powershot A720 LCD screen has been scratched, cracked, or shattered, your screen most likely needs to be replaced in order for your digital camera to continue running effectively. This guide will show you how to properly replace your screen without causing further damage to the camera in a matter of seven simple steps.
Remember, this camera has sensitive internal components that should be handled with both extreme caution and care. To get started, you'll need a Phillips-head screwdriver, a pair of tweezers, and a magnetic mat to ensure all of the magnetic components are safely stowed while working.
Be safe. You are working with glass components, so wear protective gloves if necessary.


-
-
Use your thumb to push up the battery lock on the bottom of the camera.
-
-
-
Place the camera down so that the lens is facing up.
-
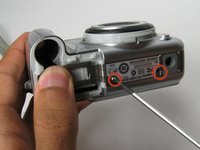
Remove the single 4 mm screw from the inside of the battery compartment using a Phillips #00 screwdriver.
-
Remove the door from the camera.
-
-
-
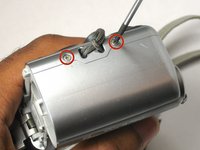
Remove the six 4 mm screws from the sides and bottom of the camera with a Phillips #00 screwdriver.
-
-
-
-
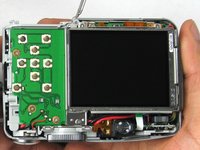
Separate the back case panel from the rest of the camera by gently prying it open with your hands.
-
-
-
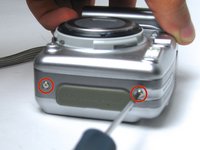
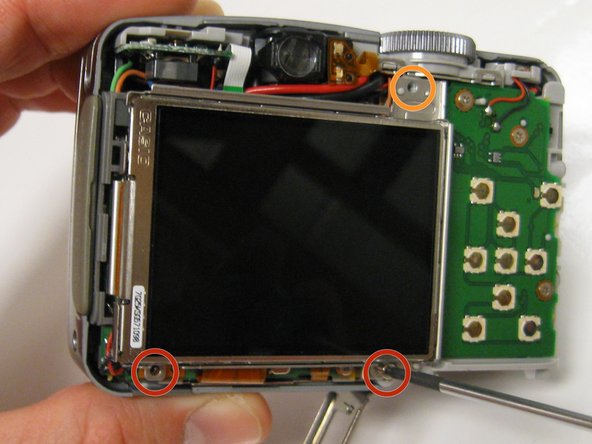
Remove the two 3 mm screws below the LCD screen mount with a Phillips #00 screwdriver.
-
Remove the top 4 mm screw with the Phillips #00 screwdriver.
-
-
-
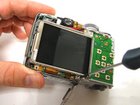
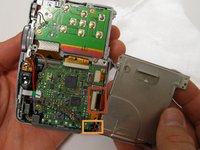
Carefully lift and turn over the LCD screen so that you are able to see the motherboard.
-
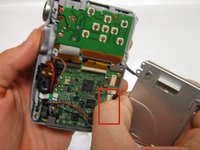
Carefully disconnect the LCD screen ribbon cable from its ZIF connector with your thumb and index finger.
-
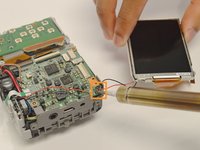
Use the soldering iron to separate the black and red power wires from the motherboard.
-
-
-
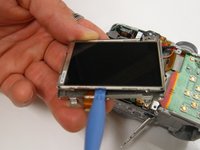
Insert the tip of the blue plastic opening tool between the LCD screen and the mount to unsnap the metal tabs.
-
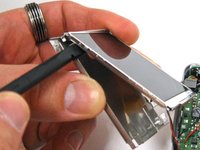
Insert the flat end of the spudger underneath the LCD screen to break apart the glue that is attaching the LCD screen to the mount.
-
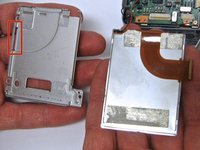
Once you have separated the the glue, carefully pull out the LCD screen from the mount.
-


To reassemble your device, follow these instructions in reverse order.
To reassemble your device, follow these instructions in reverse order.
Équipe

USF Tampa, Team 17-4, Watkins Winter 2015 Membre de l'équipe USF Tampa, Team 17-4, Watkins Winter 2015
USFT-WATKINS-W15S17G4
3 membres
8 tutoriels rédigés