Aller au contenu principal
Casio fx-9750GII Screen Replacement

Casio fx-9750GII Screen Replacement

YORK-CHEN-F21SEG[2]

YORK-CHEN-F21SEG[2] et 4 autres contributeurs

Dernière mise à jour le December 12, 2024

25 - 45 minutes
Modérée

This guide will walk you through step-by-step instructions on how to change a broken or damaged screen of your Casio fx-9750GII graphing calculator.

A display screen shows the output of what is being input into the device through the keys. A damaged screen would display distorted prints from the calculator.

Before beginning this repair, make sure to take out the DC batteries at the back of the graphing calculator. Take extra precaution if screen appears to be shattered or broken. Put on rubber gloves to protect your hands if needed.

Ce dont vous avez besoin

iFixit touche une commission lorsque vous achetez par l'intermédiaire de ces liens.
  1. Casio fx-9750GII Screen Replacement, Screen: étape 1, image 1 de 2 Casio fx-9750GII Screen Replacement, Screen: étape 1, image 2 de 2
    • Turn off the calculator and flip it over so the backside is facing up.

    • Slide the battery door off and remove all of the batteries.

  2. Casio fx-9750GII Screen Replacement: étape 2, image 1 de 1
    • Use a screwdriver to remove the screws from the back of the calculator.

  3. Casio fx-9750GII Screen Replacement: étape 3, image 1 de 1
    • Carefully remove the screw from the battery slot.

  4. Casio fx-9750GII Screen Replacement: étape 4, image 1 de 2 Casio fx-9750GII Screen Replacement: étape 4, image 2 de 2
    • Remove the back case from the calculator.

    • Be careful of the spring that shows in the second picture. The spring is the convertor of the battery.

  5. Casio fx-9750GII Screen Replacement: étape 5, image 1 de 2 Casio fx-9750GII Screen Replacement: étape 5, image 2 de 2
    • Remove the screws from the motherboard.

  6. Casio fx-9750GII Screen Replacement: étape 6, image 1 de 2 Casio fx-9750GII Screen Replacement: étape 6, image 2 de 2
    Outil utilisé dans cette étape :
    Tweezers
    $4.99
    • Separate the screen cable from the motherboard using tweezers.

    • Remove the calculator screen.

    • Replace the screen.

  7. Casio fx-9750GII Screen Replacement: étape 7, image 1 de 2 Casio fx-9750GII Screen Replacement: étape 7, image 2 de 2
    • Replace the board and back cover of the calculator, then install the batteries to test if the new screen works well.

Conclusion

To reassemble your device, follow these instructions in reverse order.

YORK-CHEN-F21SEG[2]

Membre depuis le 09/19/21

145 Réputation

1 tutoriel rédigé

Équipe

York University, Team E-2, Melo-Thaiss Fall 2021 Membre de l'équipe York University, Team E-2, Melo-Thaiss Fall 2021

YORK-MELO-THAISS-F21SEG2

1 membre

2 tutoriels rédigés

2 commentaires de tutoriel

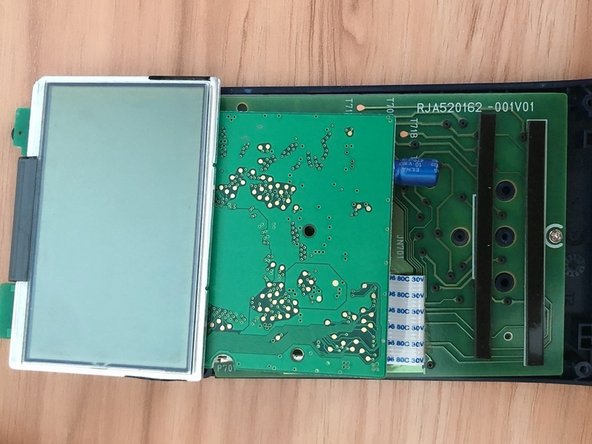
thanks for the short description and pics. my screen cable appears to be soldered directly. I would help if you said more than "separate the screen cable from the motherboard" Perhaps add another pic or two of just that description? Are you breaking the wires? are you soldering on the new replacement board? are you taking off just the screen from that main 'calculator' electronics board?

Happy Zahn - Réponse

Where to get the new replacement screen?

Ahmed Farhat - Réponse

Ajouter un commentaire

Nombre de vues :

Dernières 24 heures : 2

7 derniers jours : 20

30 derniers jours : 98

Total : 2,971