Aller au contenu principal
Creative Zen V Plus Headphone Jack Replacement

Creative Zen V Plus Headphone Jack Replacement

Joshua Meines

Joshua Meines et un autre contributeur

Dernière mise à jour le December 22, 2016

45 minutes
Difficile
Photos d’action
Outils incorrects
Nécessite plus d'images

Before replacing the headphone jack, see the troubleshooting section for the Creative Zen V Plus. You'll also need to know how to desolder and solder components so be sure to learn how with Comment souder et dessouder des connexions!

Ce dont vous avez besoin

Pièces

Outils

Afficher plus…

  1. Creative Zen V Plus Headphone Jack Replacement, Prerequisite Only: étape 1, image 1 de 1
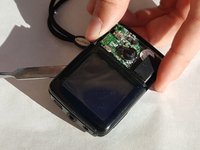
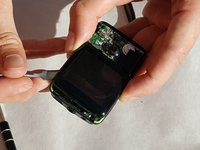
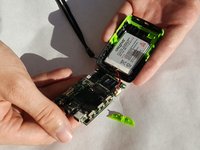
    • Find the grooves around the buttons on the front and carefully remove the panel. This can be done without the use of any tools.

  2. Creative Zen V Plus Headphone Jack Replacement: étape 2, image 1 de 1
    • Using a plastic opening tool, place the skinny flat end between the groove running along side of the device.

    • Using a twisting motion, detach the control panel from the device

  3. Creative Zen V Plus Headphone Jack Replacement: étape 3, image 1 de 1
    • Find the groove around the outside of the green section. Use an ESD safe spudger to slowly lift the plastic panel up.

  4. Creative Zen V Plus Headphone Jack Replacement: étape 4, image 1 de 2 Creative Zen V Plus Headphone Jack Replacement: étape 4, image 2 de 2
    • After removing the green section, find the groove around the display. Insert a ESD safe spudger and carefully lift the display.

  5. Creative Zen V Plus Headphone Jack Replacement: étape 5, image 1 de 1
    • The display can lift up the display but be sure not to damage any of the cables connecting it to the mother board.

    • Remove the screw located under the display using the 00 Phillips head screwdriver.

  6. Creative Zen V Plus Headphone Jack Replacement: étape 6, image 1 de 3 Creative Zen V Plus Headphone Jack Replacement: étape 6, image 2 de 3 Creative Zen V Plus Headphone Jack Replacement: étape 6, image 3 de 3
    • Pull up on the motherboard and display. It is glued to the base so it will require a little force. Be careful though, as the board is fragile.

  7. Creative Zen V Plus Headphone Jack Replacement, Headphone Jack: étape 7, image 1 de 1
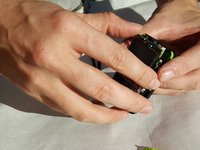
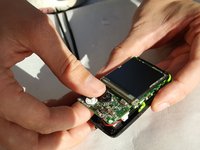
    • Locate the circles of metal holding the headphone jack to the logic board. Using a soldering iron, de-solder these circles and remove the headphone jack.

Conclusion

To reassemble your device, follow these instructions in reverse order.

Joshua Meines

Membre depuis le 10/19/16

316 Réputation

3 tutoriels rédigés

Équipe

IUPUI, Team 2-5, Baechle Fall 2016 Membre de l'équipe IUPUI, Team 2-5, Baechle Fall 2016

IUPUI-BAECHLE-F16S2G5

4 membres

7 tutoriels rédigés

0 commentaires

Ajouter un commentaire

Nombre de vues :

Dernières 24 heures : 0

7 derniers jours : 0

30 derniers jours : 2

Total : 335