Aller au contenu principal
Cuisinart DFP-14BCN Back Casing Replacement

Cuisinart DFP-14BCN Back Casing Replacement

Sonya Dick

Sonya Dick et 3 autres contributeurs

Dernière mise à jour le December 22, 2016

5 minutes
Facile
Conditions préalables uniquement
Ce tutoriel est uniquement destiné à être utilisé comme prérequis d'autres tutoriels. Il ne se suffit pas à lui-même.

Ce dont vous avez besoin

iFixit touche une commission lorsque vous achetez par l'intermédiaire de ces liens.
  1. Cuisinart DFP-14BCN Back Casing Replacement, Bowl: étape 1, image 1 de 3 Cuisinart DFP-14BCN Back Casing Replacement, Bowl: étape 1, image 2 de 3 Cuisinart DFP-14BCN Back Casing Replacement, Bowl: étape 1, image 3 de 3
    • Unplug your food processor before starting any disassembly.

    • Remove the small pusher by rotating it clockwise and lifting up.

  2. Cuisinart DFP-14BCN Back Casing Replacement: étape 2, image 1 de 1
    • Remove the large pusher by grabbing its sides and pulling up.

    • There may be a clicking sound from the safety feature being disengaged in this step.

  3. Cuisinart DFP-14BCN Back Casing Replacement: étape 3, image 1 de 3 Cuisinart DFP-14BCN Back Casing Replacement: étape 3, image 2 de 3 Cuisinart DFP-14BCN Back Casing Replacement: étape 3, image 3 de 3
    • Remove the lid from the bowl by turning it clockwise and lifting.

  4. Cuisinart DFP-14BCN Back Casing Replacement: étape 4, image 1 de 1
    • Take out the blades by grabbing the plastic center piece and lifting up.

    • Avoid contact with blades as they are extremely sharp.

  5. Cuisinart DFP-14BCN Back Casing Replacement: étape 5, image 1 de 3 Cuisinart DFP-14BCN Back Casing Replacement: étape 5, image 2 de 3 Cuisinart DFP-14BCN Back Casing Replacement: étape 5, image 3 de 3
    • Position the handle of the bowl so that it is on your left.

    • Grab the handle and push clockwise. Lift up the bowl to remove it.

  6. Cuisinart DFP-14BCN Back Casing Replacement, Back Casing: étape 6, image 1 de 2 Cuisinart DFP-14BCN Back Casing Replacement, Back Casing: étape 6, image 2 de 2
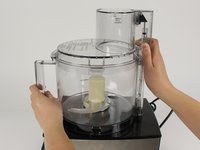
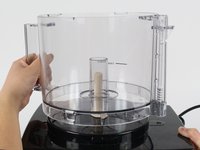
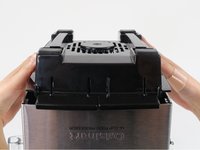
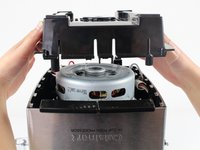
    • Turn the food processor's base upside down by lifting it up and turning it over.

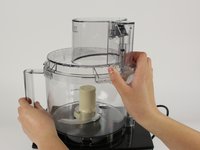
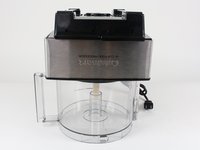
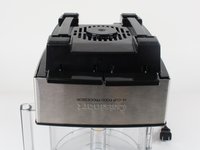
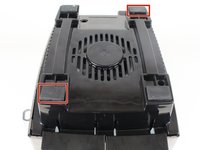
    • Position the base so that the on and pulse buttons are facing you.

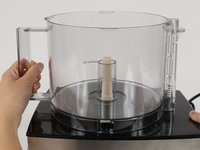
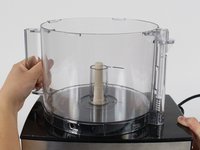
    • Place the base on top of the food processor's bowl to keep the base from wobbling while you work on it.

  7. Cuisinart DFP-14BCN Back Casing Replacement: étape 7, image 1 de 2 Cuisinart DFP-14BCN Back Casing Replacement: étape 7, image 2 de 2
    • Remove the two 13.0mm screws that hold down the casing with a Phillips #2 screwdriver.

  8. Cuisinart DFP-14BCN Back Casing Replacement: étape 8, image 1 de 3 Cuisinart DFP-14BCN Back Casing Replacement: étape 8, image 2 de 3 Cuisinart DFP-14BCN Back Casing Replacement: étape 8, image 3 de 3
    • Lift up the front left and the back right rubber feet by pulling back the rubber with your fingers.

    • Remove the 13.0mm screw under each rubber foot with a Phillips #2 screwdriver.

  9. Cuisinart DFP-14BCN Back Casing Replacement: étape 9, image 1 de 2 Cuisinart DFP-14BCN Back Casing Replacement: étape 9, image 2 de 2
    • Lift off the back casing by raising it upward.

Conclusion

To reassemble your device, follow these instructions in reverse order.

Sonya Dick

Membre depuis le 10/05/16

352 Réputation

3 tutoriels rédigés

Équipe

Cal Poly, Team 10-3, Livingston Fall 2016 Membre de l'équipe Cal Poly, Team 10-3, Livingston Fall 2016

CPSU-LIVINGSTON-F16S10G3

3 membres

7 tutoriels rédigés

0 commentaires

Ajouter un commentaire

Nombre de vues :

Dernières 24 heures : 0

7 derniers jours : 1

30 derniers jours : 1

Total : 62