
Dell Chromebook 11-3120 Battery Replacement

Introduction
Passez à l'étape 1When a laptop's battery becomes old and obsolete it may not be able to hold a charge and will need to be replaced. A new battery allows for a better power supply to important parts to the laptop for optimal usage. When removing the battery, it is important to be careful and use caution. You will need a #J0 Philips Screwdriver for the removal of the battery.
Ce dont vous avez besoin


-
-
Use the #J0 screwdriver to unscrew the seven 4mm screws located around the back panel.
-
-
-
-
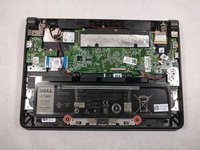
Using a JIS #0 screwdriver, unscrew the two 4mm screws securing the battery in place.
-


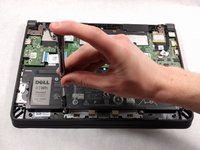

To reassemble your device, follow these instructions in reverse order.
To reassemble your device, follow these instructions in reverse order.
Annulation : je n'ai pas terminé ce tutoriel.
8 autres ont terminé cette réparation.

Équipe

UMass Dartmouth, Team S4-G1, Julie Fall 2017 Membre de l'équipe UMass Dartmouth, Team S4-G1, Julie Fall 2017
UMASSD-JULIE-F17S4G1
3 membres
6 tutoriels rédigés