Aller au contenu principal
Dell Chromebook 13-7310  Screen Replacement

Dell Chromebook 13-7310 Screen Replacement

Kayla McDaniel

Kayla McDaniel et 2 autres contributeurs

Dernière mise à jour le January 5, 2018

15 - 20 minutes
Modérée
A besoin de meilleures images

If the screen on your Dell Chromebook 13-7310 is cracked, pixelated, or fails to display material properly, use this replacement guide to replace it.

Ce dont vous avez besoin

Outils

Afficher plus…

iFixit touche une commission lorsque vous achetez par l'intermédiaire de ces liens.
  1. Dell Chromebook 13-7310  Screen Replacement, Screen: étape 1, image 1 de 3 Dell Chromebook 13-7310  Screen Replacement, Screen: étape 1, image 2 de 3 Dell Chromebook 13-7310  Screen Replacement, Screen: étape 1, image 3 de 3
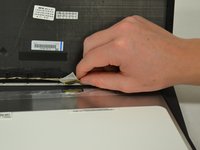
    • To remove the screen, start by using the black nylon spudger to pry off the plastic hinge cover. This allows easy removal of the screen cover.

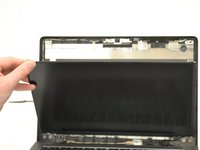
    • Using the same spudger and your finger nails, gently pry the outer casing around the screen itself. Once it is 1/3 to 1/2 of the way removed, gently pull the rest free by hand.

    • There will be popping/snapping sounds when removing. This is normal, just be careful not the crack any plastic or the cover may not reinstal properly.

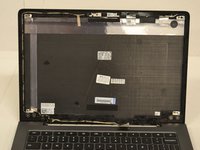
    • Once the clips are undone, remove the cover and you are ready for the next step!

  2. Dell Chromebook 13-7310  Screen Replacement: étape 2, image 1 de 2 Dell Chromebook 13-7310  Screen Replacement: étape 2, image 2 de 2
    • Now that the cover is removed, use the #1 Philips screwdriver bit to remove the four, 3mm screws located at each corner of the screen.

    • To keep from losing the screws it is best to place them o a electronics rated magnetic work pad. If you do not have access to such a pad a plastic bottle cap works just fine.

  3. Dell Chromebook 13-7310  Screen Replacement: étape 3, image 1 de 3 Dell Chromebook 13-7310  Screen Replacement: étape 3, image 2 de 3 Dell Chromebook 13-7310  Screen Replacement: étape 3, image 3 de 3
    • Now that the screws are removed, gently lay the screen face down on the keyboard. It is best to lay a cloth on the keyboard first to keep debris form entering the keyboard.

    • After laying down the screen, carefully disconnect the ribbon cable located at the bottom middle of the display screen by pulling straight back towards the laptop cover.

    • Be gentle, if the ribbon cable is damaged in the removal it will need to be replaced as well for the new display to work.

Conclusion

Congratulations! You have successfully removed the screen of your Dell Chromebook 13-7310. To reassemble your device, follow these instructions in reverse order.

Kayla McDaniel

Membre depuis le 09/08/17

213 Réputation

2 tutoriels rédigés

Équipe

Un commentaire

Hi,

If I have an i3 with non-touch matte display Dell Chromebook 7310 and an i5 touch glossy display, is it possible to swap the displays/lids so that the i5 has the non-touch matte display?

Axl R - Réponse

Ajouter un commentaire

Nombre de vues :

Dernières 24 heures : 0

7 derniers jours : 1

30 derniers jours : 3

Total : 882