
Dell Inspiron 1545 Daughter Board Replacement

Introduction
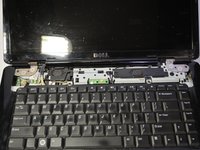
Passez à l'étape 1The daughter board is an addition to the motherboard and must be removed in order to access the motherboard.
Ce dont vous avez besoin


-
-
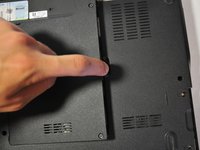
Unscrew the four screws (3mm Phillips #1) that hold the base cover in place.
-
-
-
After removing the battery, remove the two screws (3mm Phillips #1) beneath it. These screws hold the Center Control Cover in place.
-
-
-
-
Remove the 11 screws (5mm Phillips #1) from the back of the laptop as marked. One screw is in the middle, by the RAM.
-
-
-
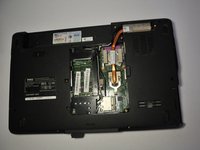
Disconnect the Bluetooth card cable, Wed cable, Camera1 cable, power cable, and touchpad cable from the respective Motherboard connectors as marked. For the Bluetooth cable and Camera1 cable, pull the plugs towards the screen. For the touchpad and power cable, lift the black tab and then pull them out. For the Wed cable, pull the blue tab up.
-
Unsecure the wires from the routing guides so they are loose.
-
-
-
Remove the 3 screws (3mm Phillips #1) that secure the daughter board to the motherboard.
-
Lift the daughter board away from the laptop.
-


To reassemble your device, follow these instructions in reverse order.
To reassemble your device, follow these instructions in reverse order.
Annulation : je n'ai pas terminé ce tutoriel.
3 autres ont terminé cette réparation.

Équipe

Cal Poly, Team 9-14, Regan Spring 2014 Membre de l'équipe Cal Poly, Team 9-14, Regan Spring 2014
CPSU-REGAN-S14S9G14
4 membres
15 tutoriels rédigés