Aller au contenu principal
Dell Inspiron 17R-N7010 Fan Replacement

Dell Inspiron 17R-N7010 Fan Replacement

Brandon Lopez

Brandon Lopez et 5 autres contributeurs

Dernière mise à jour le June 29, 2021

10 minutes
Modérée

If your Dell Inspiron (17R-N7010) is easily overheating or you don’t hear the fan running when it normally would be, it is time to replace the fan, and this guide will demonstrate how to do so.

The fan protects your computer from overheating and potentially damaging internal components. It is essential that this part be working correctly to lengthen the life of your computer.

Ce dont vous avez besoin

Outils

  • Spudger
    Spudger
  • Phillips #0 Screwdriver
    Phillips #0 Screwdriver
  1. Dell Inspiron 17R-N7010 Fan Replacement, Battery: étape 1, image 1 de 1
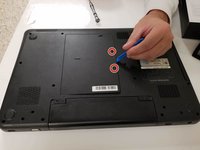
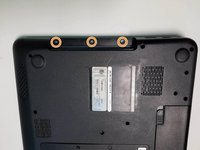
    • Flip over the laptop so the back is facing upwards.

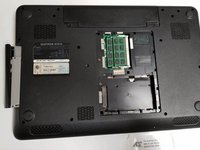
    • Locate the battery compartment.

    • Make sure your laptop is turned off before disassembly.

  2. Dell Inspiron 17R-N7010 Fan Replacement: étape 2, image 1 de 1
    • Slide both locks away from the center of the battery.

    • After you hear a click, pull out the battery.

  3. Dell Inspiron 17R-N7010 Fan Replacement, Palm Rest: étape 3, image 1 de 3 Dell Inspiron 17R-N7010 Fan Replacement, Palm Rest: étape 3, image 2 de 3 Dell Inspiron 17R-N7010 Fan Replacement, Palm Rest: étape 3, image 3 de 3
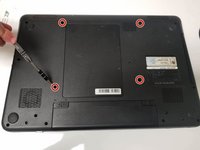
    • Remove the four screws from the back panel.

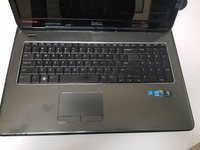
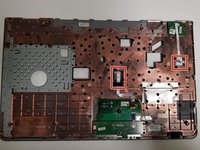
    • Flip the laptop over and open it to view the keyboard.

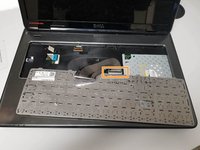
    • Disconnect the keyboard from the laptop by lifting up the latch holding the ribbon cable in place.

  4. Dell Inspiron 17R-N7010 Fan Replacement: étape 4, image 1 de 3 Dell Inspiron 17R-N7010 Fan Replacement: étape 4, image 2 de 3 Dell Inspiron 17R-N7010 Fan Replacement: étape 4, image 3 de 3
    • Close the laptop and flip it over so the bottom is facing upwards.

    • Remove the two screws from the small panel.

    • Remove the small back panel.

    • Slide the CD drive out of the laptop.

    • Remove the three screws from the CD drive slot.

  5. Dell Inspiron 17R-N7010 Fan Replacement: étape 5, image 1 de 1
    • This step is tricky and can feel like you are breaking the laptop. Follow the next steps with caution to avoid damaging the laptop.

    • Remove the top cover by inserting a spudger under the surface.

    • Working clockwise, pry upwards with the spudger to detach the clips.

  6. Dell Inspiron 17R-N7010 Fan Replacement: étape 6, image 1 de 2 Dell Inspiron 17R-N7010 Fan Replacement: étape 6, image 2 de 2
    • Disconnect the ribbon cables.

    • Remove the cover to access the inner hardware of the laptop.

  7. Dell Inspiron 17R-N7010 Fan Replacement, Fan: étape 7, image 1 de 3 Dell Inspiron 17R-N7010 Fan Replacement, Fan: étape 7, image 2 de 3 Dell Inspiron 17R-N7010 Fan Replacement, Fan: étape 7, image 3 de 3
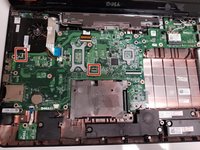
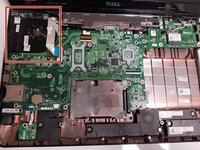
    • Locate the fan at the top left corner.

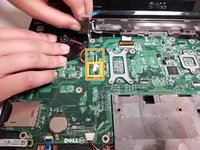
    • Remove the fan by disconnecting the coupled wires from the white port.

    • Disconnect the wire strip by lifting up the latch holding the wire in place.

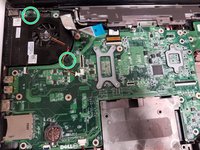
    • Unscrew the remaining two screws.

    • Remove the fan.

Conclusion

To reassemble your device, follow these instructions in reverse order.

Brandon Lopez

Membre depuis le 09/21/18

319 Réputation

3 tutoriels rédigés

Équipe

0 commentaires

Ajouter un commentaire

Nombre de vues :

Dernières 24 heures : 1

7 derniers jours : 8

30 derniers jours : 18

Total : 1,201