Aller au contenu principal
Dell Inspiron 7568 Trackpad Replacement Guide

Dell Inspiron 7568 Trackpad Replacement Guide

Yash Samant

Yash Samant et 3 autres contributeurs

Dernière mise à jour le May 16, 2017

10 minutes
Modérée

By following the steps in this guide one should be able to replace the trackpad on your device (Dell Inspiron 7568)

Ce dont vous avez besoin

Outils

  1. Dell Inspiron 7568 Trackpad Replacement Guide, Battery: étape 1, image 1 de 2 Dell Inspiron 7568 Trackpad Replacement Guide, Battery: étape 1, image 2 de 2
    • Remove the ten 7mm Phillips #1 screws on the bottom cover.

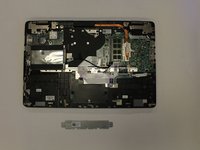
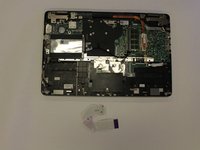
    • Remove the bottom cover.

  2. Dell Inspiron 7568 Trackpad Replacement Guide: étape 2, image 1 de 2 Dell Inspiron 7568 Trackpad Replacement Guide: étape 2, image 2 de 2
    • Remove the four 3mm Phillips #1 screws holding the battery.

    • Unhinge the connector cable to the battery.

    • Remove the battery.

  3. Dell Inspiron 7568 Trackpad Replacement Guide, Track Pad: étape 3, image 1 de 2 Dell Inspiron 7568 Trackpad Replacement Guide, Track Pad: étape 3, image 2 de 2
    • Unplug the speaker cable and remove the speakers

  4. Dell Inspiron 7568 Trackpad Replacement Guide: étape 4, image 1 de 2 Dell Inspiron 7568 Trackpad Replacement Guide: étape 4, image 2 de 2
    • Unscrew & remove the two 3mm screws (using a ph1 screwdriver bit) holding the touchpad bracket

    • Remove the touchpad bracket

  5. Dell Inspiron 7568 Trackpad Replacement Guide: étape 5, image 1 de 3 Dell Inspiron 7568 Trackpad Replacement Guide: étape 5, image 2 de 3 Dell Inspiron 7568 Trackpad Replacement Guide: étape 5, image 3 de 3
    • Use a nylon spudger to lift the ZIF connector tab. Gently pull the touchpad ribbon cable free.

    • Use a nylon spudger to lift the ZIF connector tab. Gently pull the keyboard daughter board ribbon cable free.

  6. Dell Inspiron 7568 Trackpad Replacement Guide: étape 6, image 1 de 3 Dell Inspiron 7568 Trackpad Replacement Guide: étape 6, image 2 de 3 Dell Inspiron 7568 Trackpad Replacement Guide: étape 6, image 3 de 3
    • Remove the touchpad foil using a spudger or other ESD safe blunt-tip tool.

    • Unscrew & remove the three 2mm wafer screws holding the touchpad.

    • Remove the touchpad.

Conclusion

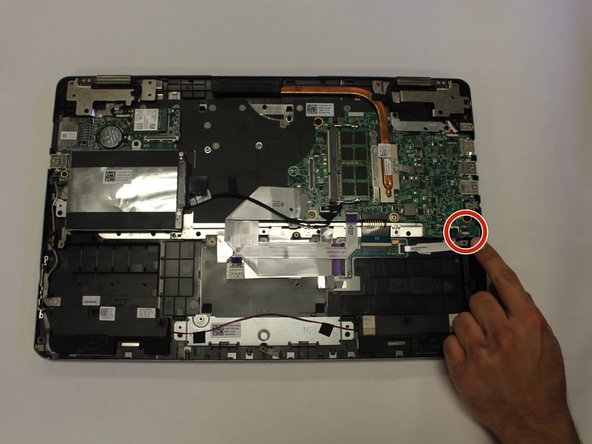
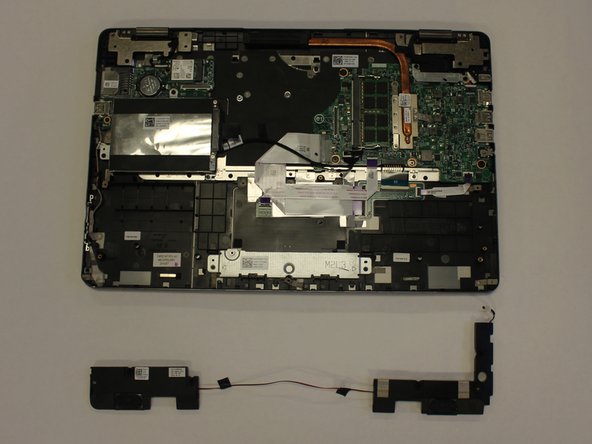
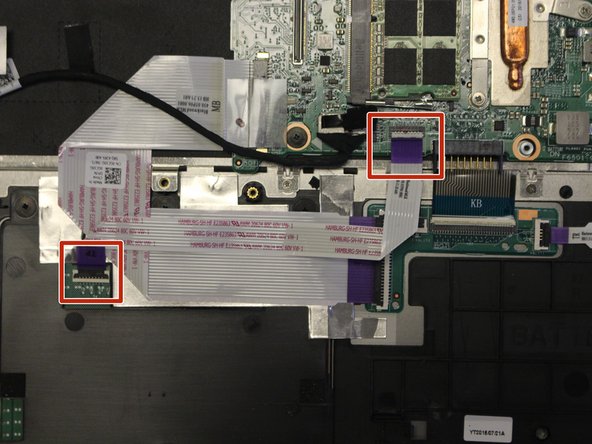
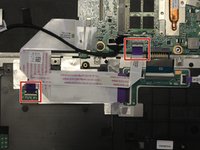
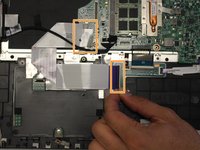
To reassemble your device, follow these instructions in reverse order.

2 autres ont terminé cette réparation.

Yash Samant

Membre depuis le 02/22/17

406 Réputation

3 tutoriels rédigés

Équipe

USF Tampa, Team S2-G2, Lacy Spring 2017 Membre de l'équipe USF Tampa, Team S2-G2, Lacy Spring 2017

USFT-LACY-S17S2G2

4 membres

7 tutoriels rédigés

0 commentaires

Ajouter un commentaire

Nombre de vues :

Dernières 24 heures : 2

7 derniers jours : 7

30 derniers jours : 7

Total : 366