Aller au contenu principal

Dell Precision 7560 Screen Replacement

Ce dont vous avez besoin

  1. Dell Precision 7560 Screen Replacement, Screen: étape 1, image 1 de 3 Dell Precision 7560 Screen Replacement, Screen: étape 1, image 2 de 3 Dell Precision 7560 Screen Replacement, Screen: étape 1, image 3 de 3
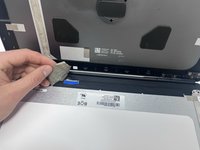
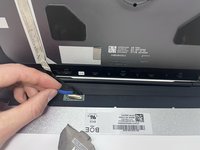
    • Using an opener tool, pry open the bezel, following along the screen's perimeter.

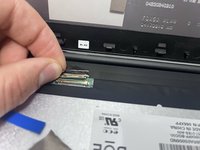
    • Lightly pull from the corners to remove the bezel.

  2. Dell Precision 7560 Screen Replacement: étape 2, image 1 de 2 Dell Precision 7560 Screen Replacement: étape 2, image 2 de 2
    • Use the Phillips #0 screwdriver to remove:

    • Two 2 mm screws from the top screen brackets.

    • Two 3 mm screws from the bottom screen brackets.

    • Once these screws are removed, you should be able to gently pry the laptop screen free.

    • Be careful not to apply too much pressure, as this could damage the screen or other components inside the laptop.

  3. Dell Precision 7560 Screen Replacement: étape 3, image 1 de 3 Dell Precision 7560 Screen Replacement: étape 3, image 2 de 3 Dell Precision 7560 Screen Replacement: étape 3, image 3 de 3
    • To fully disconnect the screen, gently peel off the white tape that secures the video connector.

    • Remove the blue tape that lies between the white tape and the video connector.

    • Open the video connector's bracket and remove the cable, pulling towards the back of the device.

Conclusion

To reassemble your device, follow these instructions in reverse order.

Laisha

Membre depuis le 02/14/23

202 Réputation

2 tutoriels rédigés

Équipe

Utah Tech University, Team 1-1, McMurrin Spring 2023 Membre de l'équipe Utah Tech University, Team 1-1, McMurrin Spring 2023

UTAHTECH-MCMURRIN-S23S1G1

3 membres

6 tutoriels rédigés

0 commentaires

Ajouter un commentaire

Nombre de vues :

Dernières 24 heures : 0

7 derniers jours : 8

30 derniers jours : 60

Total : 569